Frequently asked question
Is it possible to import a generic JSON file using the JSON to Feature tool in ArcGIS Pro?
No, it is not possible to import a generic JSON file using the JSON to Feature tool in ArcGIS Pro. A generic JSON file does not follow any standard for data organization. However, GeoJSON is a specified format for encoding a variety of geographic data structures. ArcGIS products are compatible with EsriJSON files and GeoJSON files. Using a generic JSON file with the JSON to Feature tool produces an error. Refer to ArcGIS Pro: 001558: Error parsing .json file <value> for more information. As a workaround, create a spatial ETL tool to import the generic JSON file as a feature class in ArcGIS Pro.
Note:
A Data Interoperability license is required to create the spatial ETL tool.
- Create a spatial ETL tool in the Catalog pane, and specify the following FME Reader and Writer parameters.
- In the Reader section, set Format to Text File.
- For Dataset, specify the JSON file. In the Select Source Text File(s) dialog box, select All files to view the JSON file.
- In the Writer section, set Format to Esri Geodatabase (File Geodb ArcObjects) to convert the JSON file to a file geodatabase feature class.
- For Dataset, browse to an existing file geodatabase to locate the converted feature class.
- Click OK. The Spatial ETL Tool window displays.
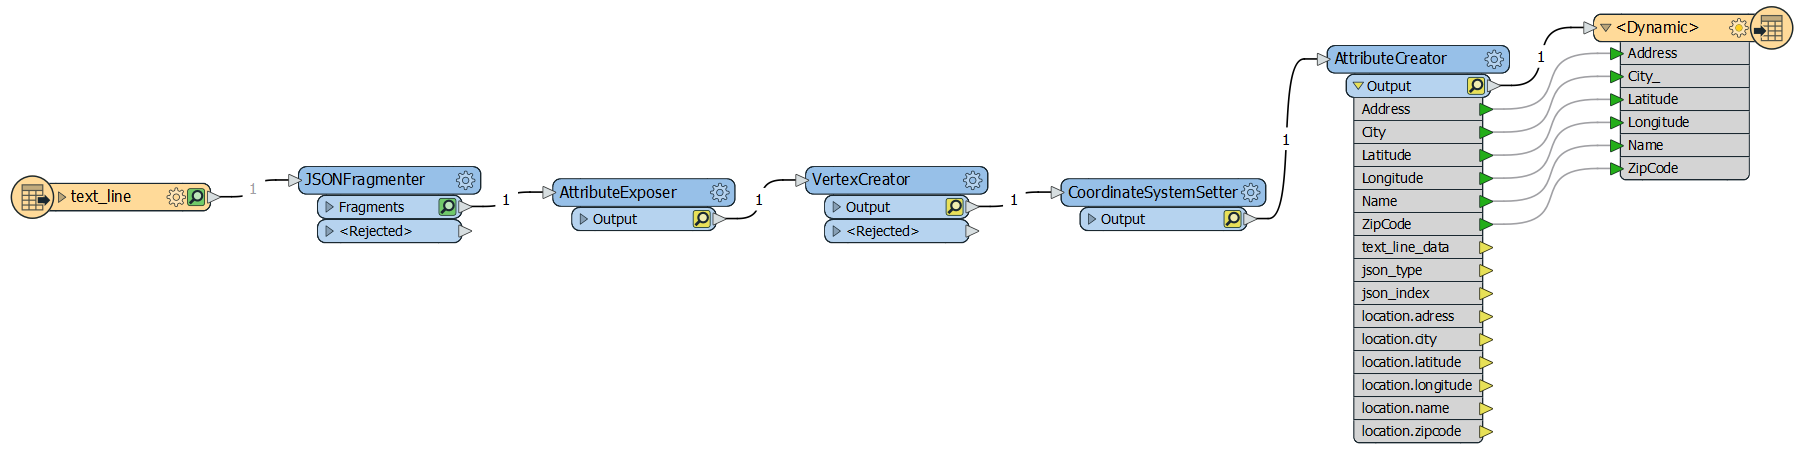
- To extract the JSON file content to feature attributes, add the JSONFragmenter transformer from the Transformer Gallery window, and connect it to Reader.
Note:
To open the Transformer Gallery window, click View > Windows > Transformer Gallery.
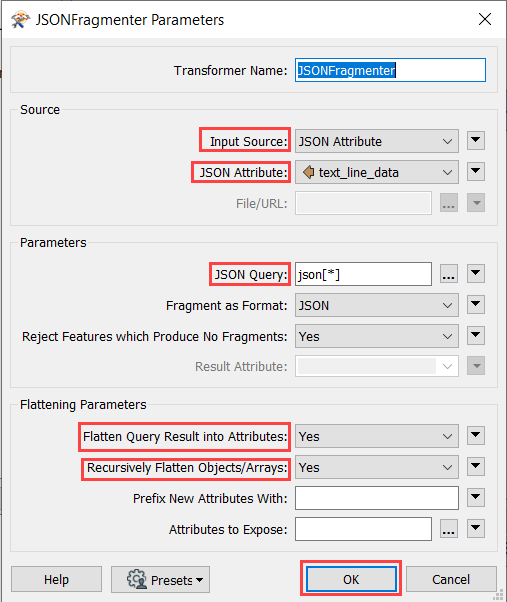
- In the JSONFragmenter Parameters dialog box, set the JSON Attribute to text_line_data.
- For JSON Query, type json[*].
- For Flatten Query Result Into Attributes, select Yes from the drop-down list, and ensure Recursively Flatten Objects/Arrays is set to Yes.
- Right-click on the JSONFragmenter transformer > Run > Run To This.
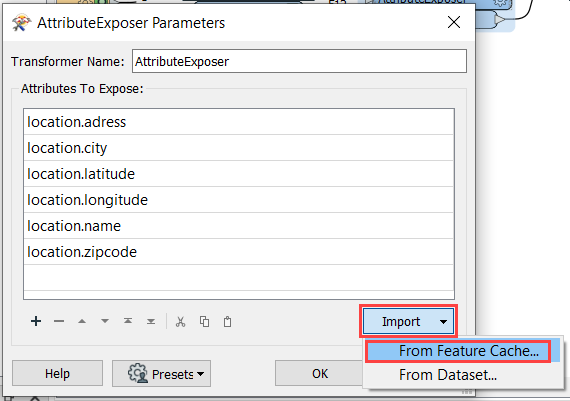
- Add the AttributeExposer transformer, and connect it to the previous transformer output.
- In the AttributeExposer Parameters dialog box, click Import > select From Feature Cache….
- From the Import Wizard dialog box, select the required attributes.
- Click Import to close the Import Wizard dialog box.
- Click OK to close the AttributeExposer Parameters dialog box.
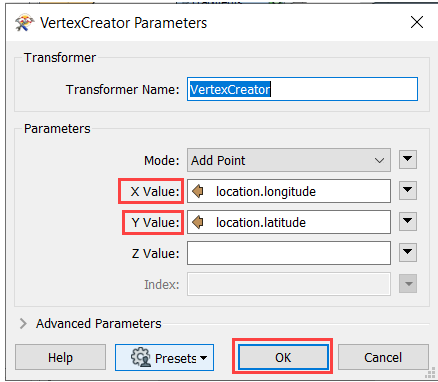
- Add the VertexCreator transformer to append the coordinates to points and connect it to the previous transformer output.
- In the VertexCreator Parameters dialog box, map the X Value and Y Value parameters with the longitude and latitude attribute values from the JSON file respectively.
- Click OK.
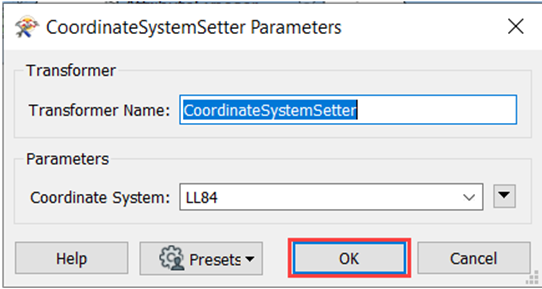
- Add a CoordinateSystemSetter transformer to tag all the features with a coordinate system. Connect it to the previous transformer output.
- In the CoordinateSystemSetter Parameters dialog box, select a value from the Coordinate System drop-down list.
- Click OK.
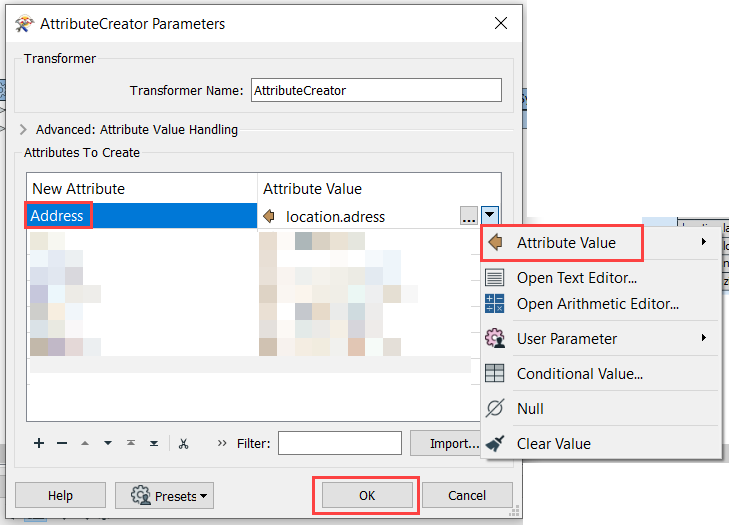
- Add an AttributeCreator transformer to import the attributes from the JSON file to output features.
- In the AttributeCreator Parameters dialog box, type the preferred field name in New Attribute.
- For Attribute Value, click the drop-down list, and select Attribute Value to select the related attributes.
- Click OK to close the AttributeCreator Parameters dialog box.
- Manually connect the output and attributes from the AttributeCreator transformer to Writer.
- Double-click Writer to edit the output feature type properties.
- In the General tab, select the Geometry type. For example, select geodb_point to convert the JSON file to a point feature class.
- Click OK.

- Click the Save
 icon, and click the Run,
 icon . The output feature class is in the file geodatabase specified in Step 1d.
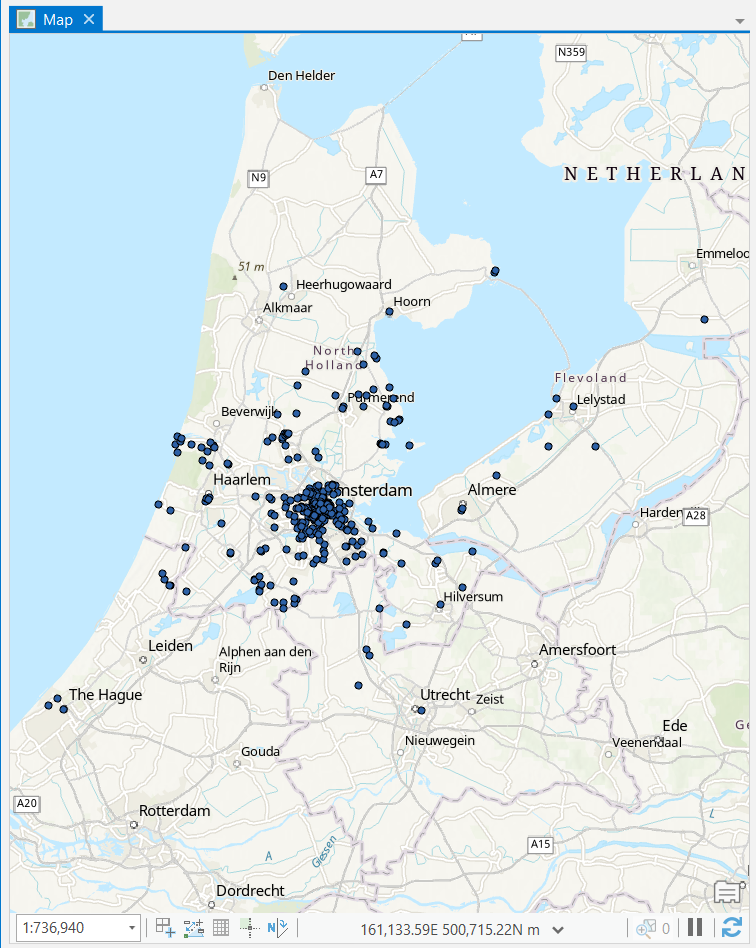
 - To view the data, add the feature class in ArcGIS Pro.
The image below shows a point feature class converted from a JSON file in ArcGIS Pro.
Article ID: 000025450
- Third Party Product
- ArcGIS Pro 2 7 x
- ArcGIS Pro 2 x
Get support with AI
Resolve your issue quickly with the Esri Support AI Chatbot.


Related Information
Discover more on this topic
Search for related information
Find training related to this topic
Explore ideas and give feedback
Get help from ArcGIS experts
Start chatting now