HOW TO
Limit the zoom extent of a web map shared via an ArcGIS Online web app
Summary
In ArcGIS Online, it is possible to set the initial map extent of a web map when it is opened in a web app or Map Viewer. When sharing web maps via web apps, limiting the zoom extent of the map is useful, so only relevant map information is displayed on the map. This article describes the methods to limit the zoom extent of a shared web map using the Media Map or Minimalist template from ArcGIS Configurable Apps, and ArcGIS Web AppBuilder.
Procedure
Configure the zoom extent of the map in the Media Map or Minimalist template
- Log in to ArcGIS Online.
- Navigate to the item details page of the web map, and click Create Web App > Configurable Apps.
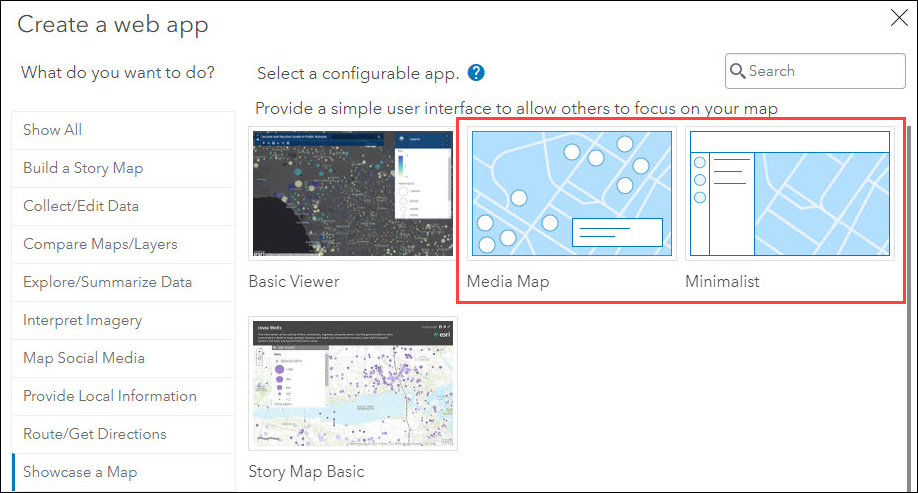
- In the Create a web app window, under Select a configurable app, select Media Map or Minimalist, and click CREATE WEB APP. In this example, Minimalist is selected.
- In the Create a web app window, specify the Title and Tags fields, and click Done.
- When prompted with Welcome to the App Setup Page, click Next > Next > Got it, or close the window.
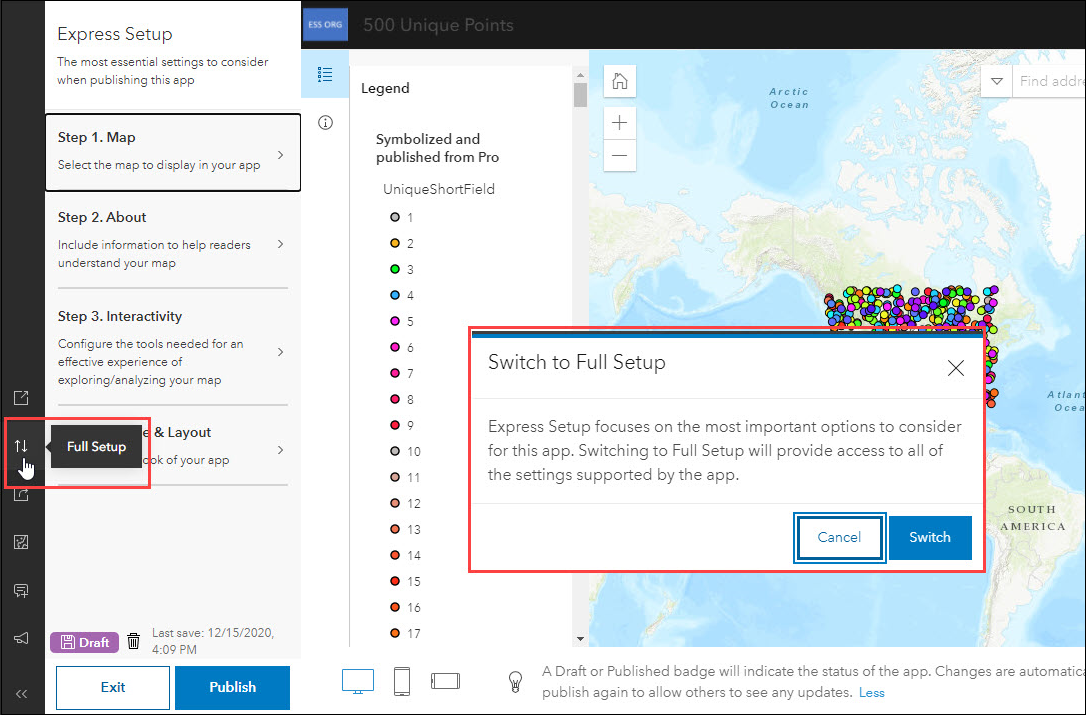
- The app editor opens in the Express Setup mode by default. On the left pane, click the opposite direction arrows
 icon. When prompted with Switch to Full Setup, click Switch.
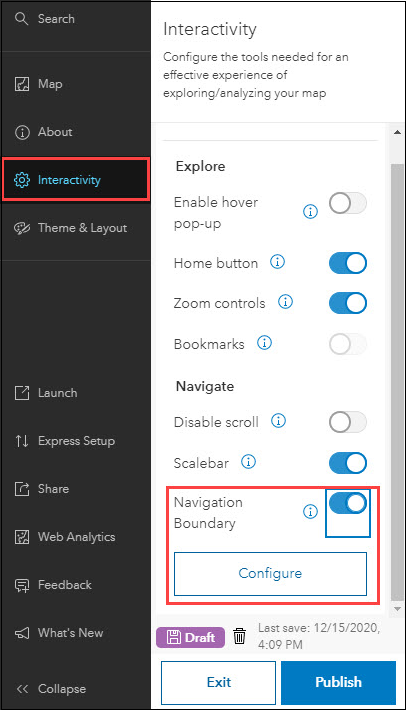
- On the left pane, click Interactivity > Explore/Navigate. Under the Navigate section, toggle Navigation Boundary on, and click Configure.
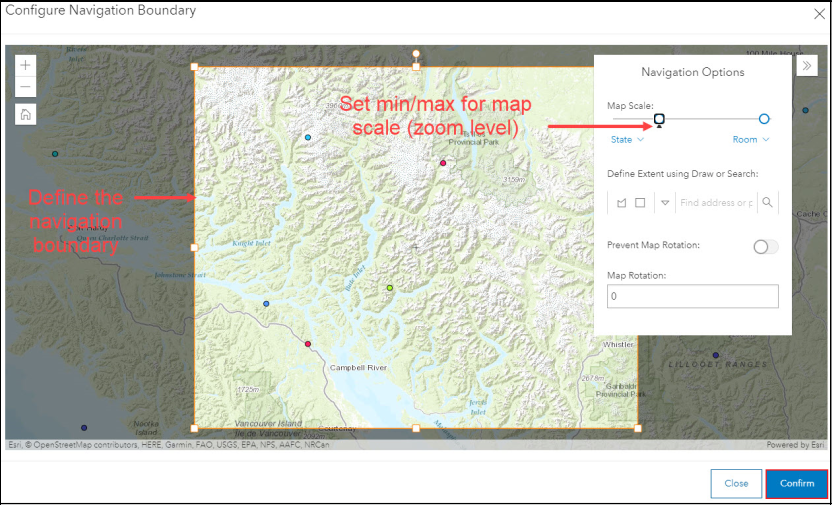
- On the Configure Navigation Boundary page, define the navigation boundary of the map.
- In the Navigation Options window, under Map Scale, set the minimum and maximum zoom level for the map. The left slider defines the zoom-out limit, and the right slider defines the zoom-in limit of the map. Click Confirm.
- In the app editor, click Publish. When prompted with Are you sure you want to publish the app?, click Confirm.
Configure the zoom extent of the map in ArcGIS Web AppBuilder
- Log in to ArcGIS Online.
- Navigate to the item details page of the web map, and click Create Web App > Web AppBuilder.
- In the Create a New Web App window, specify the Title and Tags fields, and click OK.
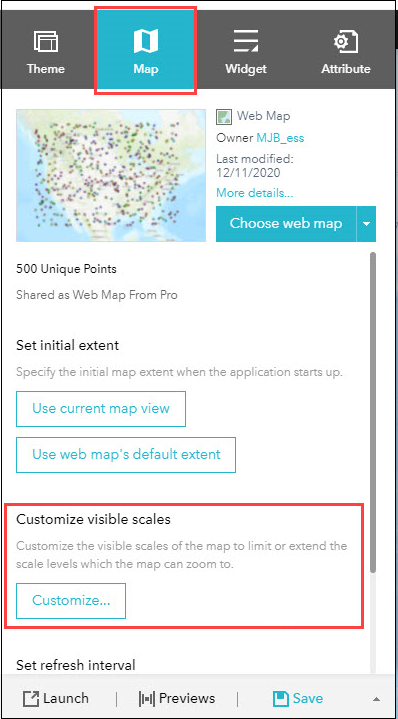
- On the left pane of the app editor, click the Map tab. Under the Customize visible scales section, click Customize.
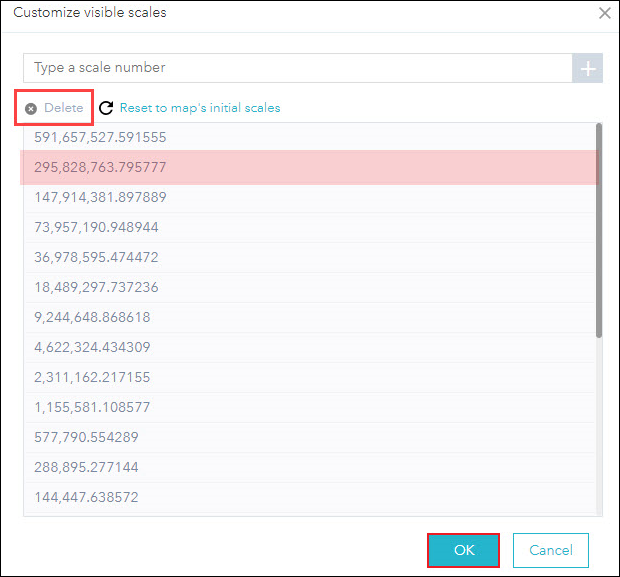
- In the Customize visible scales window, click the desired scale numbers, and click Delete. The smallest number defines the zoom-in limit, and the largest number defines the zoom-out limit of the map. Alternatively, type a scale number in the box, and click the add
 icon. Click OK.
- On the left pane of the app editor, click Save, and click Launch.
Article ID: 000024890
- ArcGIS Web AppBuilder
- Configurable Web Apps
Get support with AI
Resolve your issue quickly with the Esri Support AI Chatbot.


Related Information
Discover more on this topic
Search for related information
Find training related to this topic
Explore ideas and give feedback
Get help from ArcGIS experts
Start chatting now