HOW TO
Convert a GRIB file to netCDF in ArcGIS Pro
Summary
A GRIB file is a multidimensional raster data and commonly used in meteorology to store historical and forecast weather data. This article provides the workflow to convert a GRIB file to a netCDF file while preserving the raster multiple dimensions in ArcGIS Pro.
Procedure
- Add the GRIB file to the ArcGIS Pro project.
- On the Map tab, click Add Data, and select Multidimensional Raster Layer.
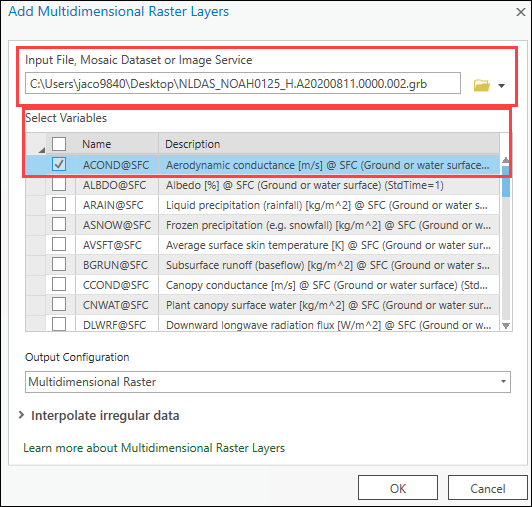
- In the Add Multidimensional Raster Layers pane, click Import Variables
 and browse to the GRIB file for the input.
 - For Select Variables, check the check boxes of the variables to retain in the raster layer.
- Click OK.
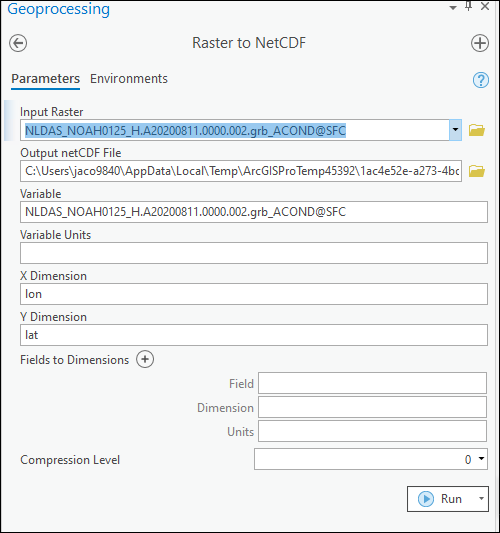
- Run the Raster to NetCDF tool to convert the GRIB file to netCDF.
- For Input Raster, select the GRIB file added to the project.
- Specify a path for Output netCDF File.
- Click Run.
- Optionally, run the Make NetCDF Raster Layer tool to create a raster layer from the converted netCDF file, and add the raster layer to the project. Refer to ArcGIS Pro: Make NetCDF Raster Layer (Multidimension) for more information.
Article ID: 000024025
Software:
- ArcGIS Pro 2 x
Get support with AI
Resolve your issue quickly with the Esri Support AI Chatbot.


Related Information
Discover more on this topic
Search for related information
Find training related to this topic
Explore ideas and give feedback
Get help from ArcGIS experts
Start chatting now