PROBLEM
Exporting a hosted feature service as a file geodatabase in ArcGIS Online returns a corrupted ZIP file
Description
In ArcGIS Online, a hosted feature service exported as a file geodatabase is downloaded as a corrupt ZIP file with a file size of 1 KB.
Cause
This issue occurs when the feature classes in the exported hosted feature service are corrupt, or contain broken geometry.
Solution or Workaround
A workaround is to repair and export the feature classes from the hosted feature service in ArcGIS Pro or ArcMap.
ArcGIS Pro
- In ArcGIS Pro, add a connection to ArcGIS Online. Refer to ArcGIS Pro: Manage portal connections from ArcGIS Pro - Add a portal connection for steps to do this.
- In the Catalog pane, navigate to the Portal tab.
- Add the hosted feature service to the map by right-clicking the hosted feature service and navigating to Add To New > Map.
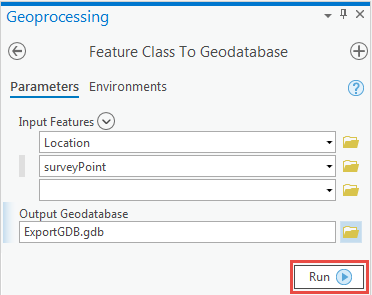
- In the Geoprocessing pane, navigate to Toolboxes > Conversion Tools > To Geodatabase and open the Feature Class To Geodatabase tool.
- Configure the Feature Class To Geodatabase tool parameters as follows:
- For Input Features, select the layers to be exported.
- For Output Geodatabase, click Browse....
 .
. - Click the New Item drop-down menu and click File Geodatabase.
- Rename the file geodatabase, and click OK.
- Click Run.
Note:
Geoprocessing tools, such as the Feature Class To Geodatabase tool, check and repair feature class geometries as part of their loading process. Refer to ArcGIS Pro: Checking and repairing geometries for more information.
ArcMap
- In ArcMap, add a connection to ArcGIS Online. Refer to ArcMap: Sign in to ArcGIS Online or ArcGIS Enterprise in ArcGIS Desktop applications for steps to do this.
- In the Catalog window, expand My Hosted Services, and drag the hosted feature service onto the map.
- In the Catalog window, navigate to Toolboxes > System Toolboxes > Conversion Tools > To Geodatabase, and open the Feature Class to Geodatabase tool.
- Configure the Feature Class to Geodatabase tool parameters as follows:
- For Input Features, select the feature classes to be exported from the drop-down list.
- For Output Geodatabase, click Browse
 , and click New File Geodatabase.
 - Rename the file geodatabase, and click Add.
- Click OK to run the tool.
- In the Catalog window, add a connection to the newly created file geodatabase. Refer to ArcMap: Connect to a file or personal geodatabase or an SQLite database for more information.
- Expand the file geodatabase and add the layers to the map.
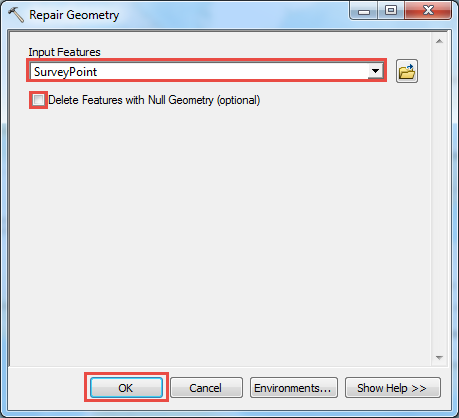
- In the Catalog window, navigate to Toolboxes > System Toolboxes > Data Management Tools > Features, and open the Repair Geometry tool.
- Configure the Repair Geometry tool parameters as follows:
- For Input Features, select the layer to be repaired from the drop-down list.
- Uncheck the Delete Features with Null Geometry check box.
- Click OK.
- Repeat this step for all subsequent layers.
REST endpoint
Another alternative is to download the hosted feature service as a file geodatabase from a REST endpoint. Refer to How To: Download a large hosted feature service with attachments from a REST endpoint for steps to do this.
Article ID: 000022902
- ArcMap
- ArcGIS Online
- ArcGIS Pro 2 x
Get support with AI
Resolve your issue quickly with the Esri Support AI Chatbot.


Related Information
Discover more on this topic
Search for related information
Find training related to this topic
Explore ideas and give feedback
Get help from ArcGIS experts
Start chatting now