HOW TO
Find the centroid of polygons using Calculate Geometry in ArcGIS Pro
Summary
Some tools, such as the Choose Best Facility tool, require point feature classes as inputs. For example, when using the Choose Best Facility tool to find the best site for a park, and the feature layer of available land parcels contain only polygons, the centroid of the polygons can be used as the input point feature class. ArcGIS Pro provides the capability to find the centroid of a polygon feature class within the attribute table using the Calculate Geometry tool.
Note:
Alternatively, use the Feature to Point tool available with an ArcGIS Pro Advanced license.
Procedure
Find the centroid of polygons using the Calculate Geometry tool
- Open the attribute table of the polygon feature class in the Contents pane, right-click the layer name, and click Attribute Table.
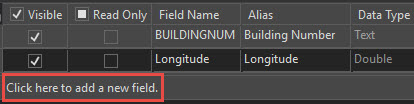
- Create two new fields with the Double data type.
- Click Add Field
 in the attribute table.
 - Name the new field Longitude, and change the data type to Double.
- Click Click here to add a new field and name the field Latitude.
- Change the data type to Double and click Save on the Fields ribbon tab.
- Close the Fields View tab.
- Click Add Field
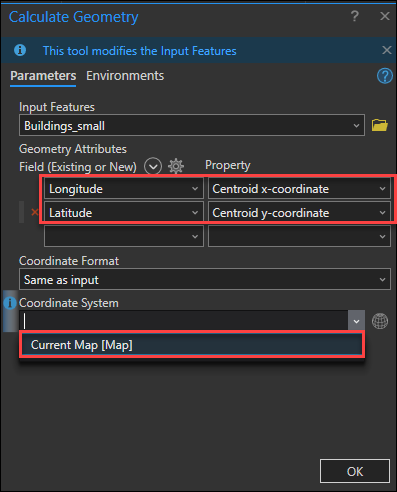
- Right-click the Longitude or Latitude field header in the attribute table, and select Calculate Geometry to open the Calculate Geometry geoprocessing pane.
- Select Longitude from the drop-down for Field.
- Select Centroid x-coordinate from the drop-down for Property.
- Select Latitude from the drop-down for Field.
- Select Centroid y-coordinate from the drop-down for Property.
- For Coordinate Format, leave the parameter as default.
- Select Current Map [Map] from the drop-down for Coordinate System.
- Click OK.
- Export the attribute table to a new table.
- On the Analysis ribbon tab, click Tools in the Geoprocessing group to open the Geoprocessing pane.
- In the Geoprocessing pane, search for and select the Copy Rows tool.
- Select the polygon feature class with the Longitude and Latitude fields for Input Rows.
- Specify a name and location for the new table in the Output Table field.
- Click Run.

The new table is added to the Contents pane.
- Display the centroid point feature class on the map.
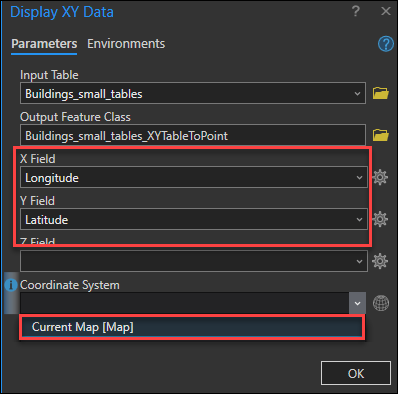
- Right-click the new table in the Contents pane, and select Display XY Data.
- Specify a name and location for the new feature class in the Output Feature Class field.
- Select Longitude for X Field.
- Select Latitude for Y Field.
- Select Current Map [Map] from the drop-down for Coordinate System.
- Click OK.
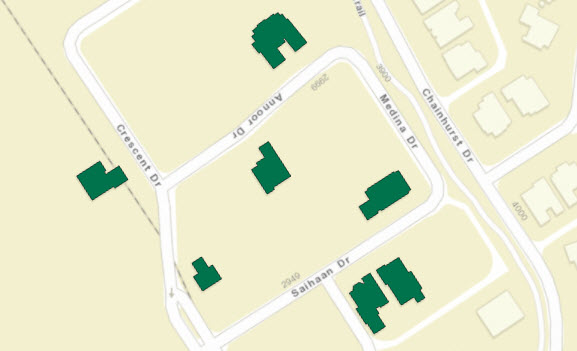
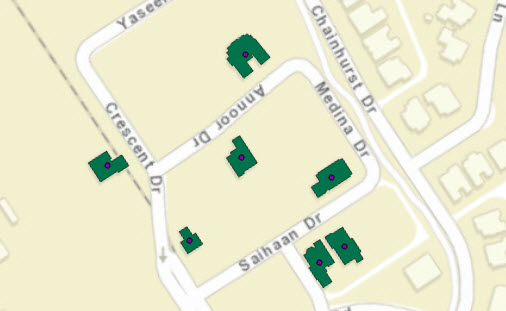
The map displays the centroid of the polygon feature class.
Article ID: 000021849
- ArcGIS Pro
Get support with AI
Resolve your issue quickly with the Esri Support AI Chatbot.


Related Information
Discover more on this topic
Search for related information
Find training related to this topic
Explore ideas and give feedback
Get help from ArcGIS experts
Start chatting now