HOW TO
Update a hosted feature layer in ArcGIS Online with data from a feature class in ArcGIS Pro
Summary
ArcGIS Online hosted feature layers must be updated with data from external feature classes to ensure the feature layers are synced with the latest data. This is essential in ongoing data collection projects, whereby data and features are continuously recorded in the external feature class, and therefore require updating in ArcGIS Online.
In ArcGIS Pro, the Append tool can be used to load new data from the external feature class to the existing hosted feature layer, provided the hosted feature layer and the external feature class have the same field schema and both contain a Global ID field. If the external feature class does not have the same field schema as the hosted feature layer, refer to ArcGIS Pro: Alter the schema of a database table for steps to edit the field schema.
This article provides the workflow to update a hosted feature layer in ArcGIS Online with data from an external feature class in ArcGIS Pro.
Procedure
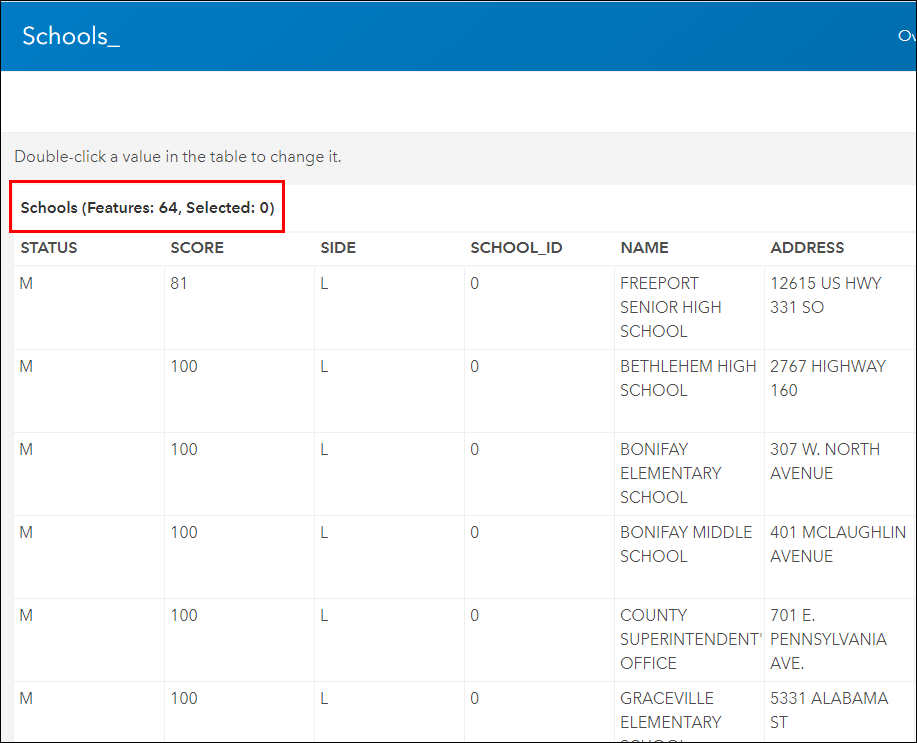
The hosted feature layer's attributes in ArcGIS Online (image shown below) must be updated with new data from the external feature class. The existing hosted feature layer contains 64 point features, representing the distribution of schools within the area.
- In ArcGIS Pro, add the feature class containing the data to load to the hosted feature layer.
- Add Global IDs to the feature class using the Add Global IDs tool. Skip this step if the feature class contains a Global ID field.
- On the top ribbon of ArcGIS Pro, click the Analysis tab > Tools. The Geoprocessing pane opens.
- In the Geoprocessing pane, click the Toolboxes tab, and navigate to Data Management Tools > Fields > Add Global IDs.
- In the Add Global IDs tool pane, select the feature class for Input Datasets.
- Click Run.
- Sign in to ArcGIS Online. Refer to ArcGIS Pro: Add a portal connection for steps to sign in to ArcGIS Online in ArcGIS Pro.
- Add the hosted feature layer to the map.
- On the top ribbon of ArcGIS Pro, click the View tab > Catalog Pane. The Catalog pane opens.
- In the Catalog pane, click the Portal tab, and click My Content
 .
. - Search or select the hosted feature layer to update, right-click the feature layer, and click Add To Current Map.
- Load the data from the external feature class to the hosted feature layer using the Append tool.
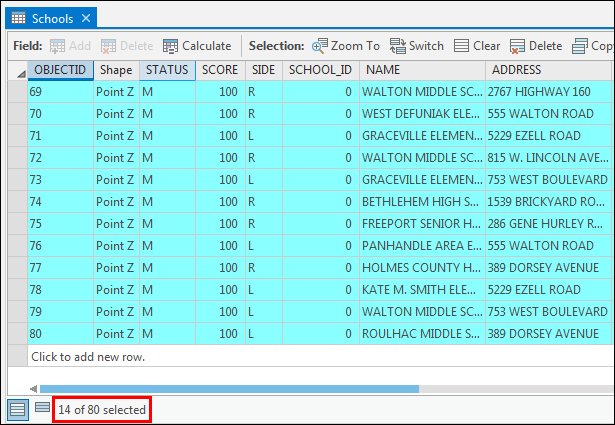
- In the map or attribute table of the feature class, select the features to be updated to the hosted feature layer. To select features, refer to ArcGIS Pro: Select features interactively or ArcGIS Pro: Select features using attributes. The selected features are highlighted in the map and attribute table.
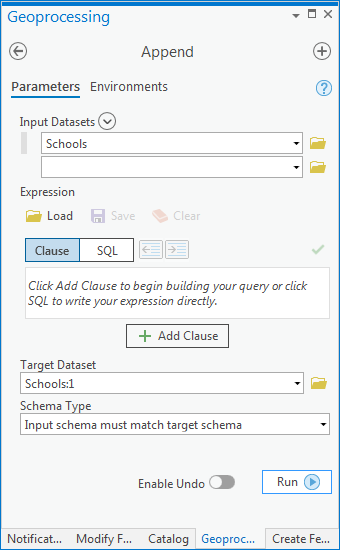
- In the Geoprocessing pane, click the Toolboxes tab, and navigate to Data Management Tools > General > Append.
- In the Append tool pane, select the feature class as Input Datasets.
- Select the added hosted feature layer as Target Dataset.
- Leave the Schema Type by default, and click Run.
- Click the Refresh
 button to refresh the map. The appended data are immediately updated in the feature layer. To view the updated data, open the hosted feature layer in ArcGIS Online, and click the Data tab in the feature layer item details page. Refer to ArcGIS Online: Work with attribute data for more information.
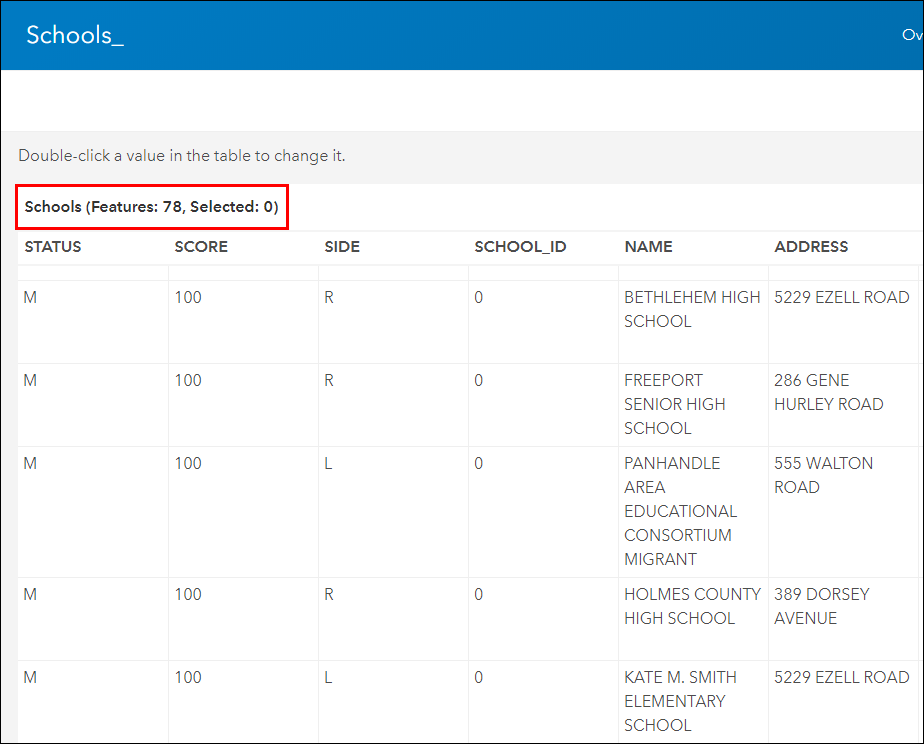
The attributes of the hosted feature layer have been updated with data from the external feature class, as shown below. The number of features in the hosted feature layer is now 78.
Article ID: 000020494
- ArcGIS Pro
- ArcGIS Online
Get support with AI
Resolve your issue quickly with the Esri Support AI Chatbot.


Related Information
Discover more on this topic
Search for related information
Find training related to this topic
Explore ideas and give feedback
Get help from ArcGIS experts
Start chatting now