PROBLEM
The configuration box in Shortlist Builder is not prompted when using the Story Map Shortlist template
Description
In some instances, when attempting to create an app from a web map containing point data using the Story Map Shortlist template, the configuration box in Shortlist Builder is not prompted. This disables the ability to select point data, theme, and fields to be used in the app.
The image below shows an example of the expected configuration prompt in Shortlist Builder when creating an app using the Story Map Shortlist template.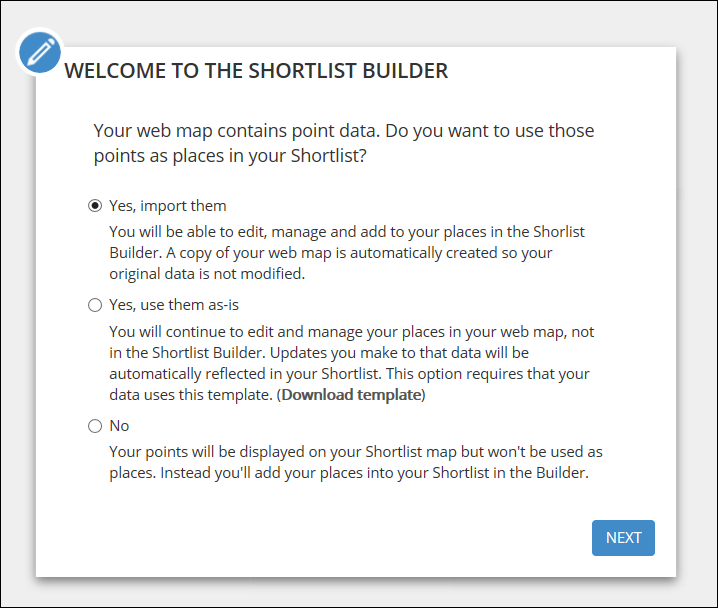
Cause
This issue occurs if the basemap used in the web map is not selected from the Basemap Gallery. For more information, refer to BUG-000117978.
Solution or Workaround
To resolve this issue, use one of the following workarounds:
Use the default basemap when creating the story map
Create the Story Map Shortlist app using a default basemap from the Basemap Gallery, and then return to the web map to add the custom basemap after the Shortlist app is created.
- In ArcGIS Online, open the web map Map Viewer, and select a default basemap from the Basemap Gallery.
- Save the web map and share it as a web application. In the Configurable Apps, click Build a Story Map > Story Map Shortlist > Create Web App. The Shortlist Builder is opened and the configuration box is displayed.
- In the displayed configuration box, configure how to use the point data in the web map.
- Click SAVE in the upper right corner to save the story map.
- Open the web map used to create the Shortlist app in Map Viewer to add the custom basemap.
Note: To identify the web map used to create the story map, go to the Content page and find the web map with the name that ends with ' - Shortlist builder'.
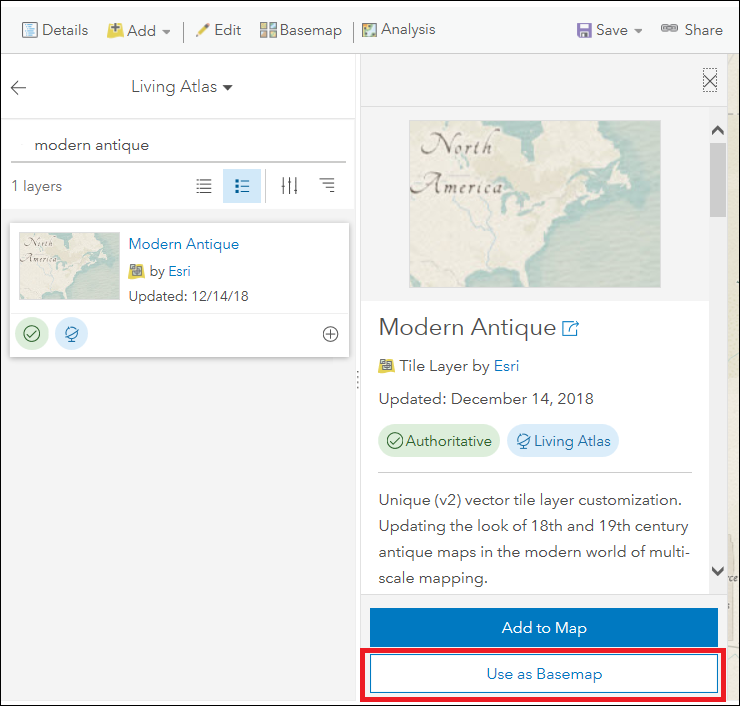
- In Map Viewer, browse Living Atlas Layers.
- Search for the desired custom basemap and click Use as Basemap.
- Click Save to save the web map.
- In the Story Builder, refresh the Shortlist app to view the custom basemap.
Add the custom basemap as a layer and increase the default basemap transparency
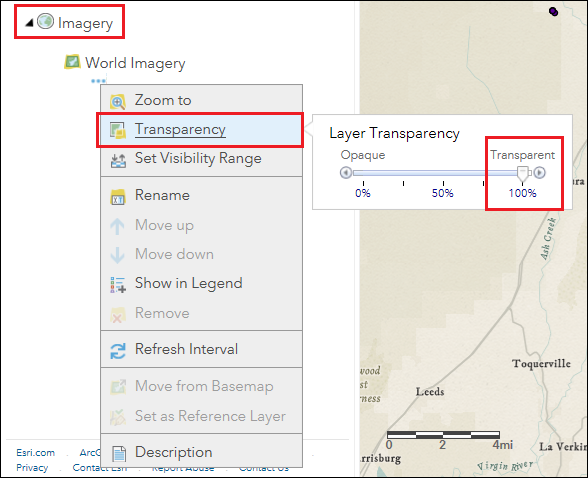
- In ArcGIS Online, open the web map in Map Viewer and select the default basemap from the gallery.
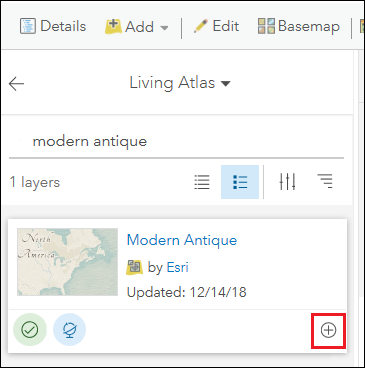
- Select and add the desired custom basemap as a layer from the Browse Living Atlas Layers and click the Add button.
- Change the transparency of the default basemap to 100%. For more information, refer to ArcGIS Online Help: Change transparency through the layer menu.
- Save the web map and share it as a web application. In the Configurable Apps, click Build a Story Map > Story Map Shortlist > Create Web App.
- The Shortlist Builder is opened and the configuration box is displayed.
Article ID:000019708
- Web Applications
- ArcGIS Online
Get help from ArcGIS experts
Download the Esri Support App
Related Information
Discover more on this topic
Search for related information
Find training related to this topic
Explore ideas and give feedback