HOW TO
Determine the XY coordinates of line vertices in ArcMap
Summary
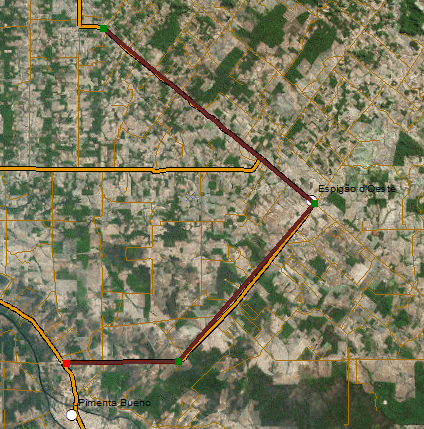
The exact location of stops within a route can be determined by finding the XY coordinates of the line vertices. This is important for scientists doing field samplings, for urban planners planning public transportation routes, or for travel agents planning vacation spots.
The image below shows a digitized line. The XY coordinates of the line vertices can be determined in ArcMap.
Procedure
Use one of the following methods to determine the XY coordinates of line vertices in ArcMap:
Through the Edit Sketch Properties window
- In ArcMap, right-click the layer of interest, and select Edit Features > Start Editing.
- On the Editor toolbar, click the Edit Vertices tool
 .
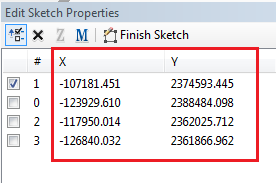
. - Click the Sketch Properties tool
 . The Edit Sketch Properties window opens, and the XY coordinates of the line vertices are listed in the X and Y columns. Refer to ArcGIS Help: Using the Edit Sketch Properties window for more information.
Using the Split Line At Vertices tool
Note:
The Split Line At Vertices tool is only available with an ArcGIS Desktop Advanced license. For an ArcGIS Desktop Basic or Standard license, splitting a line is possible by downloading the Curves and Lines add-in.
- In ArcMap, navigate to the Search tool, and type Split Line At Vertices in the search bar.
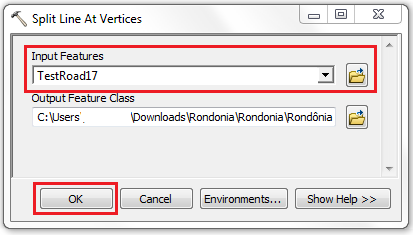
- Click the Split Line At Vertices (Data Management) tool. This opens the Split Line At Vertices dialog box. Refer to ArcGIS Help: Split Line At Vertices for more information.
- Specify the Input Features from the drop-down list. The Output Feature Class is generated once the Input Features are specified.
- Click OK. A line layer containing split lines is generated.
- Right-click the line layer in Table Of Contents, and click Open Attribute Table.
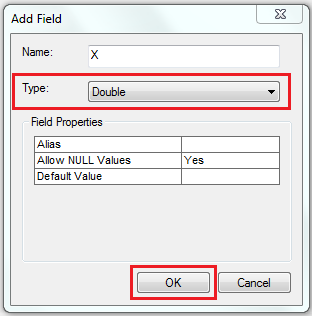
- Click Table Options > Add Field to create a new field for the X coordinate. Specify the data Type as Double, and click OK.
- Start an edit session.
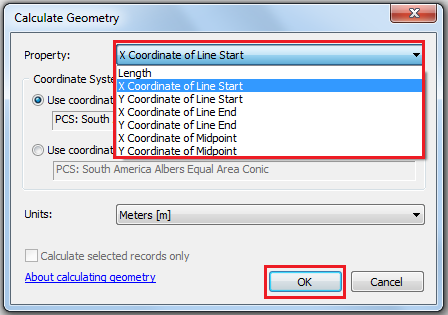
- Right-click the field header for the X coordinate, and click Calculate Geometry. This opens the Calculate Geometry dialog box.
- Specify Property from the drop-down list. Refer to Calculating area, length, and other geometric properties for more information.
Note:
The line direction depends on the drawing direction. 'Line Start' refers to the starting point of the line. 'Line End' refers to the ending point of the line. 'Midpoint' refers to the middle point between the start and end point.
- Maintain the default Use coordinate system and Units parameters.
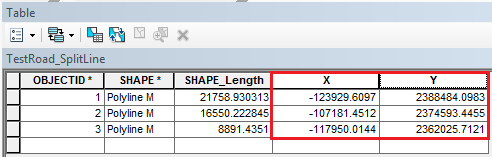
- Click OK. Repeat Steps 4 to 6 for the Y coordinate.
The X and Y coordinates are generated based on the coordinate properties specified.
Using the Feature Vertices To Points tool
Note:
The Feature Vertices To Points tool is only available with an ArcGIS Desktop Advanced license.
- In ArcMap, navigate to the Search tool, and type Feature Vertices To Points in the search bar.
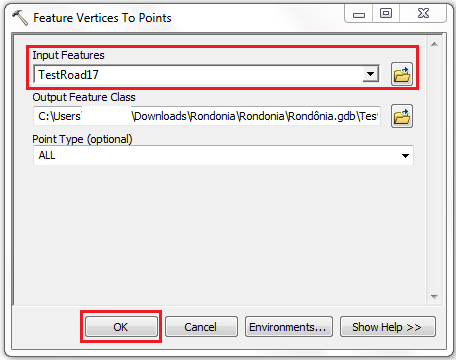
- Click the Feature Vertices To Points (Data Management) tool. This opens the Feature Vertices To Points dialog box. Refer to ArcGIS Help: Feature Vertices To Points for more information.
- Specify the Input Features from the drop-down list. The Output Feature Class is generated once the Input Features are specified.
- Determine the Point Type (optional) from the drop-down list. Maintain ALL as the point type parameter.
- Click OK. A point layer containing all the vertices on the edited line is generated.
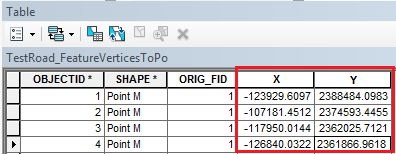
- Right-click the point layer in the Table Of Contents, and click Open Attribute Table.
- Click Table Options > Add Field to create a new field for the X coordinate. Specify the data Type as Double.
- Start an edit session.
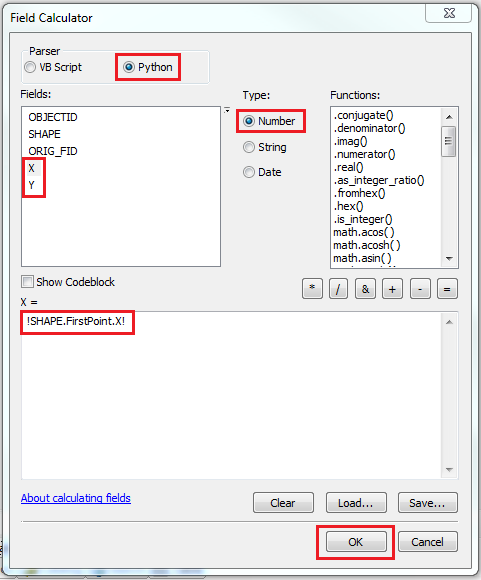
- Right-click the X coordinate field header, and click Field Calculator. This opens the Field Calculator dialog box.
- Specify Parser as Python.
- Select Fields as the X coordinate.
- Maintain the default Type as Number.
-
Use the following code to populate the selected field with the value of the X or Y coordinate.
For the X coordinate field:
!SHAPE.FirstPoint.X!
!SHAPE.FirstPoint.Y!
- Click OK. Repeat Steps 4 to 6 for the Y coordinate.
The new fields are populated with the X and Y coordinates.
Article ID: 000018585
- ArcMap
Get support with AI
Resolve your issue quickly with the Esri Support AI Chatbot.


Related Information
Discover more on this topic
Search for related information
Find training related to this topic
Explore ideas and give feedback
Get help from ArcGIS experts
Start chatting now