HOW TO
Create a subset of a Digital Elevation Model based on a specific elevation range
Summary
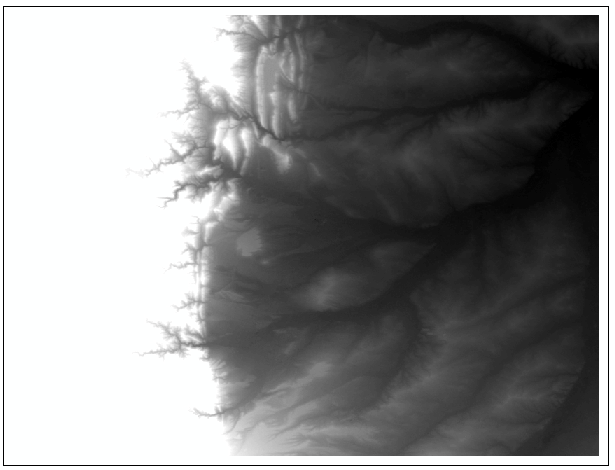
In some cases, when using a digital elevation model (DEM) for an analysis, a subset of the DEM must be created based on a specific elevation range. For example, an area that falls between 1400-2000 meters may be extracted from the original DEM for further data processing or analysis.
Procedure
The instructions provided describe how to create a subset of a DEM based on elevation by using the Raster Calculator tool in ArcMap or ArcGIS Pro.
Note:
These steps require the Spatial Analyst extension license to be active and the Spatial Analyst toolbar to be turned on.
- Add the DEM to the data frame.
- In ArcMap, click Add Data on the Standard toolbar. Browse to the DEM raster data, and click Add.
- In ArcGIS Pro, open a new blank project. Under the Map tab, click the Add Data drop-down, and click Data. Browse to the DEM raster data, and click OK.

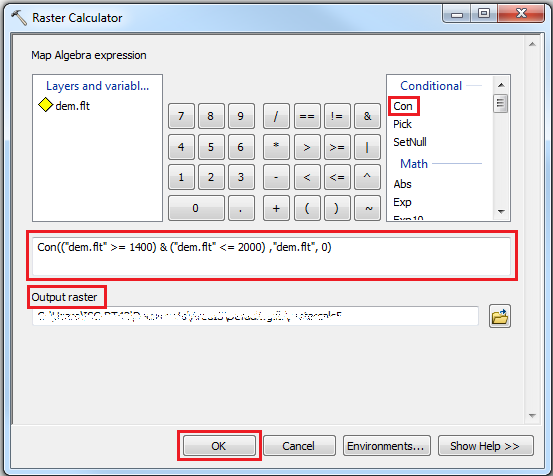
- In ArcMap's ArcToolbox side panel or ArcGIS Pro's Geoprocessing panel, navigate to Spatial Analyst Tools > Map Algebra > Raster Calculator. Double-click to open the tool.
- In the expression box, type the expression to specify the elevation range for the subset of the DEM. For example, to create a subset of a DEM with the elevation range of 1400 to 2000 meters, type the expression below:
Con(("demName" >= 1400) & ("demName" <= 2000), "demName", 0)Note: In the above expression, 'demName' is the original DEM layer in the data frame. For more information regarding 'Con' expressions, refer to following web help document: ArcMap Help: Con
- Set a name and location for the Output raster, and click OK/Run.
- A new DEM raster (with elevation = 1400-2000 meters) is created. Cells that are not within the specified range receive a 'false' value (in this example, 0) in the output raster.
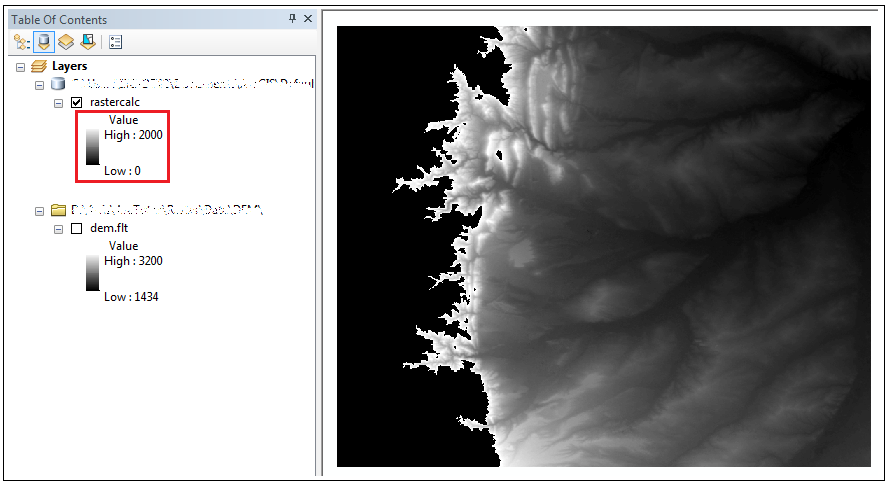
- To improve the visual contrast, remove the black area created in the output raster where the cell values are zero and change the symbology for the cells to No Color.
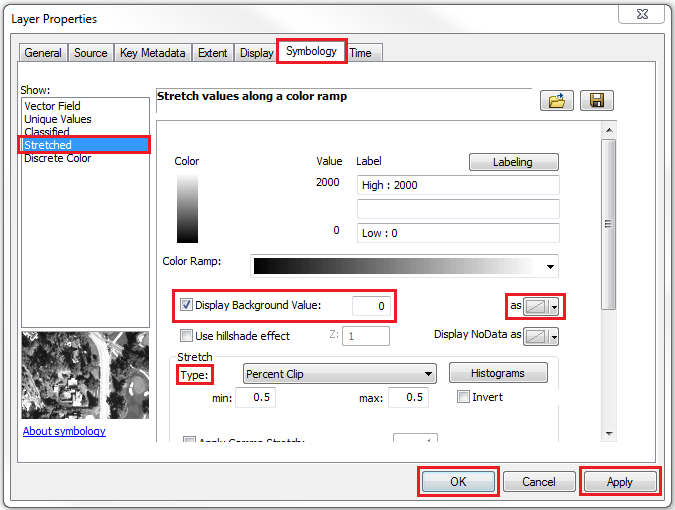
In ArcMap:- In the Table of Contents, right-click the newly created layer and select Properties.
- In Layer Properties > Symbology > Stretched > Display Background Value, click the check box and set the value to 0. Set the color as No Color.
- Select the stretch type in the Type drop-down list. For example, Percent Clip is selected in this article.
- Click Apply > OK.
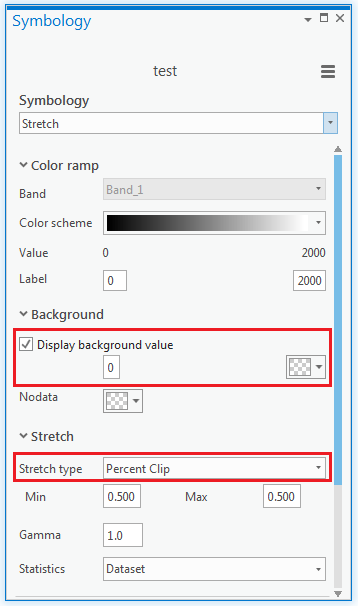
- In the Table of Contents, right-click the newly created layer and select Symbology.
- In the Symbology panel, in the first drop-down list, select Stretch.
- Under the Background section, check the Display Background Value check box and set the value to 0. Change the color to No Color.
- Under the Stretch section, in the Stretch type drop-down list, select Percent Clip. For more information about the stretch function in ArcGIS Pro, refer to the following web help page: ArcGIS Pro Help: Stretch function.
Article ID:000018199
- ArcGIS Pro
- ArcMap
Get help from ArcGIS experts
Download the Esri Support App
Related Information
Discover more on this topic
Search for related information
Find training related to this topic
Explore ideas and give feedback