HOW TO
Enable Living Atlas subscriber or premium content when a load balancer is configured in front of an ArcGIS Enterprise deployment
Summary
Note:
This article applies to retired ArcGIS Enterprise versions 10.5, 10.5.1, and 10.6. Later versions of ArcGIS may contain different functionality, as well as different names and locations for menus, commands and geoprocessing tools.
There are three types of Living Atlas content in an ArcGIS Enterprise portal: default content, subscriber content, and premium content. Default content is automatically available in a portal. To make subscriber or premium content available to the portal organization, the portal administrator must enable access to that content by configuring the portal appropriately. For more information, see Configure Living Atlas content in the Portal for ArcGIS administrator guide.
While configuring Living Atlas content, the portal administrator must stay on the configuration page (under My Organization > Edit Settings > ArcGIS Online > Configure Living Atlas Content) for the content to be properly set up. Leaving the page, closing the browser, or other interruptions may cause the configuration to not complete, and may make the content unavailable. On a typical machine, the configuration step for subscriber or premium content can take 10 to 15 minutes in ArcGIS Enterprise.
Other common Living Atlas configuration tasks take a similar amount of time, such as disabling subscriber or premium content, or updating the ArcGIS Online organizational subscription account previously configured to access the content.
However, some environments are prone to failures, where the configuration of Living Atlas content does complete despite the administrator following the steps in the documentation. This is seen at times when a load balancer is utilized. To understand more about why this occurs, this article provides solutions that can be followed to complete configuration changes.
Note:
The solutions provided also apply to upgrading Living Atlas content as part of the ArcGIS Enterprise portal upgrade process, if default content was not previously disabled in the Enterprise portal. If upgrading Living Atlas content, apply the provided solution before performing an upgrade to Portal for ArcGIS. Specifically, for those following the documentation on upgrading ArcGIS Enterprise, complete the solutions below before beginning the Reindex operation defined in step 12.

The solutions provided also apply to disabling subscriber or premium content, and to updating the ArcGIS Online organizational subscription accounts previously configured to access Living Atlas content.
When a load balancer is configured in front of the ArcGIS Enterprise deployment, it is common to see timeout values for idle HTTP connections set around one to two minutes. Therefore, enabling subscriber or premium content may fail when the load balancer prematurely closes the connection. Based on which load balancer setup is used, the message, "An error was encountered when updating the Living Atlas content configuration" or similar is returned.
Load balancers of this nature are found in several templates provided by Esri, including the highly available base ArcGIS Enterprise deployment template for Amazon Web Services (AWS) and the base ArcGIS Enterprise deployment created using the ArcGIS Enterprise Cloud Builder for Microsoft Azure. Setups like this are also found in custom on-premises implementations or other environments if a third-party load balancer is used instead of or alongside the ArcGIS Web Adaptor.
Procedure
There are two workflows that can be followed:
- Remotely connect to the machine where the ArcGIS Enterprise portal is installed, and access the portal homepage via port 7443, such as https://localhost:7443/arcgis/home, to enable additional types of Living Atlas content.
- Temporarily change the load balancer timeout from its existing value to a higher value (such as 30 minutes) before enabling additional types of Living Atlas content in the Enterprise portal. After enabling the content, change the load balancer timeout back to its previous value, if desired.
The instructions below describe how to increase the load balancer timeout for different cloud environments.
Amazon Web Services
In an AWS highly available base ArcGIS Enterprise deployment, read the instructions for increasing the timeout of the load balancer.
Microsoft Azure
For the base ArcGIS Enterprise deployment created by the ArcGIS Enterprise Cloud Builder for Microsoft Azure, there are two locations that must be updated with the increased timeout values: the internal reverse proxy, and the Microsoft Azure load balancer.
Location 1: The internal reverse proxy
Follow the steps below to increase the timeout of the internal reverse proxy. When completed, proceed to the steps required for the Microsoft Azure Load Balancer.
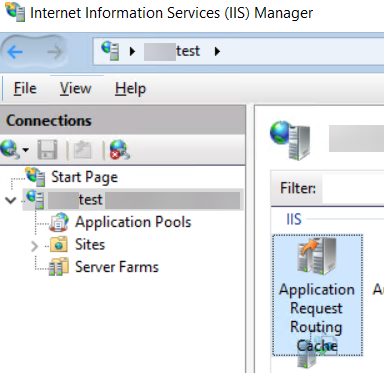
- Open IIS Manager and select the server node.
- Open the Application Request Routing Cache node.
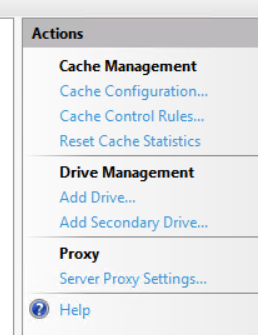
- In the Proxy section of the Actions menu, click Server Proxy Settings.
- Change the Time-out to the desired value (in seconds).
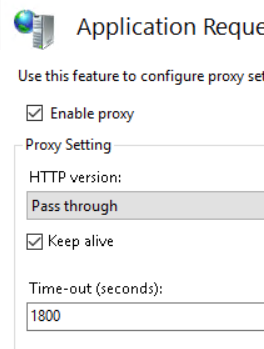
- Click Apply.
Location 2: The Microsoft Azure load balancer
Follow the steps below to increase the timeout of the Microsoft Azure load balancer. For custom on-premises deployments or other environments, similar steps unique to the environment's load balancer must be performed. This is often referred to as an 'idle timeout' or 'proxy timeout'.
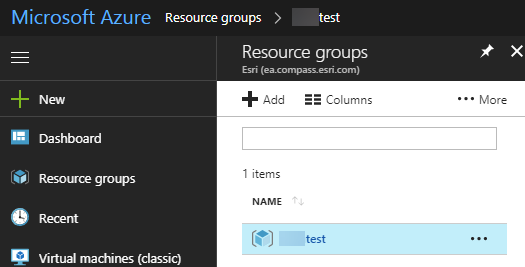
- Log in to the Microsoft Azure portal.
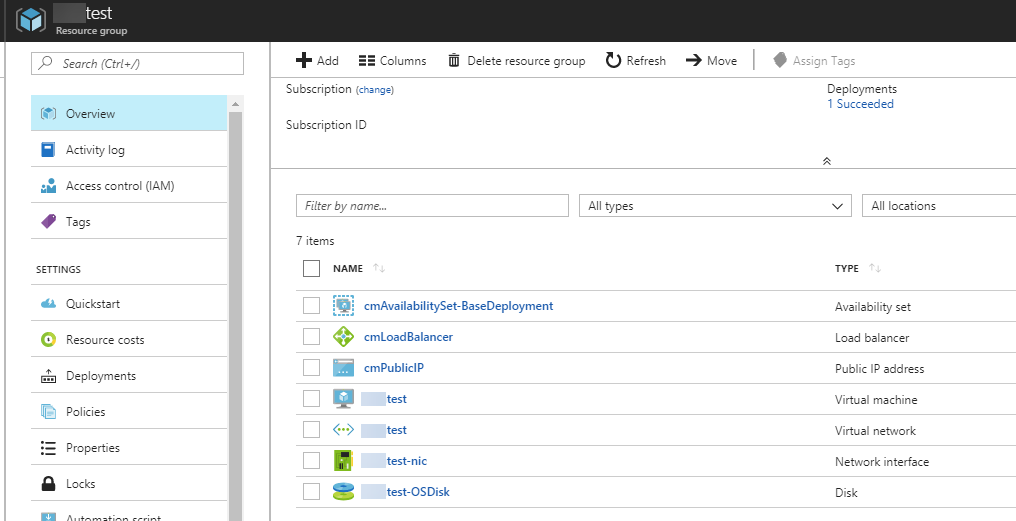
- Browse to the resource group for the ArcGIS Enterprise deployment.
- In the resources list, select the Load Balancer resource.
- In the menu, select Load balancing rules.
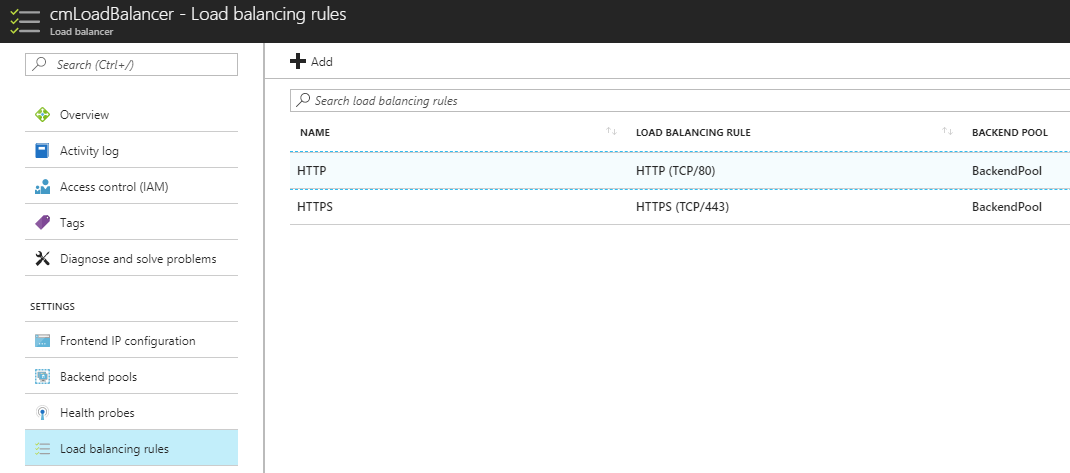
- Select HTTP.
- Use the slider control to increase the timeout to 30 minutes.

- Click Save.

- Select HTTPS.
- Use the slider control to increase the timeout to 30 minutes.
- Click Save.
Article ID:000017713
- Portal for ArcGIS
Get help from ArcGIS experts
Download the Esri Support App
Discover more on this topic
Search for related information
Find training related to this topic
Explore ideas and give feedback