PROBLEM
Raster boundaries are visible when symbolizing overlapping rasters in ArcMap
Description
When multiple overlapping raster layers are rendered with similar stretched color ramp symbology, the transition between the overlapping raster layers are not smooth and, thus, display the raster boundaries, as shown in the following image.

Cause
The color ramp of each raster may have different maximum and minimum values. Within a given raster, the values between the min and max are scaled to optimize the transition between colors. Where that raster overlaps another raster, the color assigned may be different than the color assigned to the same value in a neighboring raster. This difference creates a visible border between the rasters.
Solution or Workaround
Adjust the high and low values of each raster to the maximum high and minimum low values of all the raster layers in ArcMap. Follow the steps below.
Note:
The following solution works best if the raster layers have the same pixel size and are precisely aligned. Refer to: ArcMap: Cell size of raster data for more information on pixel size of raster data.
Based on the current color ramp values of the raster, determine the maximum and minimum pixel values for all rasters. These are displayed under each layer name in the Table of Contents.
- In Table of Contents, right-click the raster layer and click Properties.
- In the Layer Properties dialog box, navigate to the Symbology tab and select Stretched on the left pane.
- Click the Color Ramp drop-down arrow, and select the desired color ramp for the raster layer.
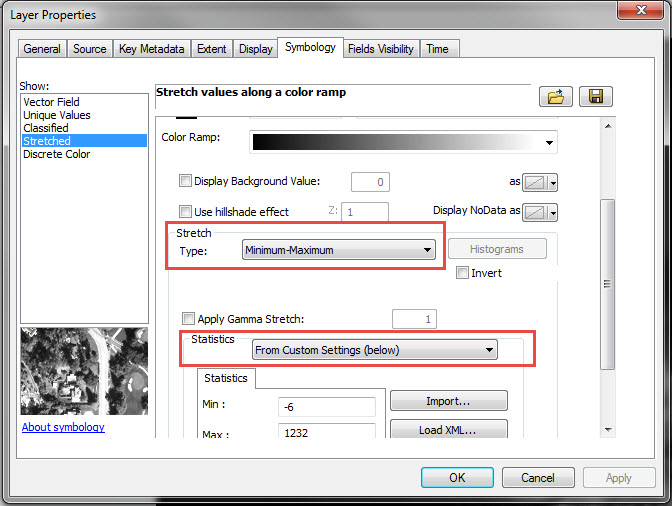
- In the Stretch section, click the Type drop-down arrow, and select Minimum-Maximum.
- In the Statistics drop-down list, select From Custom Settings (below).
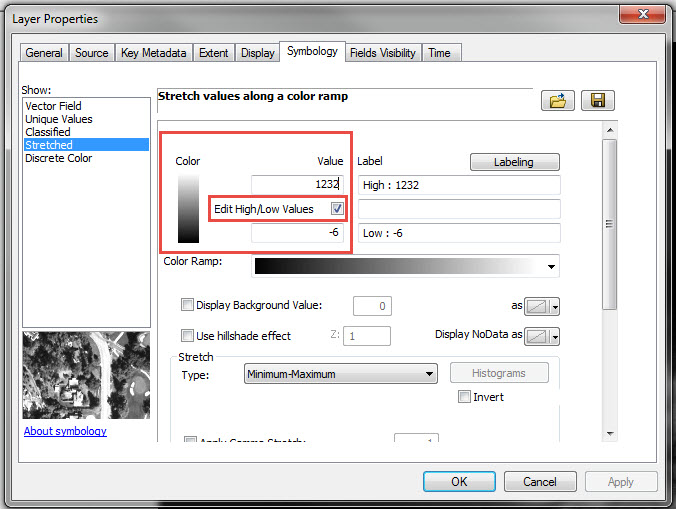
- Scroll up, and check the Edit High/Low Values check box.
- Adjust the maximum high and minimum low values in the Value text box.
- Click Apply > OK.
- Repeat Step 1 to Step 8 for the neighboring raster layers to obtain the desired result.
Article ID:000016775
- ArcMap
Get help from ArcGIS experts
Download the Esri Support App
Related Information
Discover more on this topic
Search for related information
Find training related to this topic
Explore ideas and give feedback