PROBLEM
Lines that participate in a network dataset automatically split in ArcGIS Pro
Description
When digitizing in a new line in a feature class that participates in a network dataset, if the line intersects another line at a midpoint (or any point that is not an endpoint), the intersected line is split.
Because of the split, attributes of the split road segments may be incorrect.
Cause
In ArcMap 10.x and ArcGIS Pro 1.3 or earlier, the management of network dataset connectivity after updates to the source feature classes was done entirely by the user. If a network dataset used End Point connectivity for a source feature class, there was no connectivity between road segments that connected through a midpoint. This meant that a route would not use that intersection, leading to an incorrect route or an error message stating that no route could be found.
To fix the problem, the lines needed to be manually split and the attributes recalculated, so that all road segments were connected at endpoints or switched to using Any Vertex connectivity, which could introduce new problems.
At ArcGIS Pro 1.4, new behavior was implemented to refine network dataset editing processes. The editing tools know when a user is editing features that participate in a network dataset and of the network dataset’s connectivity policy, and so special extra edits are made to ensure connectivity. If the connectivity policy is End Point, existing features and edges are automatically split when snapped to by a new feature at a midpoint or other non-endpoint location.
Attribution of the new road segments depends on whether the field has a domain applied to it and what the Merge and Split policies for that domain dictate. If the fields do not have domains attached to them, the value from the original road segments are duplicated into the split segments.
Solution or Workaround
ArcGIS Pro 1.4 and later splits lines that participate in network datasets with End Point connectivity to maintain connectivity between edges. Using a group template to place a new user junction with the Override connectivity policy establishes connectivity at the intersection and prevents the road from being split.
A user junction with the Override connectivity policy can be used to establish connectivity in places where edge connectivity policies are otherwise prohibited. By setting up a user junction feature class with the Override connectivity policy in the same connectivity group as the roads line feature class, connectivity can be established without having to split the road lines. To learn more about the Override connectivity policy and connectivity groups, read the ArcGIS Web Help article, Understanding Connectivity. For connectivity, there must be a vertex on the existing line, so that the new line snaps to a vertex and not an edge.
A group template can be created to combine the road lines feature class with an Override user junction feature class, so that whenever a road line segment is created that intersects another road line, a vertex is created on the existing line and an Override junction is placed at that intersection, therefore establishing connectivity.
It is recommended to create a project for editing the network dataset, because the group template is saved inside the project.
The instructions provided describe how to set up a group template for road lines and Override junctions.
Note:
If an Override junction feature class already exists as a network source, skip to step 6.
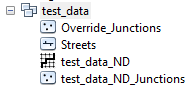
- Create a new point feature class to be the user junctions in the same feature dataset as the network dataset.
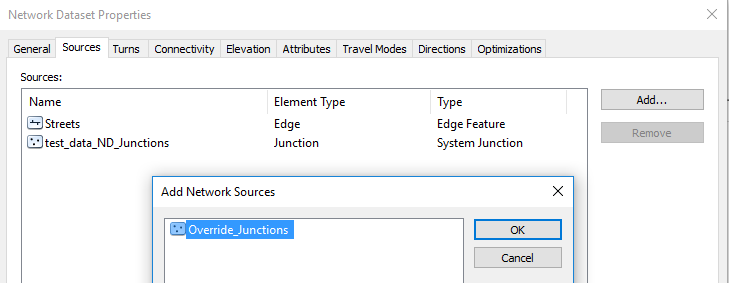
- Add the new point feature class as a network source to the network dataset, as described in the ArcGIS Web Help article, Adding network sources.
Note:
As of July 2017, ArcGIS Pro users must use ArcMap or ArcCatalog to add network sources, as this functionality is not yet available.
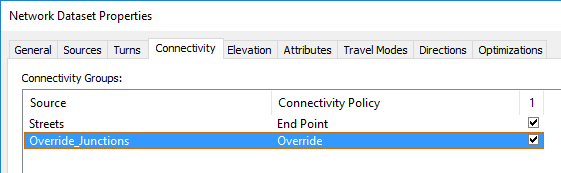
- In the Connectivity tab of the Network Dataset Properties dialog, click the word Honor next to the user junction feature class, and change the policy to Override.
- Ensure the user junctions feature class is in the same connectivity group as the roads lines feature class.
- Click OK to accept the changes to the network dataset.
- Build the network dataset, as described in the Web Help article Building a network dataset in ArcMap or Building a network dataset using a geoprocessing tool.
- Create and save a new project for ArcGIS Pro. If needed, insert a new Map.
- Add the roads and user junction feature classes to the map.
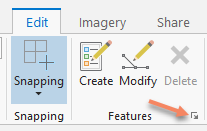
- Select the Edit ribbon, and click the arrow in the lower-right corner of the Features tool group to expand the Manage Templates pane.
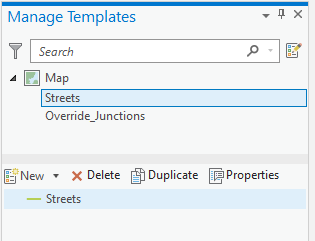
- Select the lines feature class in the top section of the Manage Templates pane.
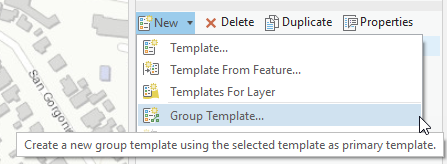
- Open the New drop-down menu in the lower section of the Manage Templates pane, and select Group Template.... The Template Properties: New Template dialog window opens.
- In the General tab, enter a Name (required), Description, and additional tags, if desired.
- In the Builders tab, click the Add button and select the user junction feature class.
- Select the method point at every intersection.
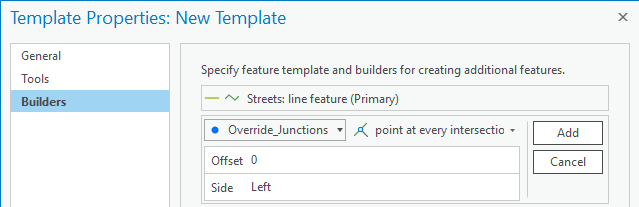
- Click Add to finish adding the new layer to the template.
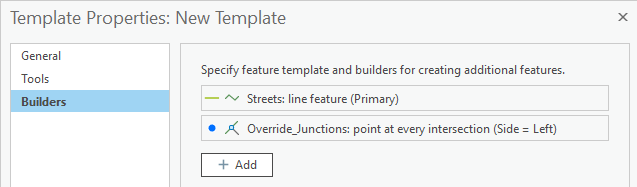
- Click OK at the bottom of the Template Properties: New Template dialog to accept the new group template.
- To test the template, select the Edit ribbon and click the Create tool in the Features group.
- Select the newly created group template from the list of templates in the Create Features pane.
- Digitize in a new street so that it intersects an existing street. For example, create a new “T” intersection, as seen in the image below.
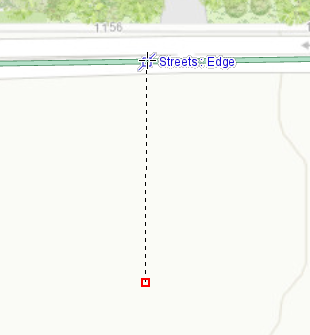
- After finishing the sketch, the new road segment is created, a new vertex is added to the existing road, and an Override junction is placed on the intersection of the two road segments. The existing line is not split.
Note:
If not using a group template to prevent the splitting of lines, once the lines are split, other attributes and features will need to be fixed.

The splitting of the lines can potentially affect other parts of the network dataset. Turn features, sign features, and historical traffic data all use the EdgeID to link to the network dataset. Splitting a line splits the edge, as well. When the edge splits, one piece keeps the original EdgeID but the other piece receives a new EdgeID.

If an edge is split that is linked to any turn feature, sign feature, or historical traffic data, the turn and sign features, and the historical traffic data must be updated to use the correct EdgeIDs. See Modifying the edge sequence of a turn feature for details on how to fix a turn feature to use a new EdgeID.

To prevent attribution of road segments from being incorrectly assigned, domains can be set up on the geodatabase and applied to the respective fields. Applying domains to the fields allows for the use of the domain’s Split and Merge policies when the roads are split. See Split and merge policies for more details.
Article ID: 000016398
- ArcGIS Pro
Get support with AI
Resolve your issue quickly with the Esri Support AI Chatbot.


Related Information
Discover more on this topic
Search for related information
Find training related to this topic
Explore ideas and give feedback
Get help from ArcGIS experts
Start chatting now