HOW TO
Create an outline around features
Summary
In ArcMap, certain features in a polygon feature class can be outlined to accentuate the selected features. This allows the outlined area to be visually segregated, and is useful when defining boundaries or highlighting areas of interest.
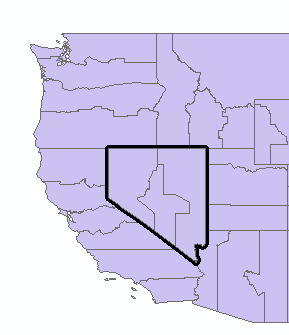
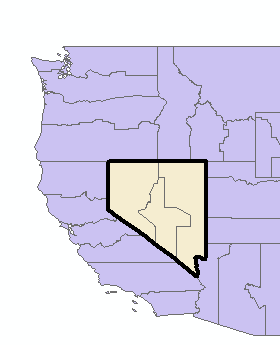
This article describes two ways to draw an outline around a specific area of a feature (as shown in the image below), that is, by creating multiple layers of the specific features, or using the Buffer tool.
Procedure
Create multiple layers of the specific features
- Select the specific features to be outlined from the feature class using the Select Features tool
 .
. - After the features are selected, right-click the feature class in Table Of Contents > Selection > Create Layer From Selected Features. A new layer of the selected features is created.
- Click the symbol of the created layer from Step 2 in Table Of Contents to open the Symbol Selector dialog box.
- Change the Fill Color to No Color, and change Outline Width and Outline Color to the desired thickness and color respectively.
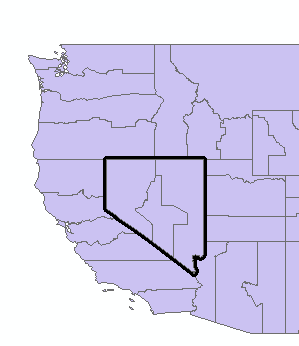
- Click OK. An outline of the selected features is created.
Note:
If it is necessary to remove the lines within the perimeter of the outlined area, proceed with the subsequent steps.
- Repeat Steps 1 and 2 for the specific features to be outlined from the feature class to create a second layer from the selected features.
Note:
Skip Step 6 if the features are not deselected after Step 5.
- Right-click the second layer of selected features in Table Of Contents, and click Properties.
- On the Symbology tab, click Import.
- In the Import Symbology dialog box, ensure the original feature class (and not any of the created layers from Steps 2 or 6) is selected in the Layer drop-down list, and click OK > OK.
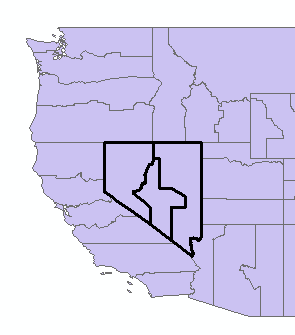
- Deselect the features. A single outline of all the selected features is visible as shown in the image below.
Use the Buffer tool
Note:
To use the Buffer tool, the map must have a projected coordinate system since the Buffer tool uses linear units.
- Select the specific features to be outlined from the feature class using the Select Features tool
 .
. - After the features are selected, right-click the feature class in the Table Of Contents > Selection > Create Layer From Selected Features. A new layer of the selected features is created.
- On the Standard toolbar, click Geoprocessing > Buffer.
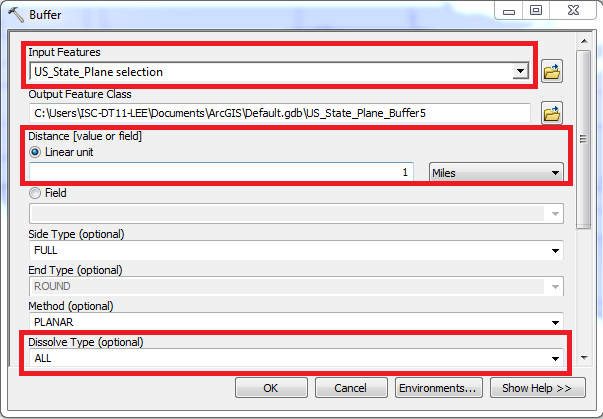
- Select the created layer of selected features in Step 2 as the Input Features. In the Linear unit field for the buffer distance, use the shortest distance, and set the smallest unit type in the unit drop-down list.
Note:
The shortest distance and smallest unit type is based on the spatial reference of the user's map.
- Change the Dissolve Type to ALL, and click OK. An output layer is created.
- Click the symbol of the output layer in Table Of Contents to open the Symbol Selector dialog box.
- Change Fill Color to No Color, and change Outline Width and Outline Color to the desired thickness and color, respectively.
- Click OK. An outline of the selected features is created.
Article ID:000015558
- ArcMap
Get help from ArcGIS experts
Download the Esri Support App
Related Information
Discover more on this topic
Search for related information
Find training related to this topic
Explore ideas and give feedback