HOW TO
Edit field alias names displayed in ArcGIS Online web scene pop-ups
Summary
ArcGIS Online provides the ability to enable pop-ups in 3D web scenes, but there is no way to configure the pop-ups. For example, it is not possible to change the field alias name displayed in the pop-ups. However, ArcGIS Pro provides a method for editing the field alias name in the layer data source before creating a layer package and publishing it to ArcGIS Online as a hosted scene layer.
Procedure
The instructions provided describe how to edit the field alias name displayed in the ArcGIS Online web scene pop-up.
- In ArcGIS Pro, run the Alter Field tool to edit the field alias name of the multipatch layer table. Open the Geoprocessing pane by clicking the Analysis tab > Tools. In the Geoprocessing pane, click Toolboxes, and navigate to Data Management Tools > Fields > Alter Field.
Note:
The changes made directly in the attribute table to the field alias name are not reflected in the layer data source.
- Select the table of the multipatch layer as the Input Table.
- Select the field to edit in the Field Name parameter.
- Type in a name for the New Field Name parameter. To retain the original field name, type in the original name of the field.
- Type in the new field alias name to be displayed in the web scene pop-up in the New Field Alias parameter.
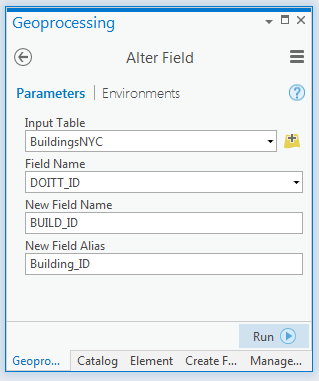
- Click Run.
- Create a scene layer package for the multipatch layer containing the edited field alias name. Refer to the following document for steps to create a scene layer package: Create a 3D object scene layer.
- Upload the scene layer package created in Step 2 to ArcGIS Online using the Share Package tool. Navigate to Data Management Tools > Package > Share Package.
- In the Geoprocessing pane, select the scene layer package created in Step 2 as the Input Package.
- Type in a summary of the scene layer package in the Summary parameter.
- Type in the tags for the scene layer package in the Tags parameter.
- Check the checkbox for any group in the Groups section to share the scene layer package with other groups, if required.
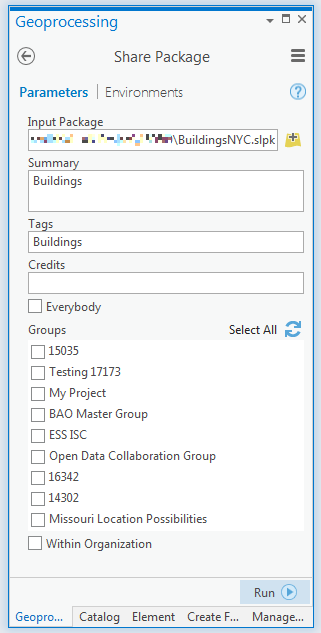
- Click Run.
- Publish a hosted scene layer from the hosted scene layer package uploaded in Step 3.
- Log in to www.arcgis.com.
- Open My Content, and click the hosted scene layer package to open the item details page for the scene layer package to publish.
- Click Publish, and type a unique title and tags for the hosted scene layer.
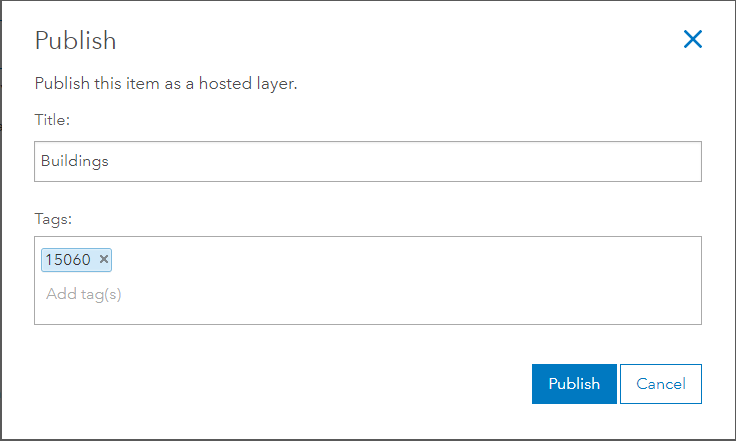
- Click Publish.
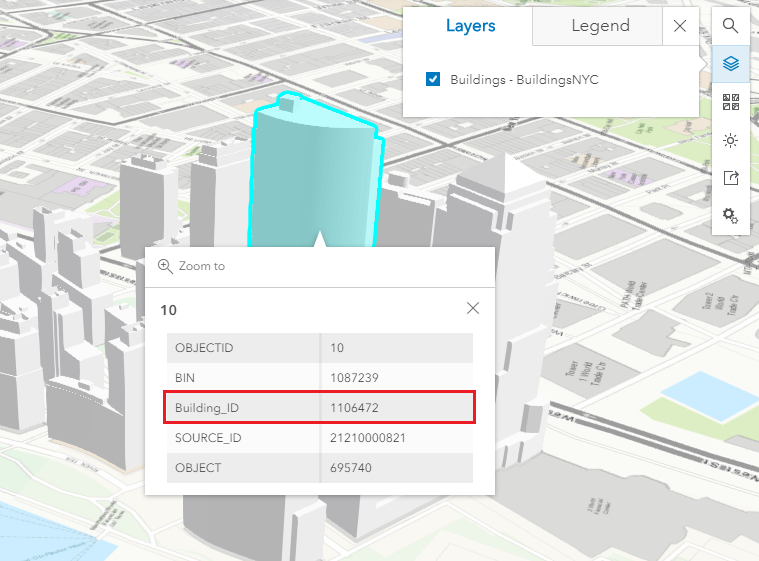
- To view the edited field alias name, add the hosted scene layer to a web scene and enable the pop-up for the layer. The edited field alias name is displayed in the pop-up when clicking on a feature.
Article ID: 000015060
- ArcGIS Pro
- ArcGIS Online
Get support with AI
Resolve your issue quickly with the Esri Support AI Chatbot.


Related Information
Discover more on this topic
Search for related information
Find training related to this topic
Explore ideas and give feedback
Get help from ArcGIS experts
Start chatting now