ERROR
ERROR 000426: Out Of Memory
Error Message
When performing export or selection operations or using a geoprocessing tool on a dataset, the following error message is returned:
Error:
ERROR 000426: Out Of Memory
Cause
This error may occur due to the following reasons:
- processing large datasets
- background processing of another geoprocessing tool
For more information on the error message, refer to the following documentation, 000426: Out Of Memory.
Solution or Workaround
To resolve the error, use any of the following solutions (depending on the cause) and rerun the tool or operation.
A. Separate large datasets into smaller groups
This method breaks up the feature classes into smaller groups of data, and stores the data as a new feature class.
- To create a new feature class in ArcMap, right-click the desired folder in the Catalog pane > New > Feature Class.
- In the Table Of Contents, right-click the large feature class desired to split, and click Open Attribute Table.
- In the attribute table, select the features for the first group.
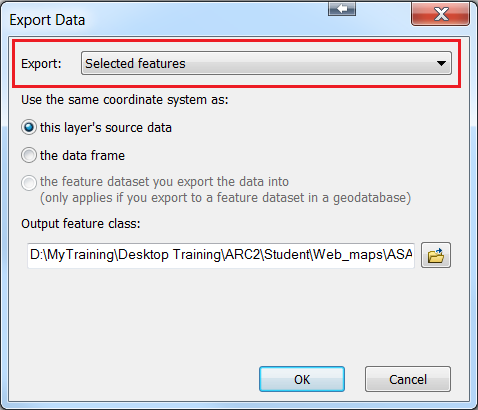
- Right-click the layer in the Table Of Contents > Data > click Export Data.
- In the Export Data dialog box under Export, click Selected features from the drop-down list.
- For the Output feature class, select the new feature class created in Step 1 and click OK.
- Repeat the above steps for the remaining groups of features.
B. Clip features to smaller pieces using the Grid Index Features tool
This method clips the features using the Grid Index Features tool.
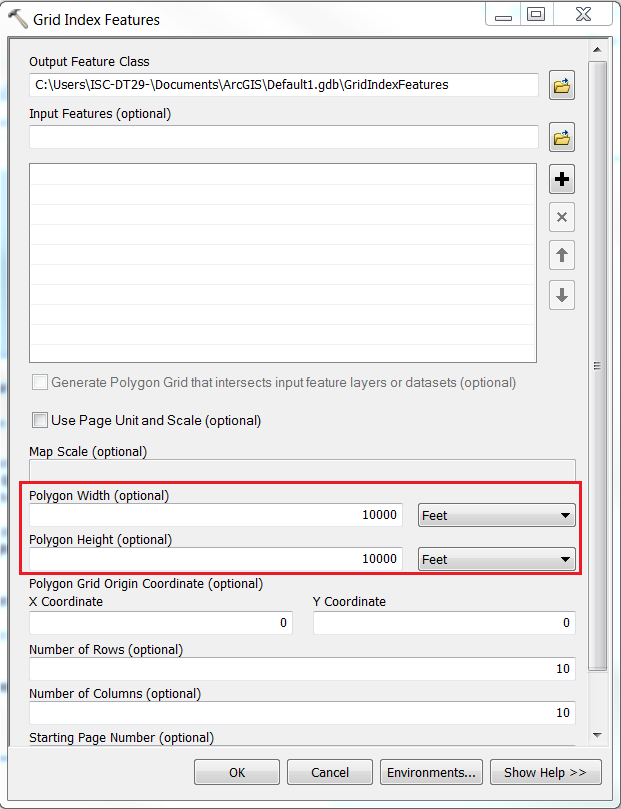
- In ArcMap, run the Grid Index Features geoprocessing tool (Geoprocessing > ArcToolbox > Cartography Tools > Data Driven Pages > Grid Index Features).
- In the Output Feature Class box, type the output name for the grid index features without spaces.
- In the Input Features box, select the feature class from the drop-down list.
- Enter 10000 for both the Polygon Width and Polygon Height, and select Feet as the unit from the drop-down list for both Polygon Width and Polygon Height.
- Click OK to add the grid to the map.
- Right-click one of the grid boxes on the map, and click Select Features.
- In the Geoprocessing menu, click the Clip tool.
- In the Input Feature box, select the feature class, and select the grid index features layer for Clip Features.
- Name the output feature class, and click OK to run the tool.
- Repeat Steps 6 through 9 for the remaining grid boxes.
C. Extract datasets using the Create Fishnet tool
This tool extracts parts of data and exports the subsets into new datasets.
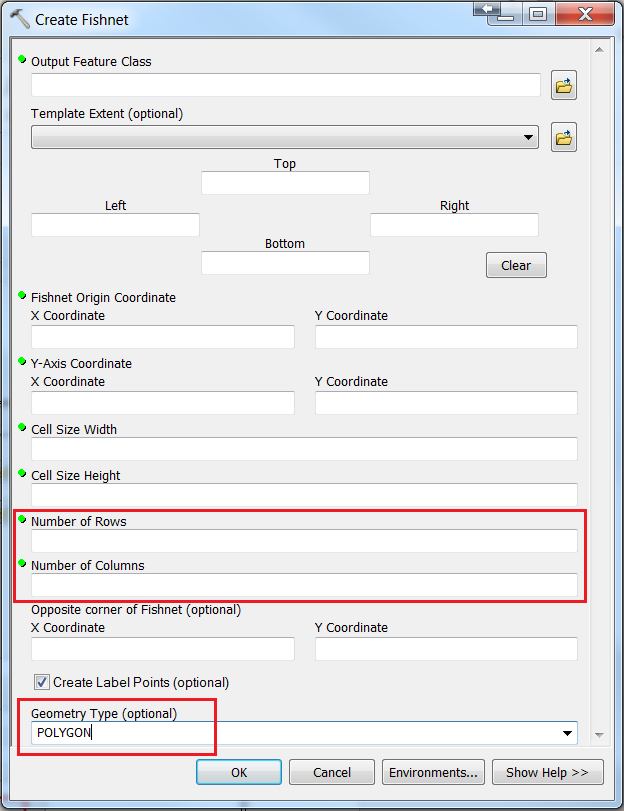
- To run the Create Fishnet tool, navigate to Geoprocessing > ArcToolbox > Data Management Tools > Sampling > Create Fishnet.
- Enter the name and location of the Output Feature Class.
- Select the feature class for the Template Extent.
- Enter the desired value for the Number of Rows and Number of Columns.
- For the Geometry Type parameter, select POLYGON, and click OK to run the tool. The POLYGON geometry forms a grid that overlays on an existing dataset.
- Select one of the grid boxes on the map, right-click, and click Select Features.
- Open the Select By Location dialog box (Selection > Select By Location).
- Set the feature class as the target layer and the grid as the source layer.
- Enable the Use selected features check box, and click OK.
- Click the icon for General tabular operations > Export > Selected Records. This step exports only the selected data.
- Repeat Steps 7 to 10 for each section to export all data.
D. Disable background processing
Other geoprocessing tools executing in the background consume computer memory and may cause an operation to fail. Disabling background processing of other tools frees up the memory and allows the desired operation to run.
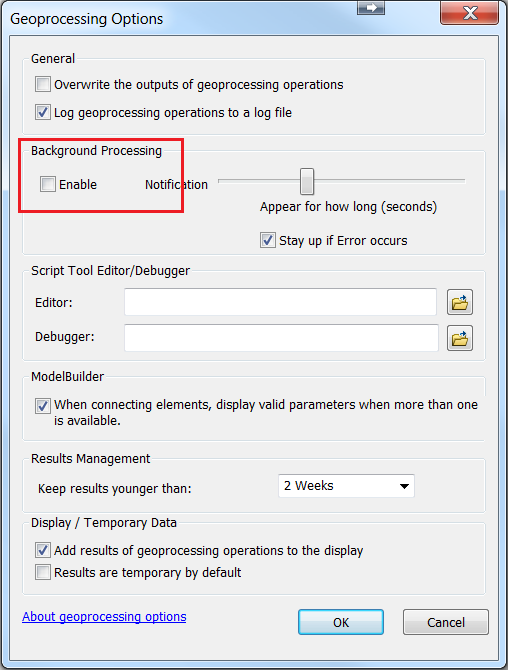
- To disable background processes, navigate to Geoprocessing > Geoprocessing Options.
- Uncheck the Enable check box in the Background Processing section and click OK.
- Rerun the failed tool or operation.
Article ID: 000014733
- ArcMap
Get support with AI
Resolve your issue quickly with the Esri Support AI Chatbot.


Related Information
Discover more on this topic
Search for related information
Find training related to this topic
Explore ideas and give feedback
Get help from ArcGIS experts
Start chatting now