HOW TO
Use Spline with Barriers to visualize the depth of water channels
Summary
The depth of water channels can be visualized by using raster interpolation with values collected using GPS. This can be done using the Spline with Barriers tool, however, using only the Spline tool interpolates all values including the area outside the water channels.
Procedure
The following instructions describe how to use Spline with Barriers to visualize the depth of water channels:
Note:
The Spline with Barriers tool requires a Spatial Analyst or 3D Analyst license.
- Create a rectangle feature around the channels feature.
- Draw a graphic rectangle using the Rectangle tool on the Draw toolbar.
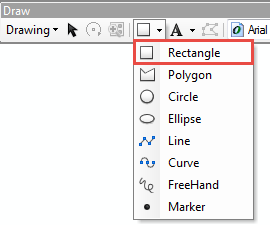
- Convert the rectangle graphic to a feature by using the Convert Graphic to Feature command.
- Draw a graphic rectangle using the Rectangle tool on the Draw toolbar.
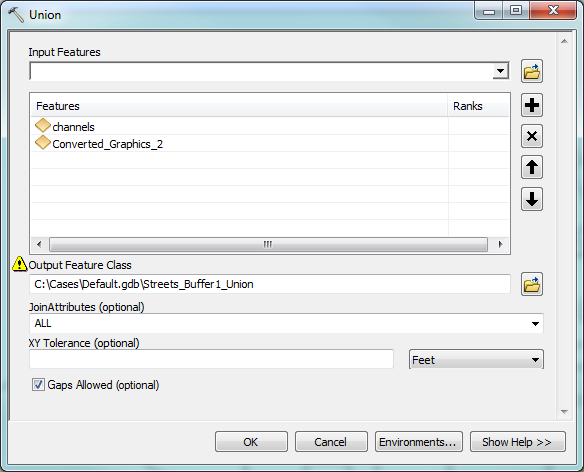
- Combine the rectangle and channel features using the Union tool.
- In the Catalog window, navigate to System Toolboxes > Analysis Tools > Overlay > Union.
- Select the rectangle and channel features as input features.
- Click OK. A new layer is created.
- Remove the channel interiors feature from the output created in Step 2.
- Start an edit session on the output feature created in Step 2.
- Open the attribute table of the feature.
- Select the channel interiors feature from the map.
- Right-click the selected feature in the attribute table > Delete Selected.
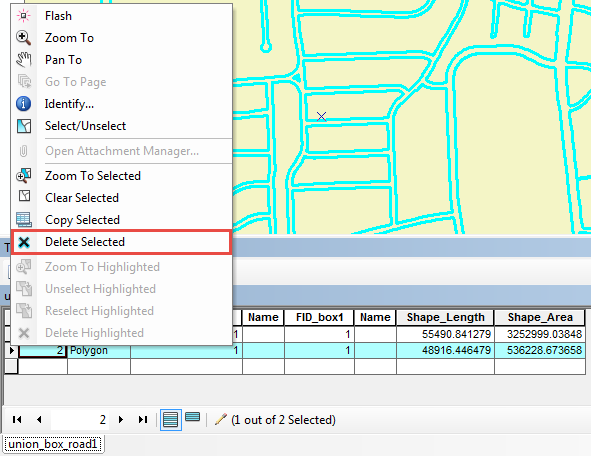
- Save and stop the editing session.
- Interpolate the raster by running the Spline with Barriers tool on the point feature containing depth values and the feature from Step 3.
- In the Catalog window, navigate to System Toolboxes > Spatial Analyst Tools > Interpolation > Spline with Barriers.
- For Input Point Features, select the point feature containing depth values..
- For Z value field, select the field with depth values.
- For Input barriers features, select the output feature created in Step 3.
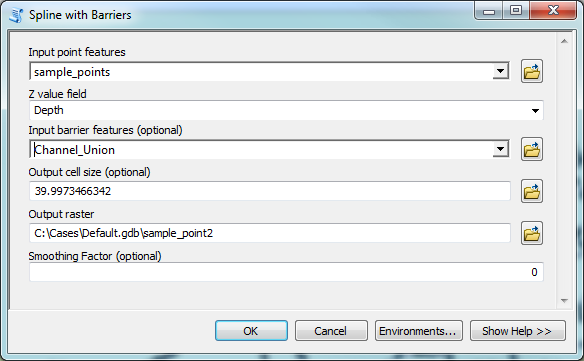
- Click OK.
- Modify the raster symbology.
Note:
Users may modify the color ramp and classes.
- In the Table Of Contents, right-click the raster layer > Properties.
- On the Symbology tab, click Classified in the left pane.
- Click Classify to open the Classification dialog.
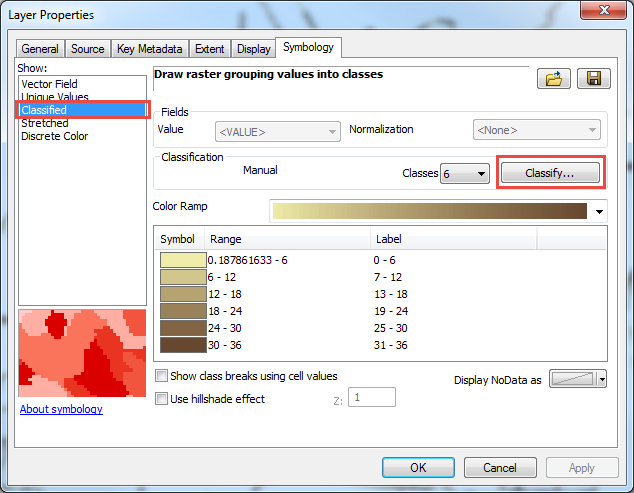
- Select Manual from the Method drop-down list. Click OK.
- Click OK to apply the changes.
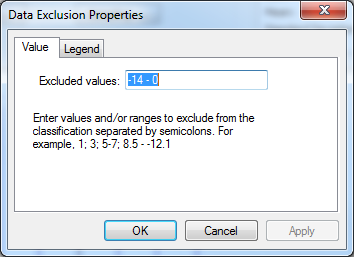
Note: The Spline with Barriers tool may produce negative values because it does not understand the real-world scenario. This depends on the user's data, negative depth may not be relevant in the analysis. If necessary, exclude negative values from the symbology classification by following the steps below: 1. In the Classification window, click Exclusion.
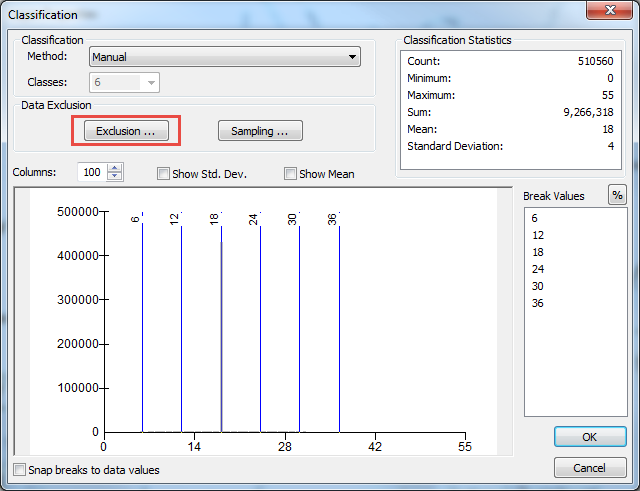 2. In the Data Exclusion Properties window, enter values or ranges to exclude from the classification. Click OK > OK.
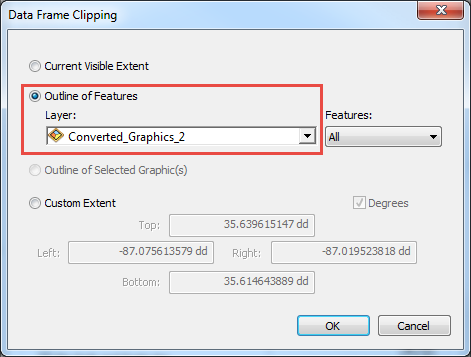
- Clip the raster output.
- In the Table Of Contents, right-click the data frame layer > Properties > the Data Frame tab.
- In the Clip Options section, select Clip to shape from the drop-down list.
- Click Specify Shape.
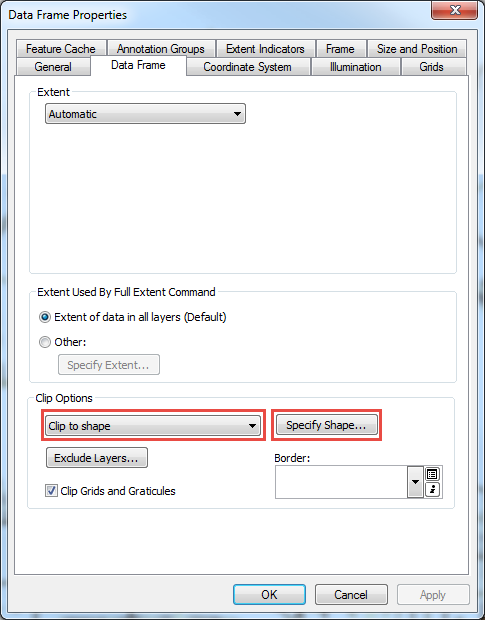
- Select the Outline of Features option.
- Select the rectangle feature created in Step 1 from the Layer drop-down list. Click OK.
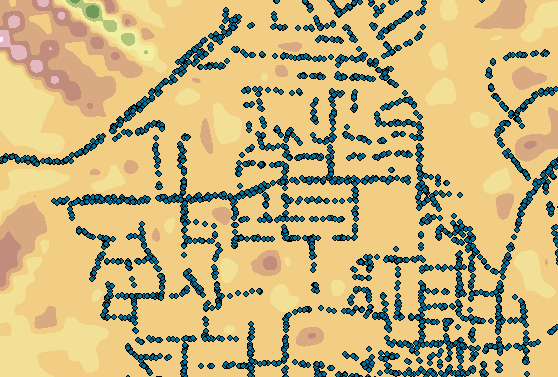
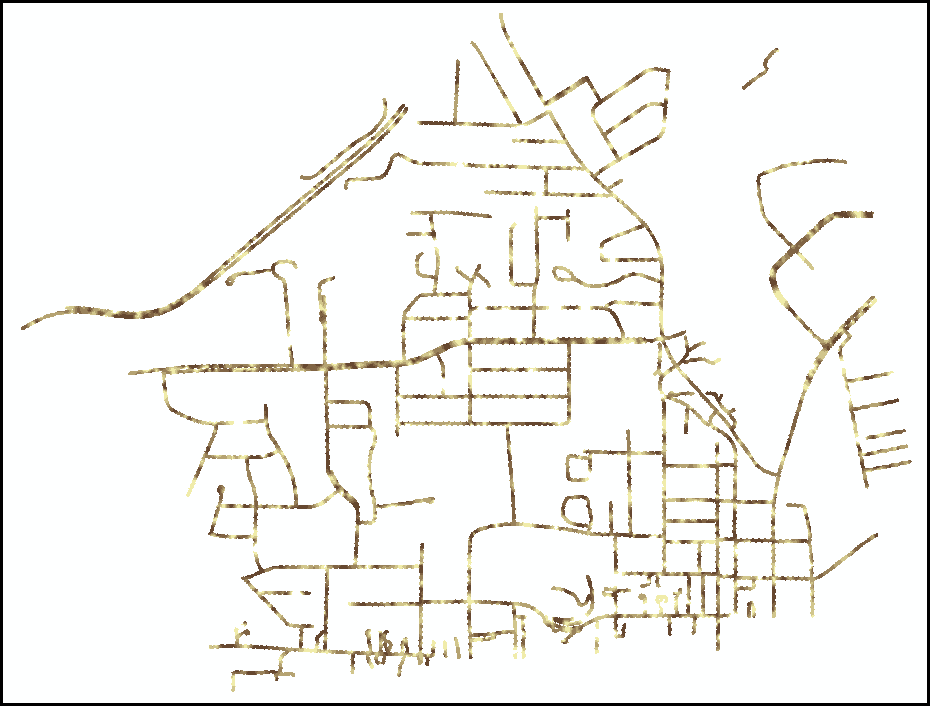
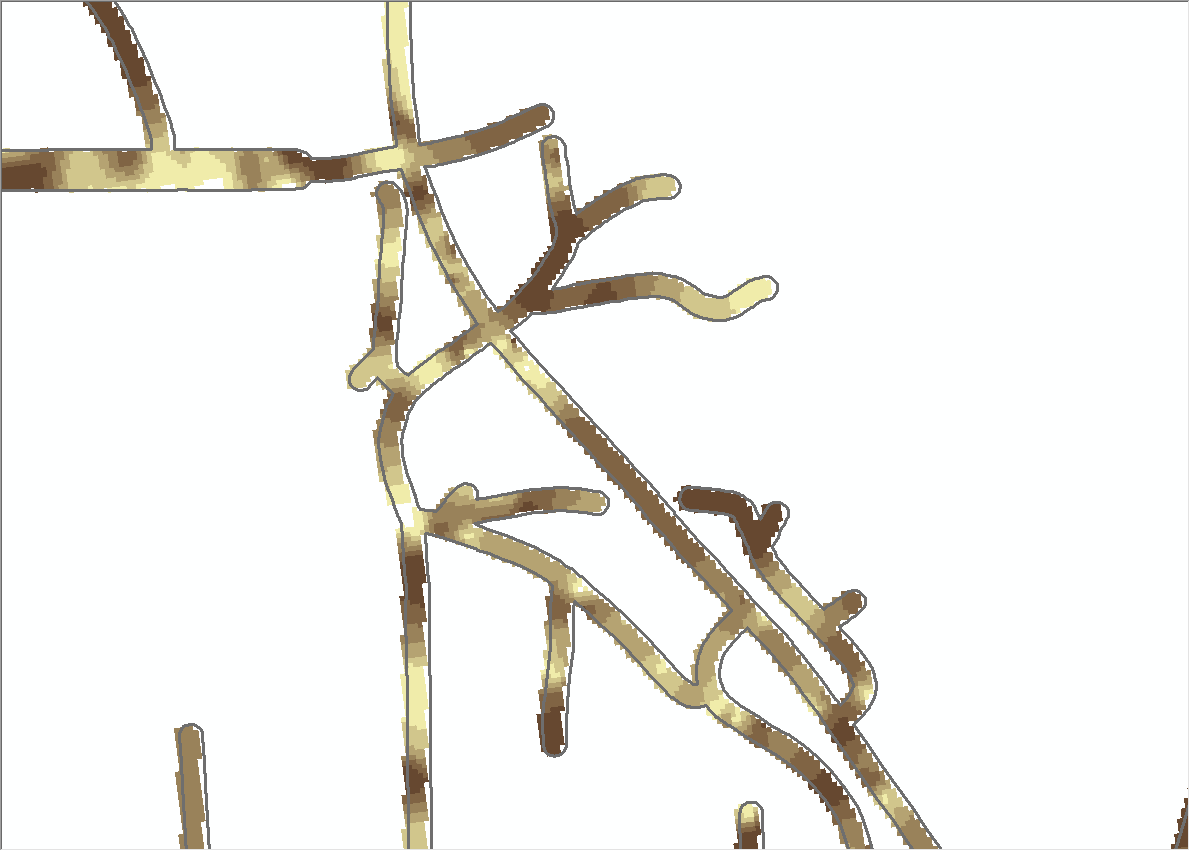
- Click OK to apply the changes. The example of the output is shown below.
Article ID: 000014496
- ArcMap
Get support with AI
Resolve your issue quickly with the Esri Support AI Chatbot.


Related Information
Discover more on this topic
Search for related information
Find training related to this topic
Explore ideas and give feedback
Get help from ArcGIS experts
Start chatting now