HOW TO
Remove overlapping areas of a polygon without using the Erase tool
Summary
The Erase tool in ArcMap helps users remove portions of a feature when editing to ensure data is accurately represented on the map. However, the tool is only available for users with the ArcGIS for Desktop Advanced license.
When editing polygon features to remove overlapping areas, users with the Basic and Standard licenses may use a combination of different tools to achieve the same results as the Erase tool. The instructions provided describe how to erase overlapping areas of a polygon without using the Erase tool.
Procedure
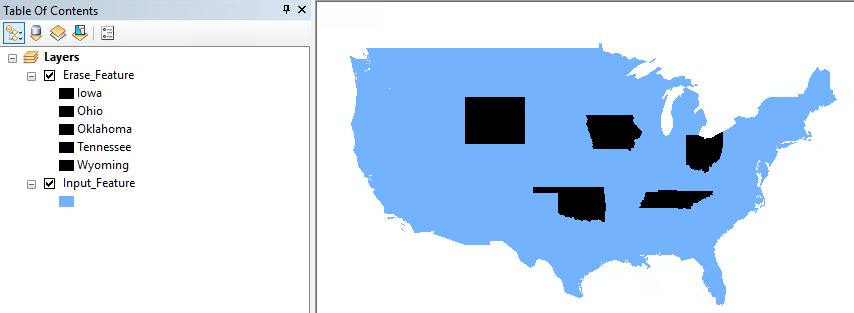
- In ArcMap, add the input layer and the layer to be removed to the data frame. In this example, the input layer is named 'Input_Feature', and the layer to be removed is named 'Erase_Feature'.
Note:
If any of the features to be removed are not within the extent of the input features, run the Clip tool before proceeding to Step 2. Add the 'Erase_Feature' layer for the Input Features field and the 'Input_Feature' layer for the Clip Features field. In Step 2 and Step 3, substitute the 'Erase_Feature' layer with the output of the Clip tool.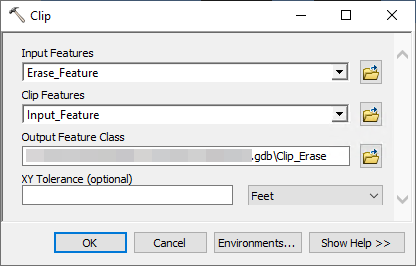
- Run the Intersect tool.
- For the Input Features field, add both the 'Input_Feature' and 'Erase_Feature' layers.
- Rename the output feature class if necessary. In this example, the output feature class for the Intersect tool is named 'Intersect_Input_Erase'.
- Click OK.
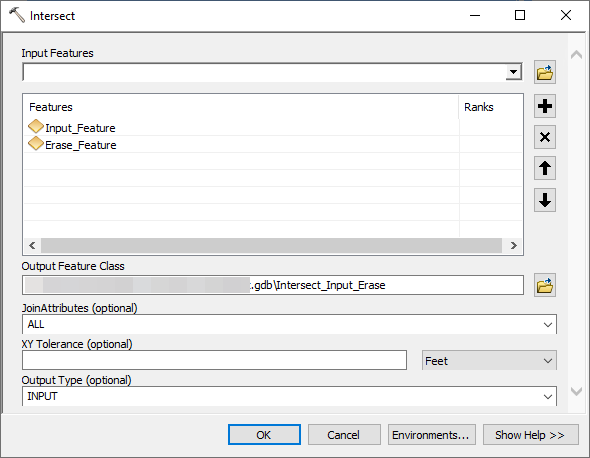
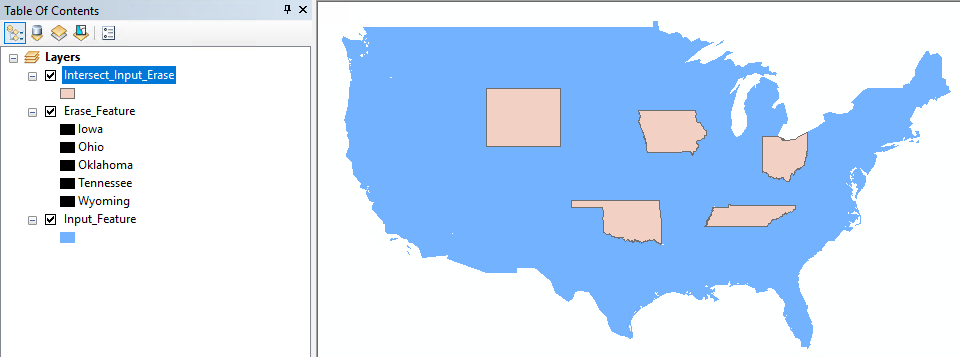
The image below displays the map and the Table Of Contents with the newly created 'Intersect_Input_Erase' feature layer, and other related feature layers.
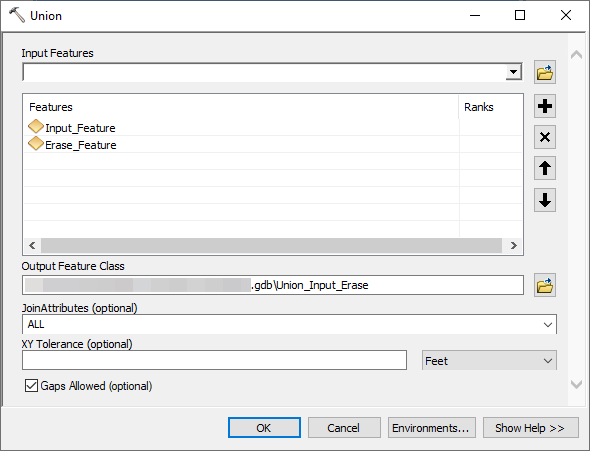
- Run the Union tool.
- For the Input Features field, add both the 'Input_Feature' and 'Erase_Feature' layers.
- Rename the output feature class if necessary. In this example, the output feature class for the Union tool is named 'Union_Input_Erase'.
- Click OK.
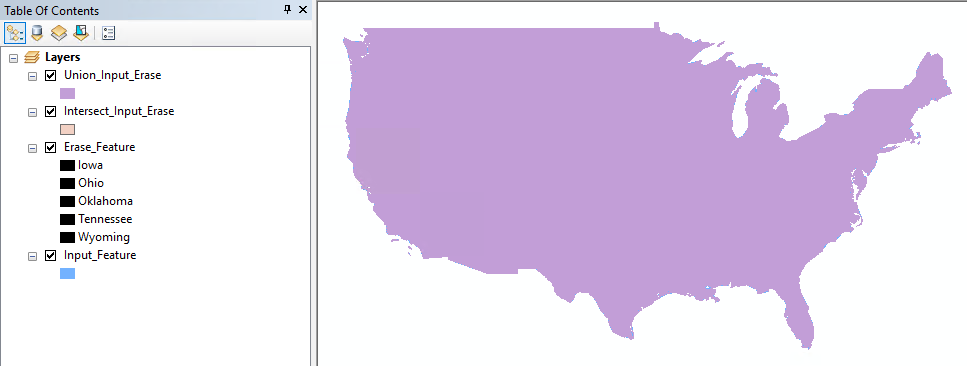
The image below displays the map and the Table Of Contents with the newly created 'Union_Input_Erase' feature layer, and other related feature layers.
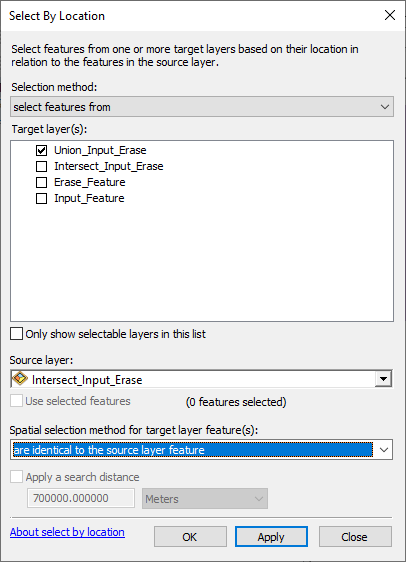
- From the Selection menu, click Select By Location.
- In the Select By Location window, select 'Union_Input_Erase' as the target layer.
- Select 'Intersect_Input_Erase' as the source layer.
- For the Spatial selection method for target layer feature(s) drop-down list, select either are identical to the source layer feature or have their centroid in the source layer feature.
- Click Apply and OK.
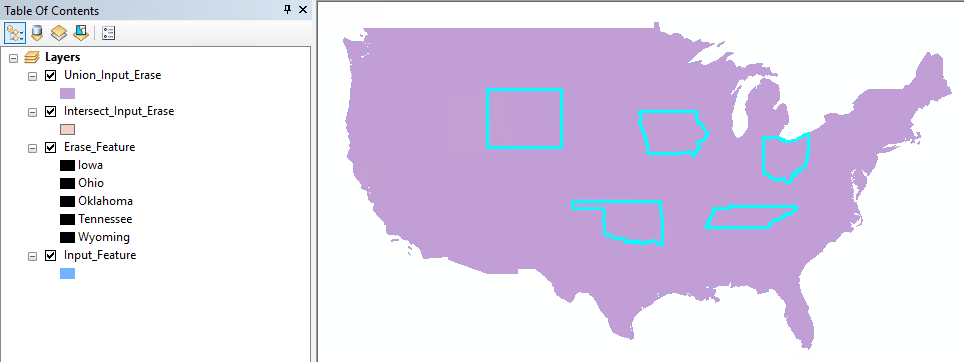
The image below displays the map with the selected overlapping areas between the 'Union_Input_Erase' and 'Intersect_Input_Erase' feature layer, and the Table Of Contents.
- When the features are selected, start an edit session.
Note:
If the Start Editing window displays, prompting users to choose the layer to edit, select 'Union_Input_Erase', and click OK.
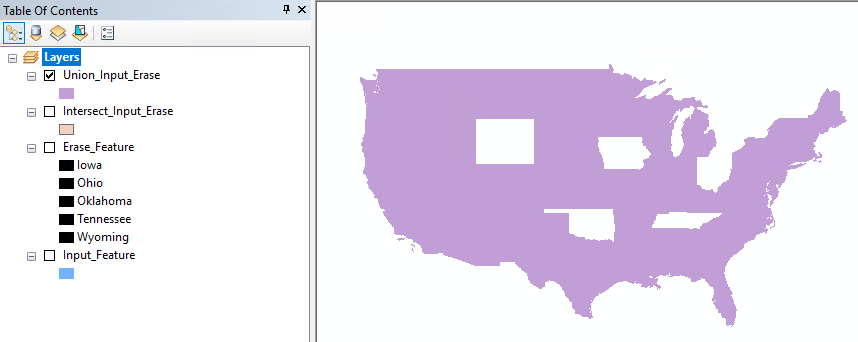
- Press the Delete key to delete the features. The image below displays the map after deleting the selected overlapping areas, and the Table Of Contents pane.
- Save the edits, and the features to be removed are erased.
Note:
Uncheck all the feature layers in the Table Of Contents except the 'Union_Input_Erase' feature layer.
The image below displays the map after removing the overlapping areas of a polygon without using the Erase tool.
Article ID: 000014010
- ArcMap
Get support with AI
Resolve your issue quickly with the Esri Support AI Chatbot.


Related Information
Discover more on this topic
Search for related information
Find training related to this topic
Explore ideas and give feedback
Get help from ArcGIS experts
Start chatting now