HOW TO
Create an Esri Secure License File (ESLF)
Summary
Due to new organizational security requirements, the commonly used online and offline workflows can no longer be applied. Therefore, Esri has implemented an alternative for select organizations to authorize their software using a self-service process. Instead of having the organization's machines connect to Esri and complete the authorization process, files that contain authorizations can be created from the 'Esri Secure License File (ESLF)' tab on the My Esri website.
Procedure
To create an ESLF, a Machine or Network Identifier is required. The following identifiers can be used:
- Machine Identifiers
- MAC Address
- UMN ID (for ArcGIS Desktop, ArcGIS Engine, and ArcGIS License Manager). The UMN contains the MAC address and/or a boot disk serial number in an encrypted format.
- Network Identifiers: Domain that the machine is on.
These identifiers can be obtained from ArcGIS Administrator and License Server Administrator.
Follow the instructions below to generate and use an ESLF.
Generating an ESLF
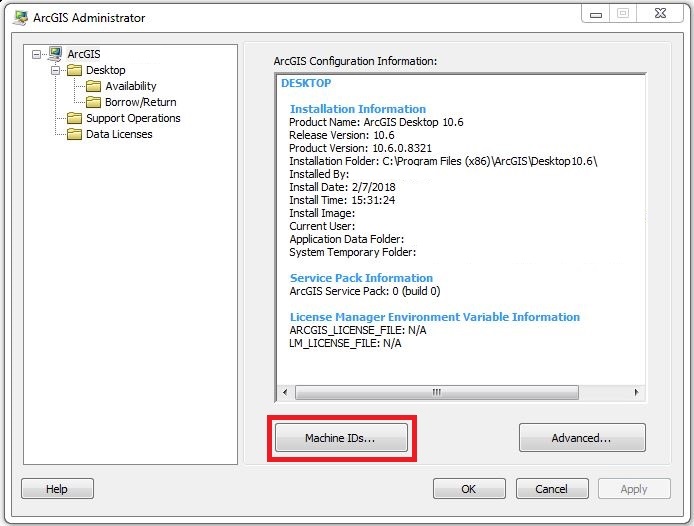
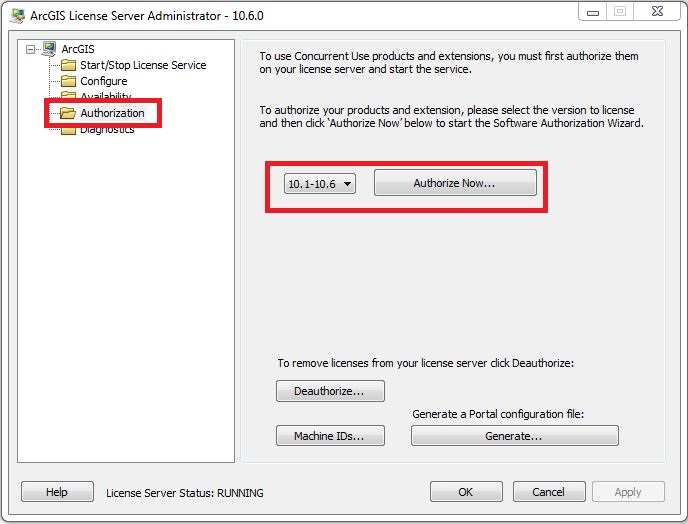
- Obtain the Machine or Network Identifiers. Launch ArcGIS Administrator (or License Server Administrator for ArcGIS License Manager), and click Machine IDs.
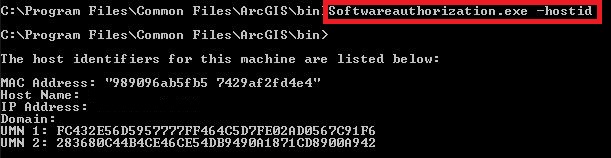
For ArcGIS for Server or ArcGIS Runtime, the MAC address can be obtained via the following command prompt:
Softwareauthorization.exe -hostid
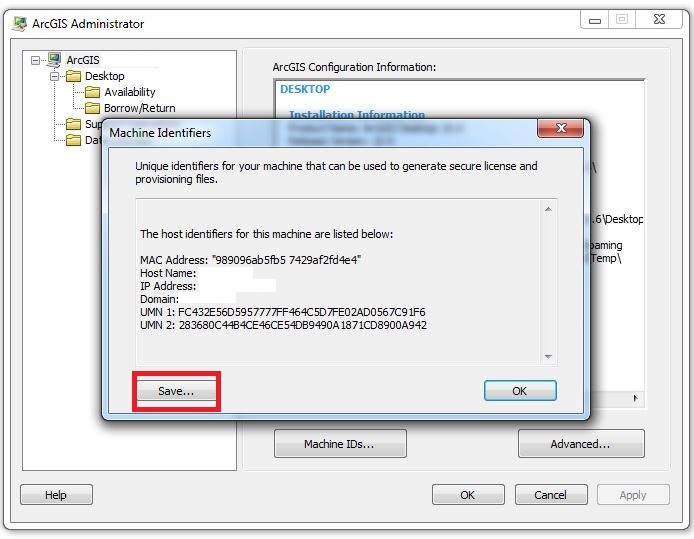
- Click Save... to save the Machine Identifiers as a text file to the machine.
- Log in to My Esri.
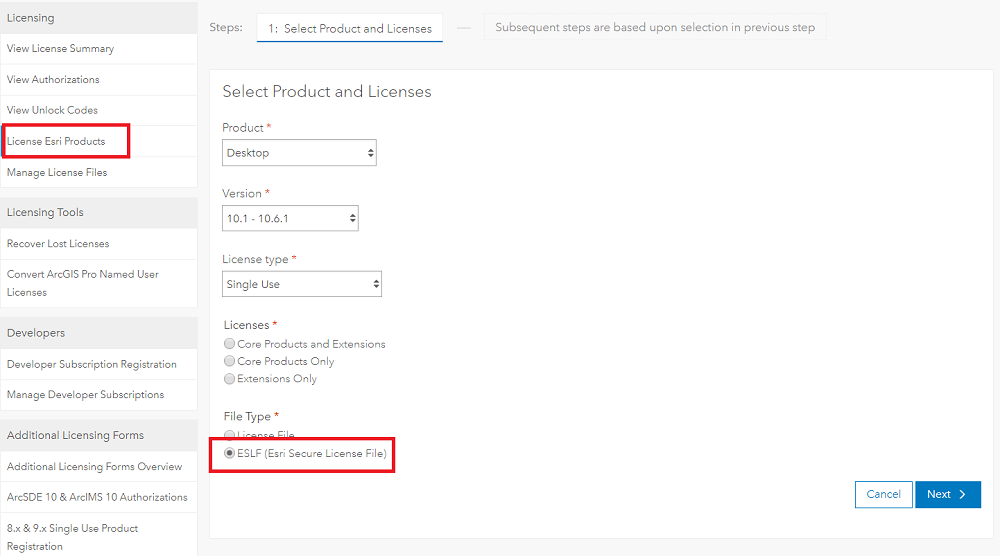
- Navigate to My Organizations > Licensing > License Esri Products.
- From the drop-down menu, select the Product, Version, License type, and Licenses. For File Type, select ESLF. Click Next.
- Allocate the necessary licenses against the product. Select Next.
Note:
If it is a Concurrent Use license, a number must be input. If it is a Single Use or ArcGIS Server license, the option to allocate a license to a specific product is present.
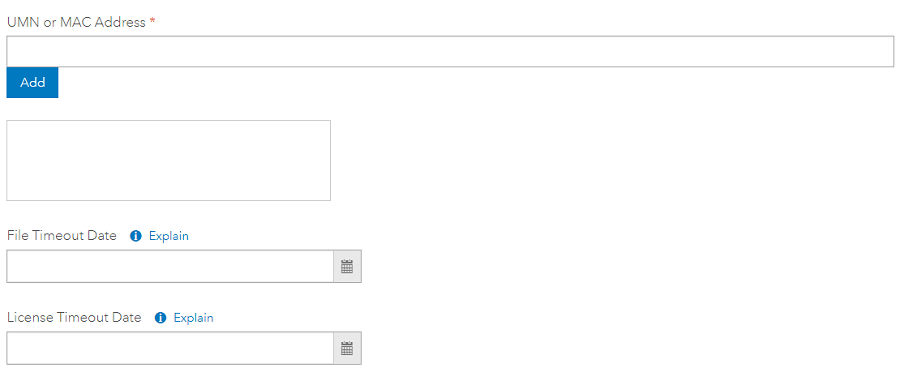
- Enter the Machine or Network Identifiers. For Single Use licenses, multiple identifiers can be entered if more than one machine is authorized with a UNM or MAC address.
Note:
There is an option to set a timeout for the ESLF, to ensure it cannot be applied to a machine beyond the set date.
- Select Download or Email, and click Create to generate the ESLF.
Using the ESLF
- Launch ArcGIS Administrator (or License Server Administrator for ArcGIS License Manager).
- Select the relevant product. Click Authorize Now.
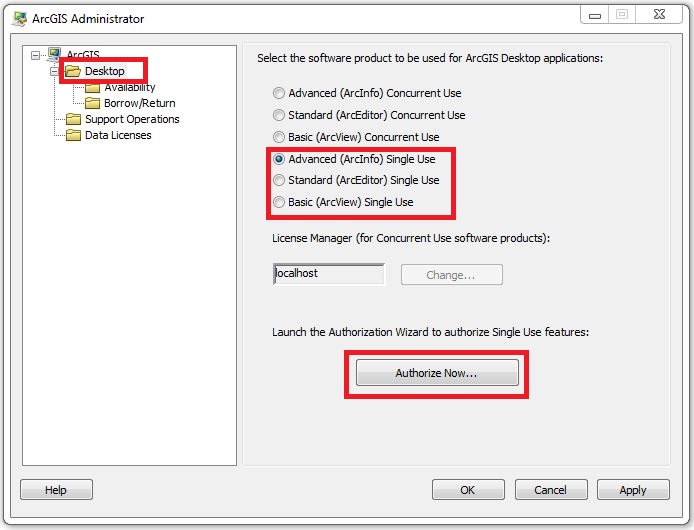
- Under Authorization Options, select I have received an authorization file from Esri and am now ready to finish the authorization process. Browse to the saved ESLF to complete the authorization process.
Article ID: 000012999
- ArcMap
Get support with AI
Resolve your issue quickly with the Esri Support AI Chatbot.


Related Information
Discover more on this topic
Search for related information
Find training related to this topic
Explore ideas and give feedback
Get help from ArcGIS experts
Start chatting now