HOW TO
Label line features with odd-numbered values on one side of the line and even-numbered values on the other
Summary
Line features can be labeled with numbered values with odd values on one side and even values on the other side using SQL expressions.
The given example is a line feature class with a series of address numbers for a downtown city area. For each city block, the lowest number (the first available street number for that block) is an even number. The highest number (the last available street number for that block) is an odd number. The instructions provided describe how to label these line features such that the numbers appear on opposite sides of the feature.
To specifically label street addresses, refer to the Related Information section below.
Procedure
Instructions provided describe how to set up label classes by odd and even values, and set offsets for each class, in either ArcGIS Pro or ArcMap.
ArcGIS Pro
- Open ArcGIS Pro, and load a project and/or add data to a map to be labeled.
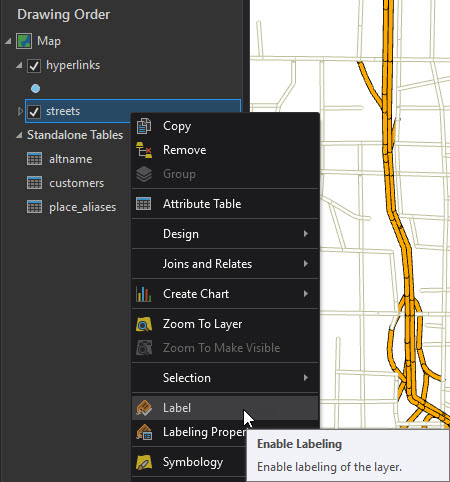
- If the feature class is not already labeled, on the top ribbon, under Feature Layer, select Labeling and click Label. Or, right-click the feature class in the Table of Contents and select Label.
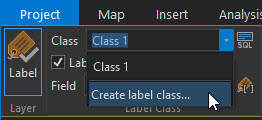
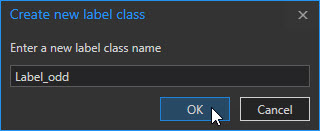
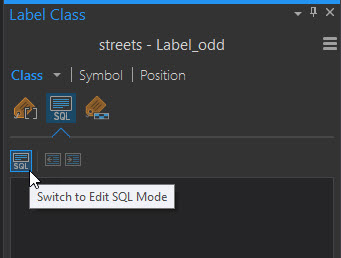
- Next to Class, click the drop-down menu > Create Label Class. Name the class Label_odd.
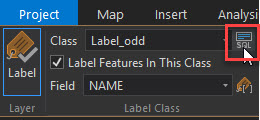
- Next to the 'Label_odd' Class drop-down menu, click the SQL Query button.
- The Label Class pane opens. Click the Switch To Edit SQL Mode button.
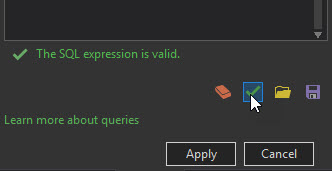
- In the text box, type MOD(<name of the field>,2)<>0. In this example, the 'R_T_Num' field lists the last odd-numbered value for the section of the street.

- Verify the expression, and click Apply. Disregard the message stating the expression cannot be edited in Clause mode.
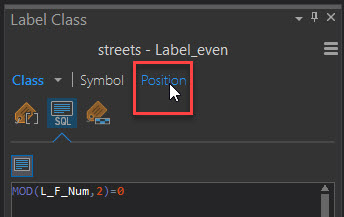
- Create a Label_even class, or rename the default 'Class 1' class.
- Follow steps 3 through 6 for 'Label_even'. For Step 5, write 'MOD(<name of the field>,2)=0'.
- Determine which label class must appear below the line, and open the Label Class pane for those labels. In the Label Class pane, click Position.
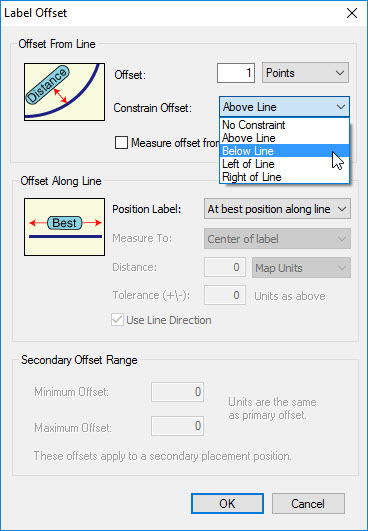
- Expand the Placement tree view. Change the Constrain Offset setting to Below line, and change other values as needed.
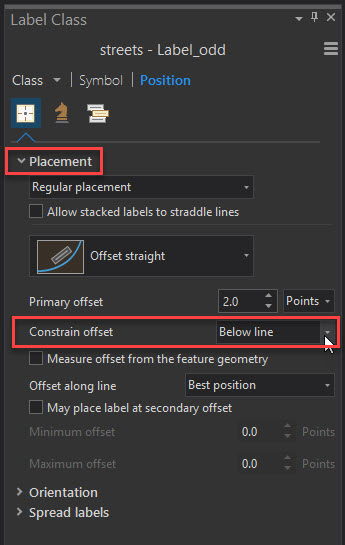
When the settings are adjusted as needed, the label positioning can be saved for future iterations by clicking the hamburger icon on the top-right corner of the Label Class pane and saving the position as a style.
ArcMap
- Open ArcMap, and load the project to be labeled.
- If the Labeling toolbar is not already visible, from the main menu, navigate to the Customize drop-down menu, and select Toolbars > Labeling.
- On the Labeling toolbar, click the Labeling drop-down, and click Use Maplex Label Engine.

- If the line features are not already labeled, right-click the feature class in the Table of Contents, and click Label Features.
- Click the Label Manager button
 on the Labeling toolbar to open the Label Manager dialog box.
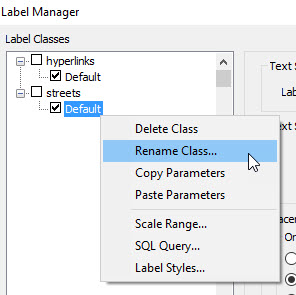
- Click the 'Default' label class for the layer. Right-click and select Rename Class, and name the class Label_even. Click OK.
- Click the name of the layer, and in the Add label class text box, type Label_odd. Click Add.

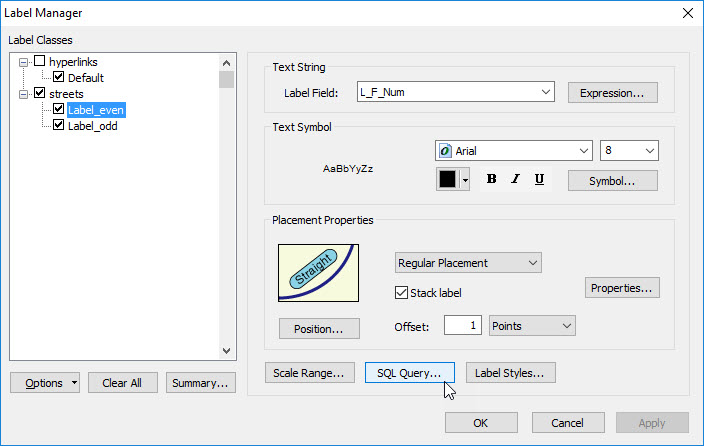
- Select the Label_even label class. In the Label Field drop-down menu, select the field to be labeled for the layer. Towards the bottom of the dialog, click the SQL Query button.
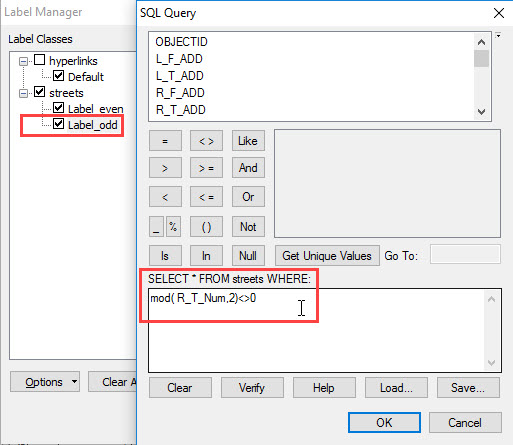
- In the query text window, type mod(<name of field>,2)=0. Click the Verify button to verify the expression. Click OK.
- Select the Label_odd label class. Repeat steps 8 and 9, writing mod(<name of field>,2)<>0 for the SQL query expression.
- Click Apply to produce the changes.
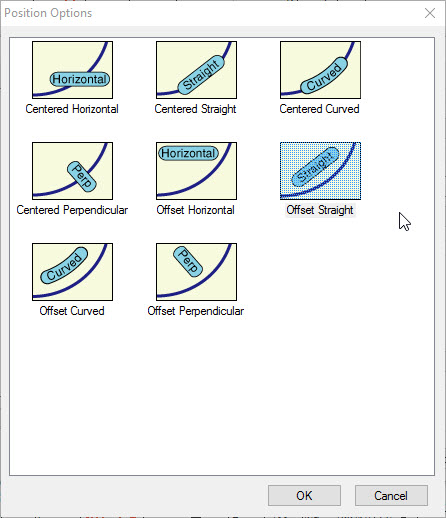
- Determine which label class must appear below the line. In the Label Manager dialog, under Placement Properties, verify that Regular Placement is selected.
- Click the Position button, and verify that 'Offset Straight' or 'Offset Curved' is selected. Click OK.
- Under Placement Properties, click Properties > Label Offset, and change the Constrain Offset value to Below Line. Change the other offset values as needed. Click OK > OK > Apply.
Article ID:000012751
- ArcGIS Pro
- ArcMap
Get help from ArcGIS experts
Download the Esri Support App
Related Information
Discover more on this topic
Search for related information
Find training related to this topic
Explore ideas and give feedback