HOW TO
Enable z-values on an existing shapefile
Summary
The instructions provided describe how to enable z-values on an existing shapefile to associate with vertices in ArcMap.
Note:
The instructions assume a field of z-values already exists in the attribute table of the shapefile. Refer to ArcMap: About defining the z-value for a layer for more information.
Procedure
- In the Table Of Contents, right-click the shapefile, and open the attribute table.
- In the Table Options, select Export, and click the folder button to browse for a location to save the table. Save the Output table in the dBase Table format (.dbf).
![[O-Image]](https://webapps-cdn.esri.com/CDN/support-site/technical-articles-images/000012300/00N39000003LL2C-0EM39000000wdZj.png)
- Add the Output table to the ArcMap document, and right-click the .dbf file in the Table Of Contents > Display XY Data.
- In the Display XY Data dialog box, set the X, Y, and Z Field values, and click OK to create the event layer.
![[O-Image]](https://webapps-cdn.esri.com/CDN/support-site/technical-articles-images/000012300/00N39000003LL2C-0EM39000000wdZl.png)
- From the events layer, export the data to a new shapefile. Right-click the events layer > Data > Export Data, and determine the location for the shapefile.
![[O-Image] Export Data to a shapefile](https://webapps-cdn.esri.com/CDN/support-site/technical-articles-images/000012300/00N39000003LL2C-0EM39000000wdZf.png)
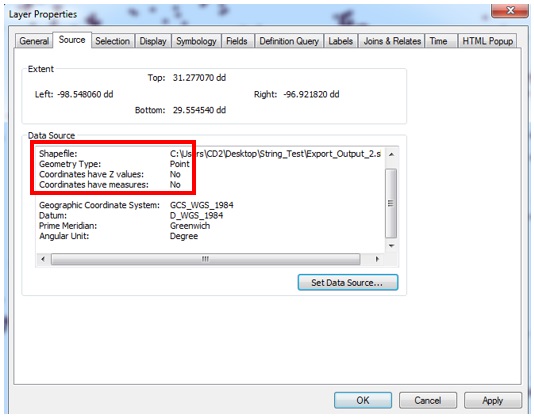
- Once the new shapefile is created, in the Table Of Contents, right-click the newly created shapefile, and select Properties > Source tab. Verify the coordinates have z-values enabled in the Data Source section.
![[O-Image]](https://webapps-cdn.esri.com/CDN/support-site/technical-articles-images/000012300/00N39000003LL2C-0EM39000000wdZh.png)
Article ID: 000012300
Software:
- ArcMap
Get support with AI
Resolve your issue quickly with the Esri Support AI Chatbot.


Related Information
Discover more on this topic
Search for related information
Find training related to this topic
Explore ideas and give feedback
Get help from ArcGIS experts
Start chatting now