HOW TO
Define projection for all files in a workspace
Summary
The instructions provided describe how to define the projection for all files in a workspace.
Procedure
In ArcMap, use model iteration to define the projection for all files in a workspace. The Define Projection tool is used when the files have no assigned projection.
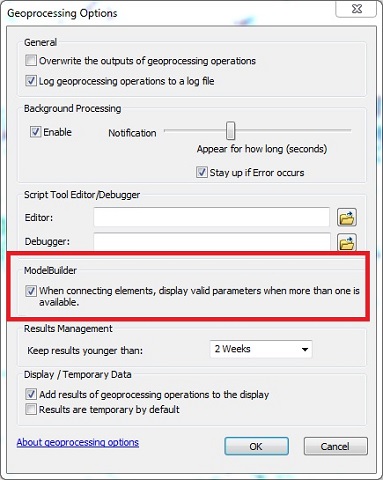
Note:
In ArcMap, click Geoprocessing > Geoprocessing Options. In the Geoprocessing Options window, ensure the When connecting elements, display valid parameters when more than one is available check box is checked, as shown in the image below. The ModelBuilder Connect tool displays the option to select the target parameters.
- Create a new model.
- In the Catalog pane, right-click the folder where the MXD is located, and click New > Toolbox.
- Rename the toolbox as desired.
- Right-click the toolbox, and click New > Model. This creates a model in the toolbox and opens ModelBuilder for editing the model.
- In the Catalog pane, under the newly created toolbox, right-click the model, and select Rename to rename it according to its intended task.
Note:
To view the model properties, right-click the model in the Catalog pane, and click Properties. In the Model Properties window, click the General tab. The General tab displays the options to configure the model's name, label, and description.
- Add an iterator to the model.
- If the new model is not already open, right-click the model in the Catalog pane, and select Edit to open the model's window.
- In the model's window, click Insert > Iterators > Feature Classes. The iterator is white since no parameter values have been provided.
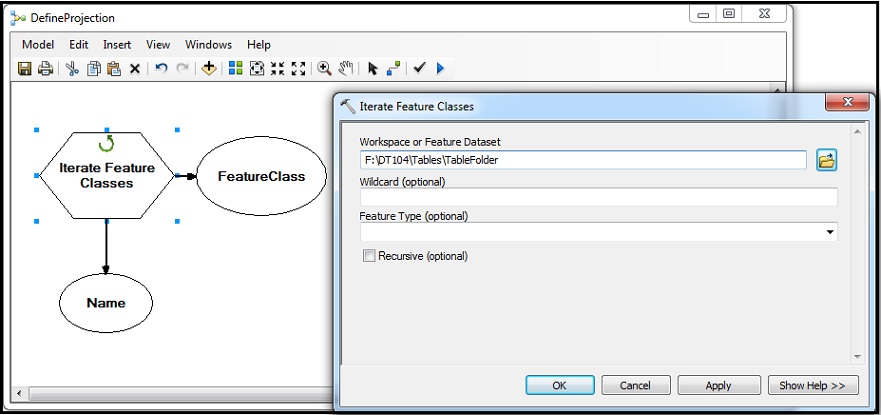
- Double-click the Iterate Feature Classes hexagon. In the Iterate Feature Classes window, for Workspace or Feature Dataset, specify a folder, geodatabase, or feature dataset as the workspace.
- Click OK after valid inputs are specified in the Iterate Feature Classes window. A dark blue input is displayed.
Note:
The Wildcard (optional) and Feature Type (optional) parameters are used to restrict the feature classes selected for the iteration. This iterator has two output variables, the output feature class file, and the name of the output feature class. The output FeatureClass file can be connected to the next tool in the model for processing, and the Name variable can be used for inline variable substitution.
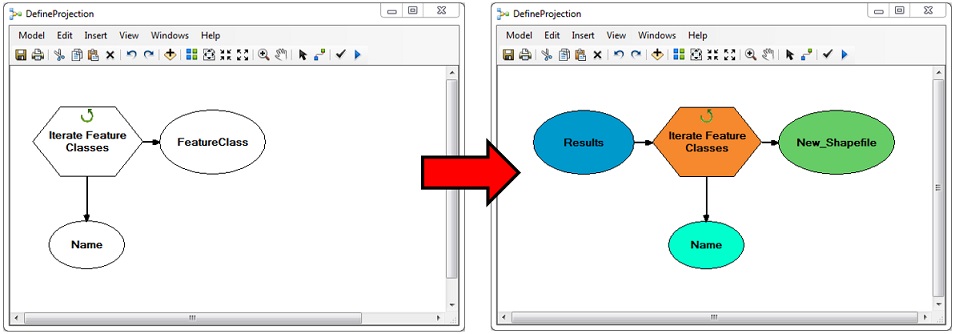
Note:
ModelBuilder uses color to indicate the status of tools and variables. A white color indicates input parameters are not specified. Once the parameteres are specified, the iterator color changes to orange (other tools change to gold). Inputs are displayed in blue and outputs in green.
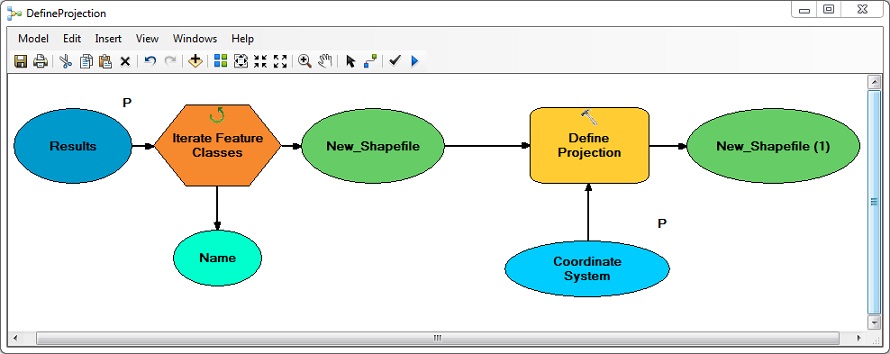
The iterator before and after parameter values are provided.
- Add the Define Projection tool to the model. In ArcMap, click ArcToolbox. The ArcToolbox pane opens.
- Navigate to ArcToolbox > Data Management Tools > Projections and Transformations.
- Drag and drop the Define Projection tool into the ModelBuilder canvas in an empty area.
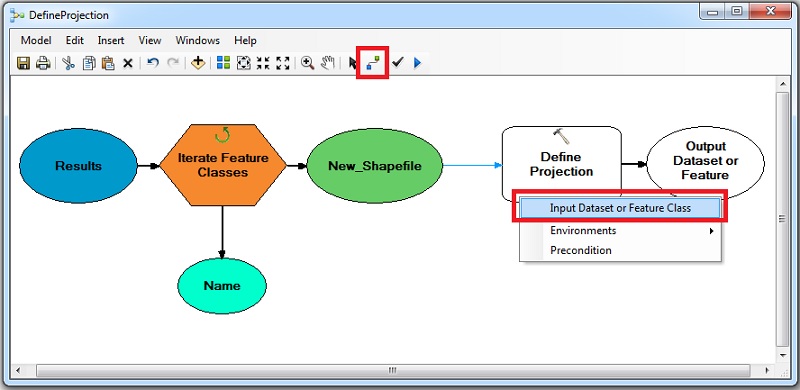
- In the model, use the Connect tool on the toolbar to connect the iterator’s output feature class variable to the Define Projection tool, and select Input Dataset or Feature Class.
- In the model, double-click the Define Projection tool. The Define Projection window opens.
- For Input Dataset or Feature Class, specify a dataset or feature class with the projection to be defined. If there are feature classes in the previously selected workspace, this field is populated automatically with one of the feature classes. If the workspace is empty, this field displays a generic output name.
- For Coordinate System, select the coordinate system to be applied to the input.
Note:
The Define Projection tool is used to define the projection of a feature class that does not have any specified coordinate system. When the tool is run from the model, it does not create a new feature class as output, it only sets the projection for the original feature class. If the tool is used on a feature class that already has a projection defined, the following error message is returned, "000132: The dataset already has a projection defined."
- Configure the following model parameters.
- Right-click the dark blue input to the iterator, and check the Model Parameter option. This displays the parameter when the model is run from its toolbox.
- Right-click the Define Projection tool, and select Make Variable > From Parameter > Coordinate System.
- Right-click the Coordinate System oval, and check the Model Parameter option.
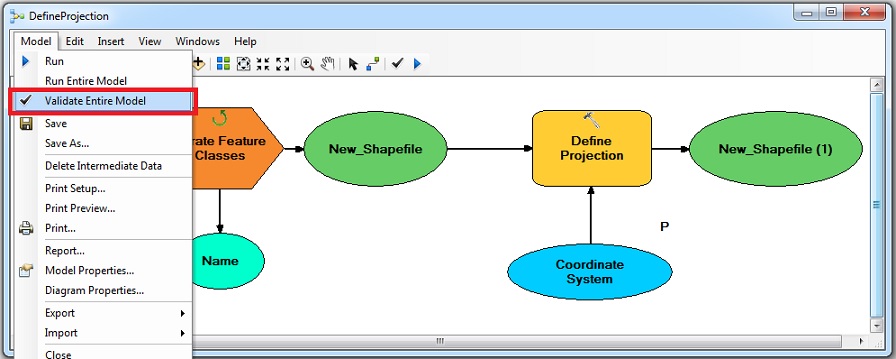
- Validate the model to check for any errors. Navigate to the Model drop-down menu, and click Validate Entire Model.
Note:
A process in the model is ready to run only when all required parameters are provided for the iterator and the tool. In the model window, ensure all boxes and ovals are colored before running the model.
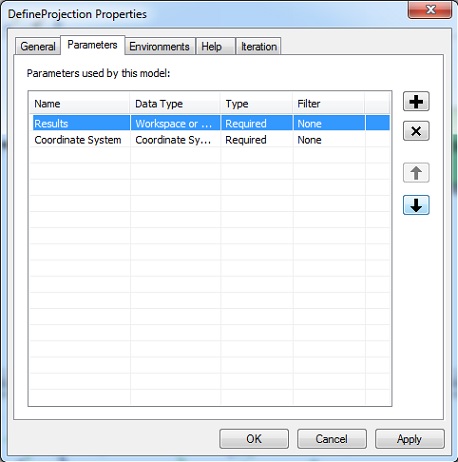
- Save the model, and navigate to Model > Model Properties > Parameters. View the parameter properties and change the names and order of parameters as desired.
Note:
The Iterate Feature Classes tool iterates the feature classes in a workspace. The output of the iterator is the input of the Define Projection tool. The Define Projection tool modifies the input feature class rather than creating a new output feature class. When the model is run, the projection of the feature classes in the workspace is set by the tool.
- Run the model from its toolbox in ArcCatalog or the Catalog pane in ArcMap.
Article ID:000012116
Software:
- ArcMap
Get help from ArcGIS experts
Download the Esri Support App
Related Information
Discover more on this topic
Search for related information
Find training related to this topic
Explore ideas and give feedback