HOW TO
Confirm the active Python environment for an ArcGIS Server Site (2.x/3.x, federated or stand alone)
Summary
Using custom Python environments for an ArcGIS Server site or a particular geoprocessing service can be very desirable for certain workflows and deployment needs and/or expectations. There are great resources available for configuring these custom environments, however, sometimes it may not be clear if the workflow completed successfully.
Investigating IT-heavy parameters, such as the Window Registry, are not readily supported by Esri's support resources. However, there is a way to extract the active Python environment in use for an ArcGIS Server site using a geoprocessing service to export the active Python environment directories in use.
If instructions for configuring a custom Python environment for ArcGIS Server are not followed exactly, or some other secondary issue is encountered, the specified environment may not actually be in use, even though the workflow to set the custom environment was completed. There is no parameter in the Server Admin REST API to confirm the default Python environment set for ArcGIS Server.
So when troubleshooting a geoprocessing service, an assumption can be made that a custom Python environment is active, when in reality, the default or a different environment altogether is active.
Procedure
Using the attached diagnostic geoprocessing script tool PythonEnvDetector.7z in ArcGIS Pro and publishing as a geoprocessing service using the publish web tool workflow, we can confirm the active ArcGIS Server site's Python environment. Instructions are as follows:
Script Tool Description
This tool is meant to be added as a script to a toolbox in ArcGIS Pro. Running from Pro creates a .txt file at the specified file path starting with the label "ArcGIS_DesktopAtEpoch...". When published to ArcGIS Server, the output file label should read as "ArcGIS_ServerAtEpoch..."
- Extract the zip file and make a local copy of the script file PythonEnvDetector.py, on your local machine.
- Open ArcGIS Pro and create new toolbox.
- Right-click the new tool box, select New > script.
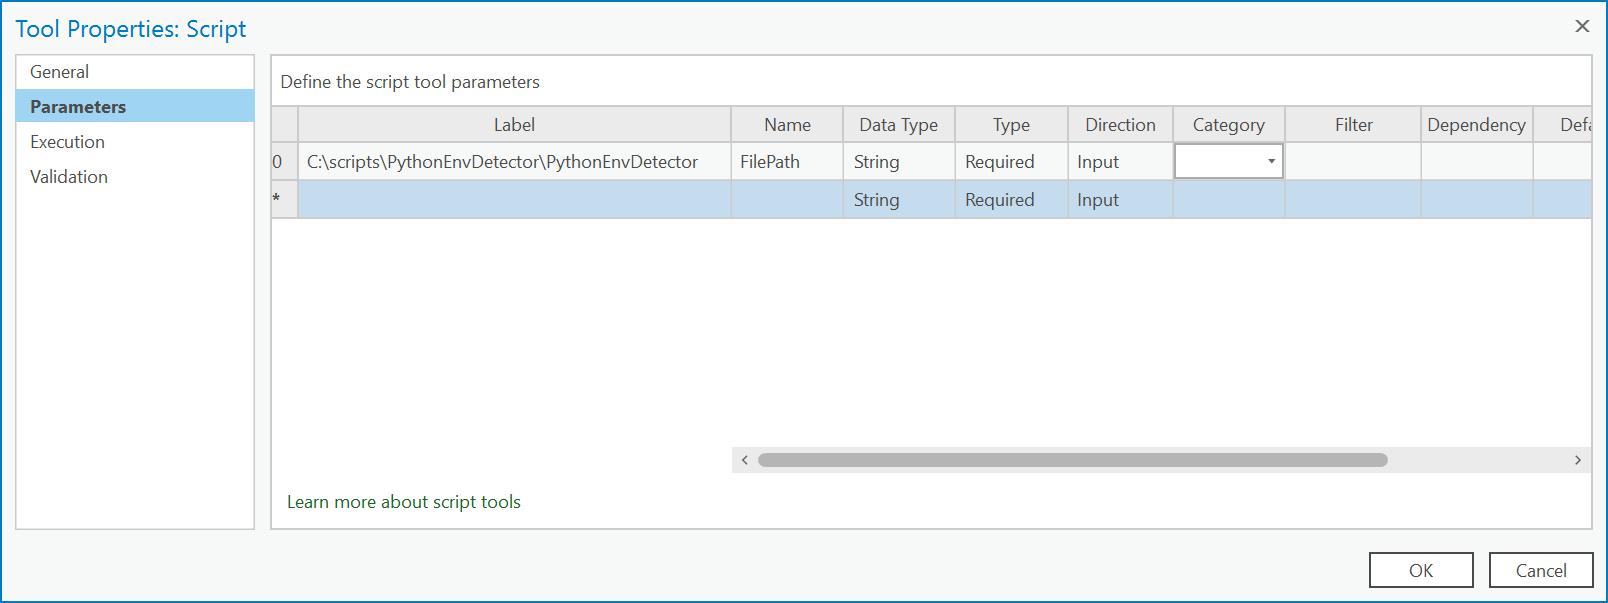
- Locate script, configure with appropriate name, configure with a String parameter with the following qualities, and as shown in the subsequent image:
- LABEL= Enter locally accessible file path here to the folder containing the script. This could be a local folder accessible to Pro, or a network share accessible to ArcGIS Server. In either case, the client application must have write access to this folder.
- NAME= FilePath
- DATATYPE= String
- TYPE= Required
- DIRECTION= Input
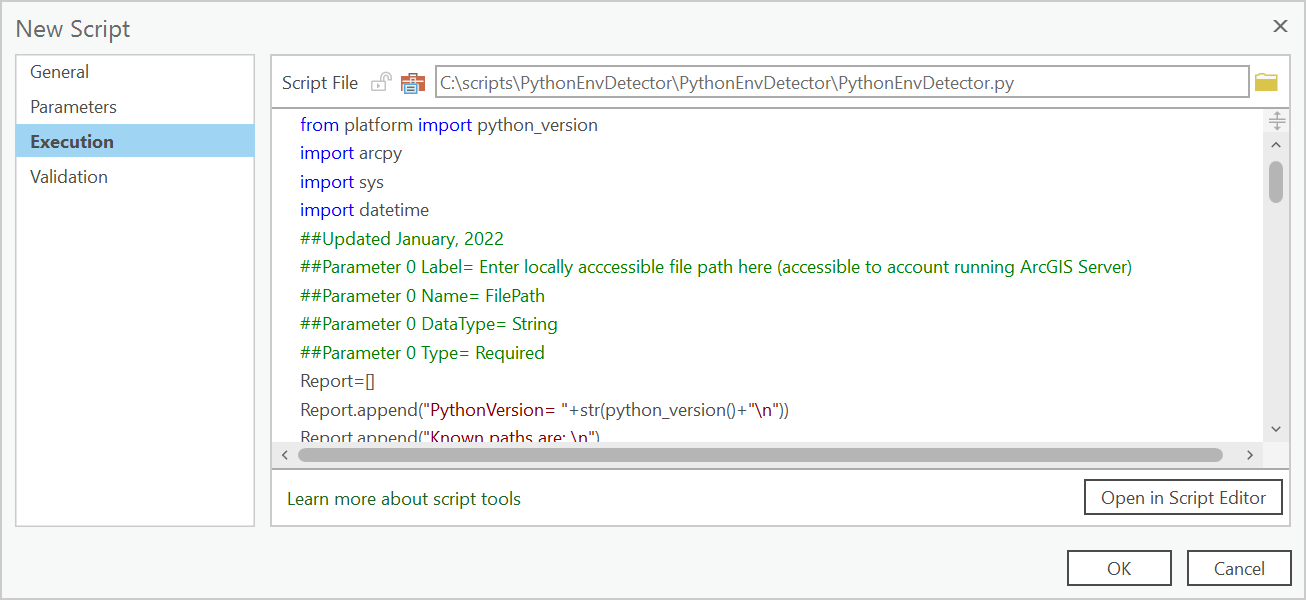
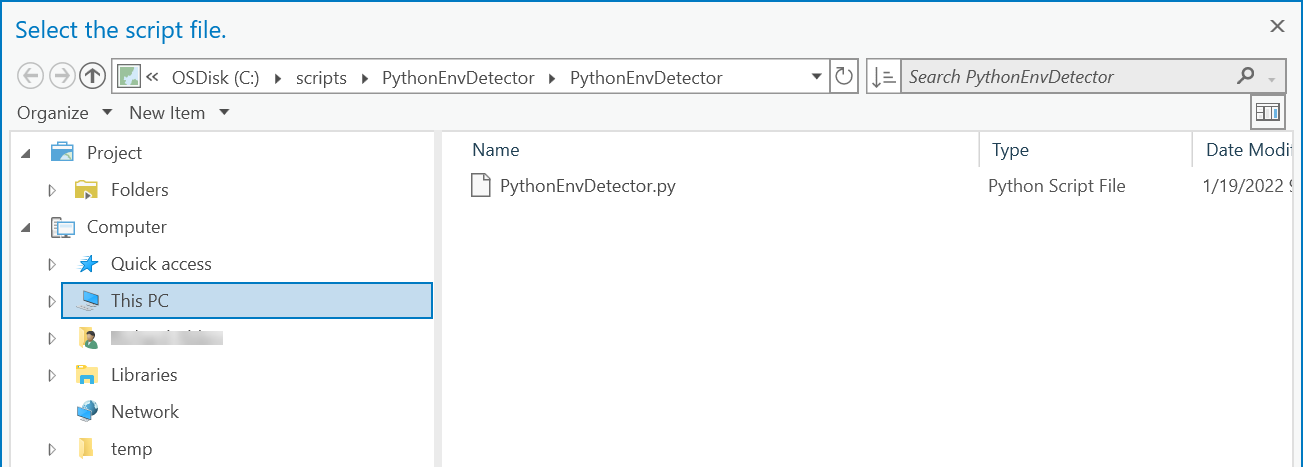
- Click the Execution tab, and in the Script File field, click the folder icon on the right, and navigate to the folder containing the script, as shown in the images below. Click OK.
- Run the geoprocessing (script) tool from ArcGIS Pro.
- Specify an output path to a folder accessible to the local machine where Pro is running.
- Review the results, which should be in a file within the specified folder path starting with the filename "ArcGIS_DesktopAtEpoch...". This file shows the active Python environment being used by ArcGIS Pro.
- Go to History, right click the tool and select Share as > Share Web Tool.
- Select Analyze, resolve any errors that result, and select Publish.

- After the tool is successfully published, select Manage the web tool.
- If published to Federated Server, find the REST service URL at the bottom right of the Portal item, and navigate there.
- If published to a standalone Server, you should be at the REST service URL for the web tool already.
- Run from REST and review output
- Under Tasks, select PythonEnvDetector, and select Submit Job.
- For the first parameter, specify a path to a folder directly accessible to the ArcGIS Server application and the ArcGIS Server Run As account. This is usually a local path on the server machine or UNC path it has access to.
- Leave rest of the parameters as defaults and select Submit Job (Get).
- Select Check Job Details Again if needed, and review output 'FilePath'.
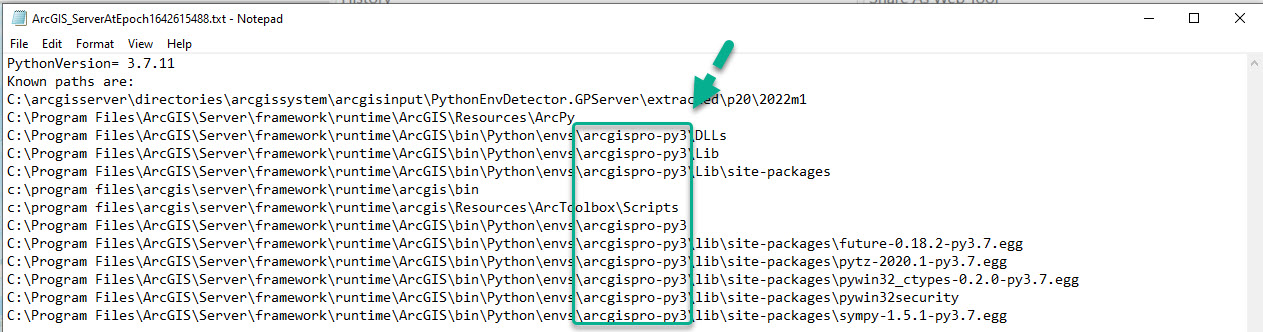
- Review the results. These should be in a file within the specified folder path starting with the filename "ArcGIS_ServerAtEpoch...".
- The output should have a list of directories known at the time of execution, which include the name of the active Python environment for ArcGIS Server.
- In the example output shown in the image below, the default environment 'arcgispro-py3' is the active environment for ArcGIS Server.
Article ID:000026845
- ArcGIS Server
- ArcGIS Pro 2 8 x
- ArcGIS Pro 2 7 x
- ArcGIS Pro 2 x
Get help from ArcGIS experts
Download the Esri Support App
Related Information
Discover more on this topic
Search for related information
Find training related to this topic
Explore ideas and give feedback