PROBLEM
Unable to display configured layer fields in the Attribute Table widget in ArcGIS Web AppBuilder
Description
In ArcGIS Web AppBuilder, it is possible to configure layer fields in the Attribute Table widget. In the layer field's configuration, fields can be selected for display and the field's alias can be edited. These changes are reflected in the web app's attribute table. However, when the Show option is unchecked in the Configure Attribute Table window, the changes during the configuration are not displayed in the attribute table.
Cause
This is by design. The changes to the layer fields configuration are not displayed when the Show check box is unchecked in the Attribute Table widget's configuration window.
Solution or Workaround
To circumvent the issue, use one of the following workarounds.
Hide fields or change the field's alias in the feature layer's Visualization tab
- In ArcGIS Online, open the item details page for the feature layer.
- On the layer's item details page, click the Visualization tab.
- On the left pane, click the Configure Pop-up
 icon. In the Configure Pop-up pane, click Configure Attributes.
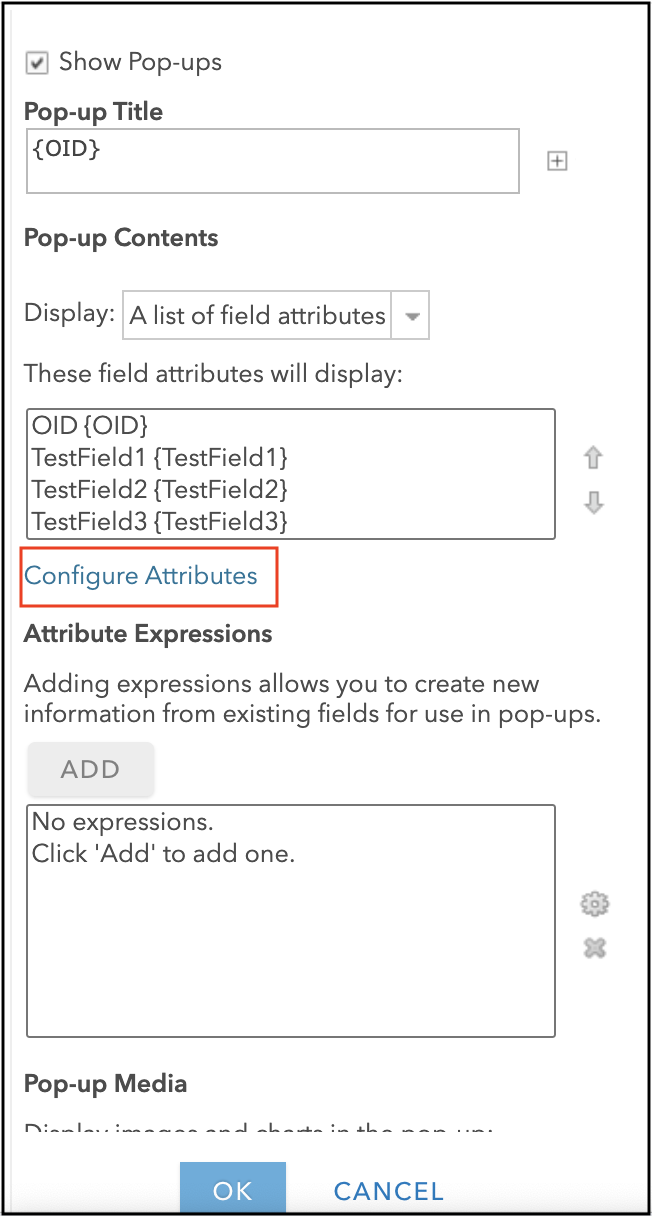
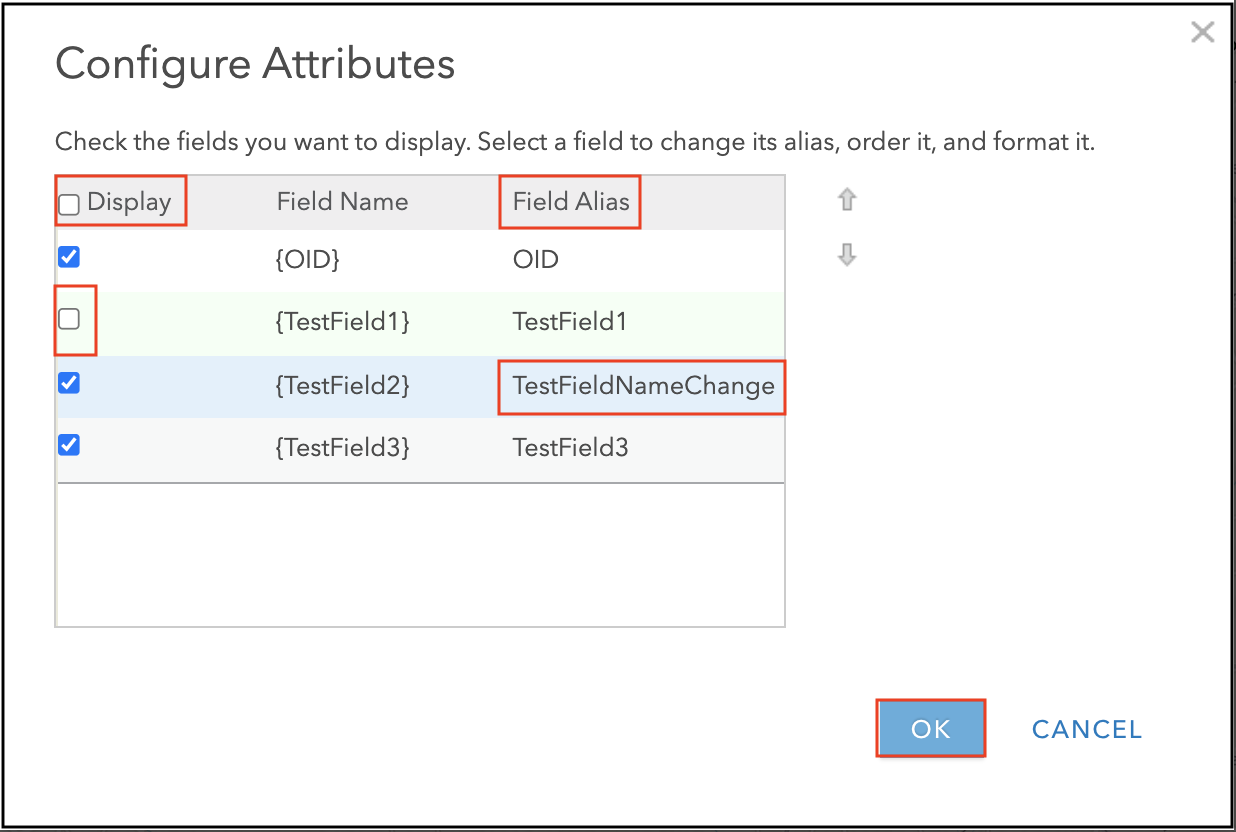
- In the Configure Attributes window, configure the desired fields.
- In the Display column, uncheck the check box of the desired field. In this example, TestField1 is unchecked.
- In the Field Alias column, change the alias of the desired field. In this example, TestField2 alias is changed to TestFieldNameChange.
- Click OK.
- In the Configure Pop-up pane, click OK.
- In the layer's Visualization tab, click Save Layer.

- In ArcGIS Web AppBuilder, refresh the web app.
- Open the attribute table using the Layer List widget. Refer to ArcGIS Web AppBuilder: Use the Layer List widget for instructions.
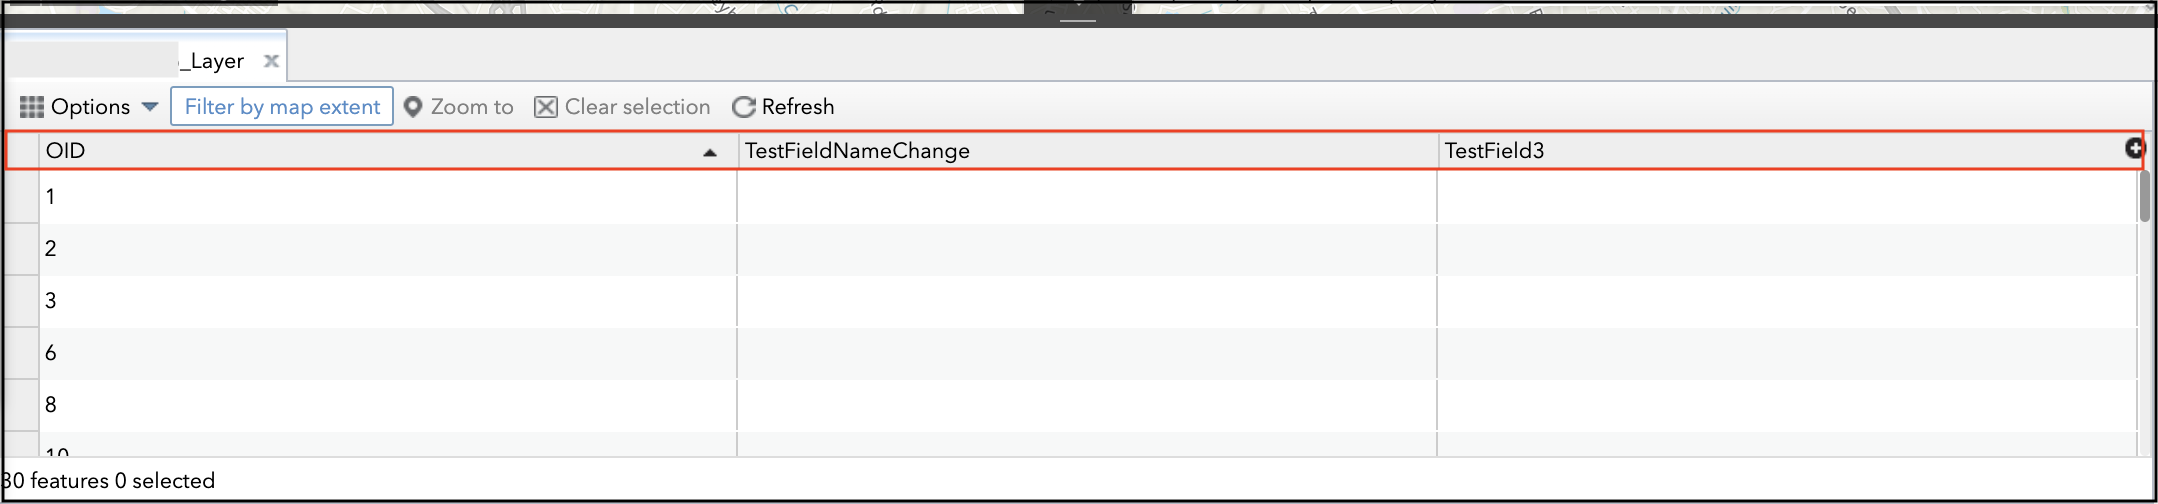
The attribute table shows TestField1 is not displayed and TestField2 is changed to TestFieldNameChange.
Note:
If future changes are required in the attribute table, it is still possible to use the Attribute Table widget to configure the layer fields, but the Show check box must be checked to display the changes.
Change the field's alias in the feature layer's Data tab
- In ArcGIS Online, open the item details page for the feature layer.
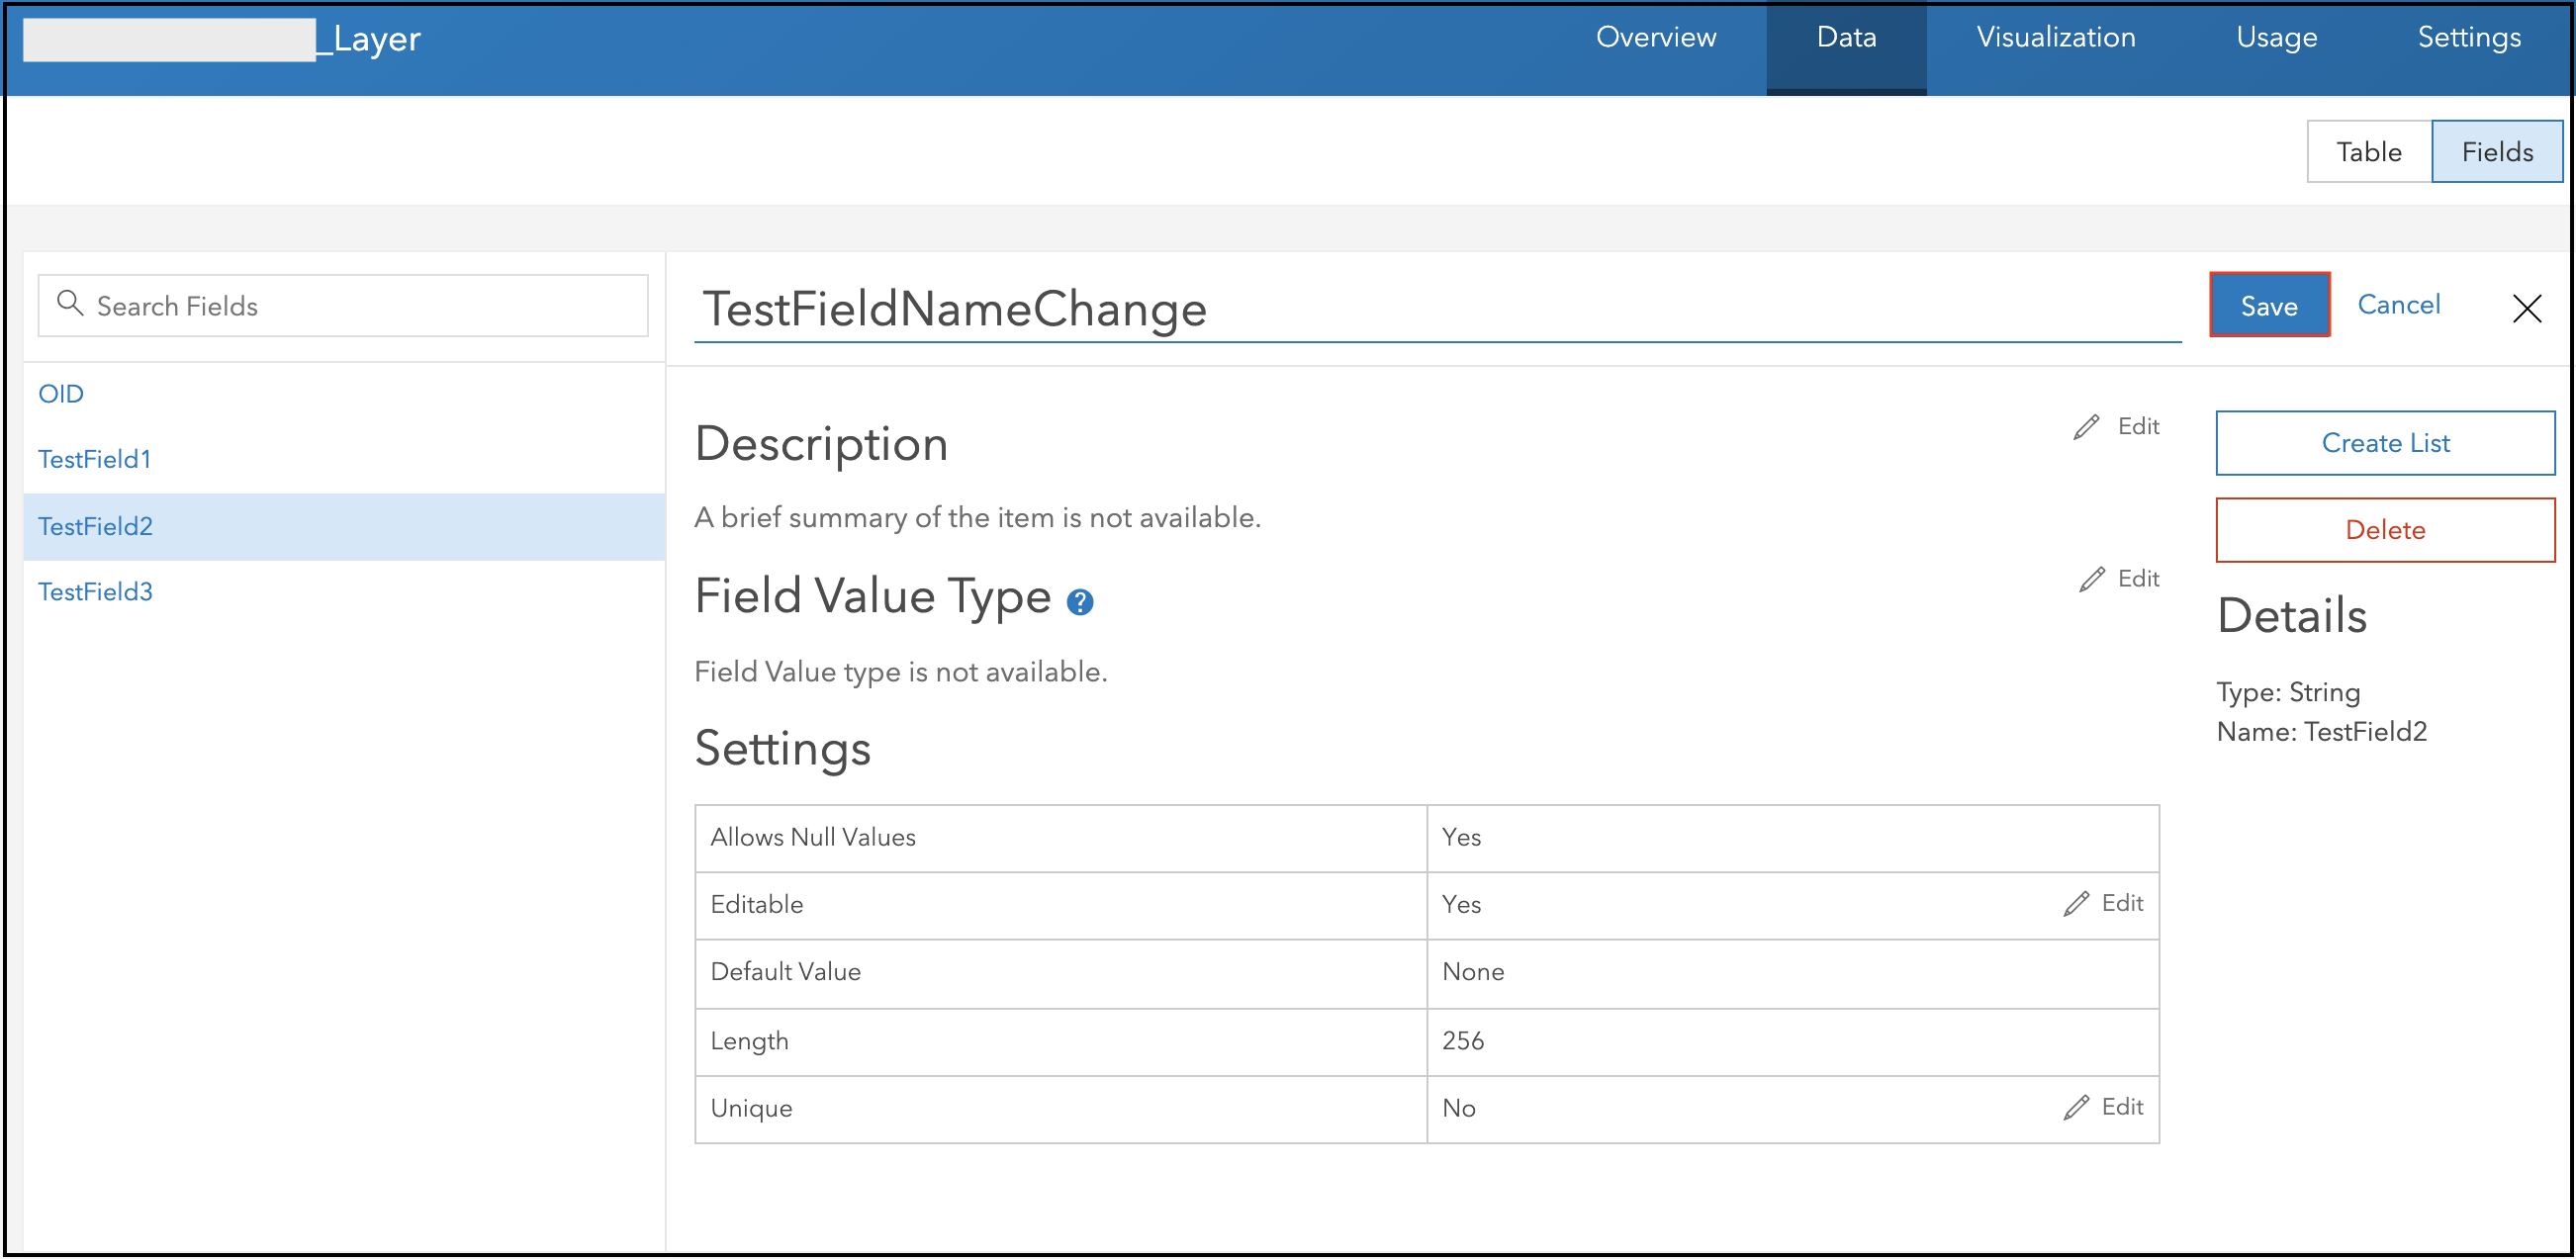
- On the layer's item details page, click the Data tab.
- On the Data tab, click Fields.
- On the Fields page, select the desired field. In this example, TestField2 is selected.
- Click the pencil button next to the field's name.
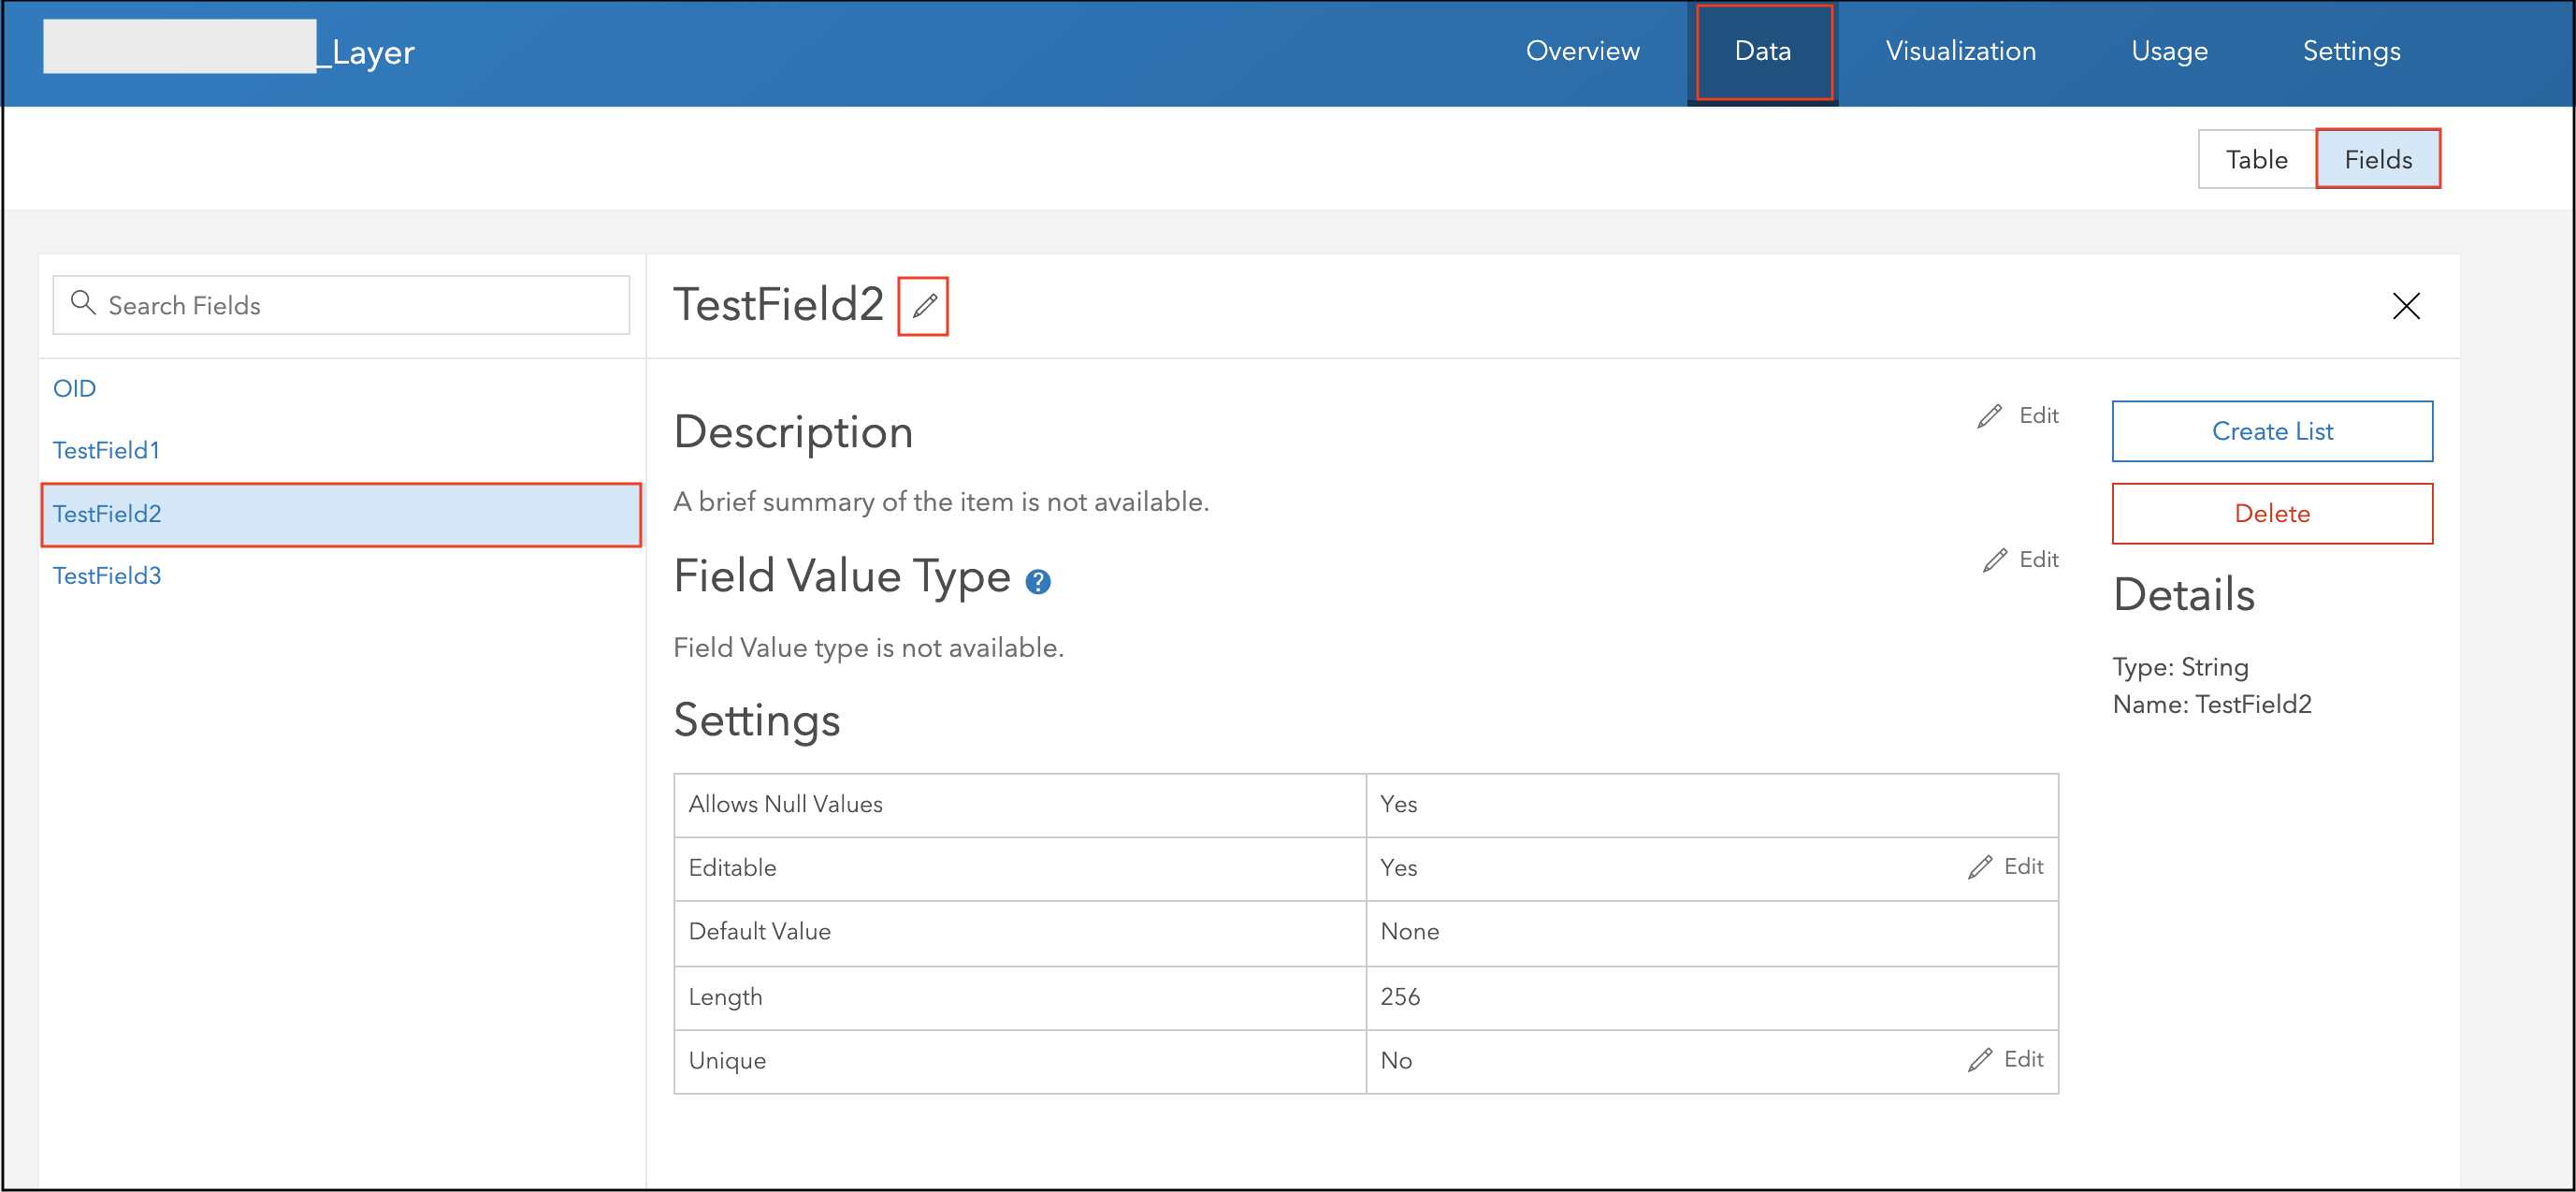
- Change the field's name to a desired name. In this example, TestField2 is changed to TestFieldNameChange.
- Click Save.
- In ArcGIS Web AppBuilder, refresh the web app.
- Open the attribute table using the Layer List widget. Refer to ArcGIS Web AppBuilder: Use the Layer List widget for instructions.
The attribute table shows the TestField2 is changed to TestFieldNameChange.

Note:
If future changes are required in the attribute table, it is still possible to use the Attribute Table widget to configure the layer fields, but the Show check box must be checked to display the changes.
Create a view layer and hide fields in the layer's Update View settings
- Create a view layer from the feature layer. Refer to ArcGIS Online: Create a hosted feature layer view for instructions.
- In the view layer's Update View page, in the Layer definitions pane, in Fields > Select fields, select the desired fields to be displayed in the attribute table. Refer to ArcGIS Online: Edit a hosted feature layer view definition for instructions.
- Open the view layer in Map Viewer or Map Viewer classic, and save it as a web map.
- Create an ArcGIS Web AppBuilder app using the web map created in step 3. Refer to ArcGIS Online: Create apps from maps for instructions.
- Open the attribute table using the Layer List widget. Refer to ArcGIS Web AppBuilder: Use the Layer List widget for instructions.
Note:
If future changes are required in the attribute table, the layer fields can be configured in the view layer's Update View page. Refer to ArcGIS Online: Edit a hosted feature layer view definition for instructions.
Article ID: 000027146
- ArcGIS Web AppBuilder
- ArcGIS Online
Get support with AI
Resolve your issue quickly with the Esri Support AI Chatbot.


Related Information
Discover more on this topic
Search for related information
Find training related to this topic
Explore ideas and give feedback
Get help from ArcGIS experts
Start chatting now