PROBLEM
Submitted polygons display as deformed or offset on the ArcGIS Survey123 website
Description
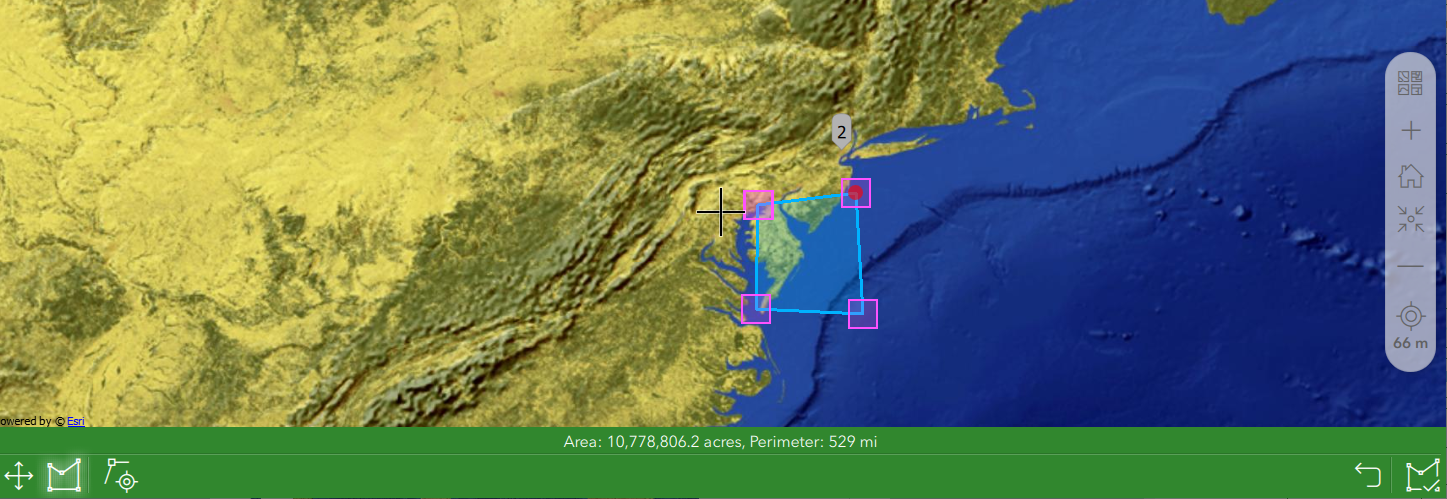
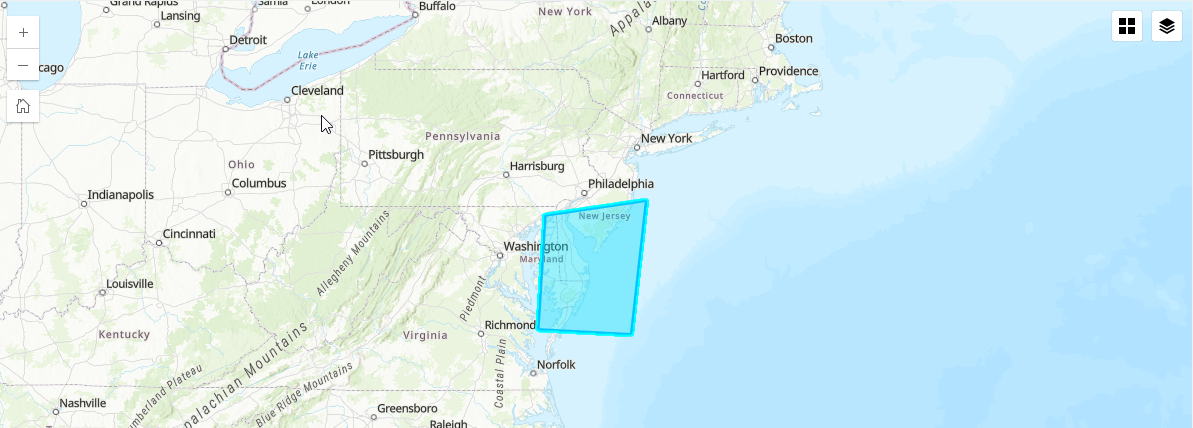
Submitted polygons via a geoshape question appear deformed or to have shifted location when viewed on the ArcGIS Survey123 website. The map images below show the polygon submitted via the ArcGIS Survey123 field app and the polygon displayed on the ArcGIS Survey123 website Data tab.
Cause
The referenced map or feature layer in the ArcGIS Survey123 survey uses a different coordinate system from the default used in ArcGIS Survey123, which is WGS 84 Web Mercator. The data collected via ArcGIS Survey123 is automatically recorded using the default coordinate system.
Solution or Workaround
When referencing a feature layer or a map from ArcGIS Online in the ArcGIS Survey123 survey, ensure the referenced map or feature layer's coordinate system is compatible with the WGS 84 Web Mercator. If the referenced map or feature layer uses an incompatible coordinate system, recreate the survey form without referencing the map or feature layer, collect the data, project the data to a desired coordinate system in ArcGIS Pro, and overwrite the layer into ArcGIS Online. Follow the steps below to project the collected survey data to a necessary coordinate system.
- Export the survey data from the ArcGIS Survey123 website. Refer to ArcGIS Survey123: Download results for instructions, and for Step 3, select either Shapefile or File Geodatabase.
- Open ArcGIS Pro and log in to the ArcGIS Online account.
- Add the data to ArcGIS pro.
- Open ArcGIS Pro. Refer to Steps 1 through 4 in ArcGIS Pro: Create a project from a default template for instructions.
- Add the downloaded data as a layer on the map. Choose one of the options below depending on the format of the downloaded data.
- For shapefiles, refer to ArcGIS Pro: Add a shapefile to the map for instructions.
- For databases and folders, refer to ArcGIS Pro: Add an existing database to a project and ArcGIS Pro: Connect to an existing folder for instructions.
- Project the added layer's coordinate system to a necessary coordinate system.
- On the Analysis ribbon tab, in the Geoprocessing group, click Tools.
- In the Geoprocessing pane, search for and select Project (Data Management Tools).
- Fill in the parameters. Refer to ArcGIS Pro: Project (Data Management) for more information.
- Click Run.
- Overwrite the layers to ArcGIS Online. Refer to ArcGIS Pro: Overwrite a web feature layer for instructions.
Article ID: 000032616
- ArcGIS Pro 3 1
- ArcGIS Pro 3 3
- ArcGIS Survey123
- ArcGIS Pro 3 2
Get support with AI
Resolve your issue quickly with the Esri Support AI Chatbot.


Related Information
Discover more on this topic
Search for related information
Find training related to this topic
Explore ideas and give feedback
Get help from ArcGIS experts
Start chatting now