PROBLEM
Some labels are not displayed for a cluster of points in ArcGIS Online Map Viewer
Description
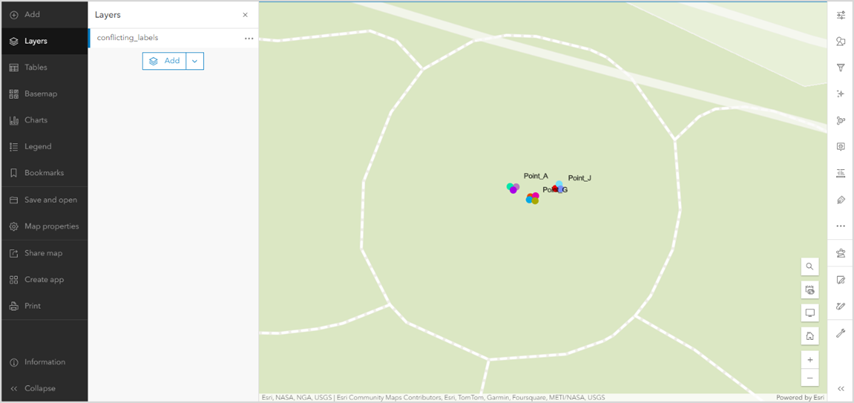
When attempting to display the labels from a cluster of point features in ArcGIS Online Map Viewer, only one is displayed.
The image below shows clusters of visible point features such as Point A, Point G and Point J, whereas the other point features are not showing its label.
Cause
The point features are close to each other or are overlapping. Therefore, some labels are not displayed at certain zoom levels, preventing all labels from being displayed at once.
Solution or Workaround
- Log in to ArcGIS Online and click Content > My content.
- Browse to and click the web map. In the item details page, click Open in Map Viewer.
- On the Contents (dark) toolbar, click Layer
 .
. - In the Layers pane, click the layer with the cluster of point features.
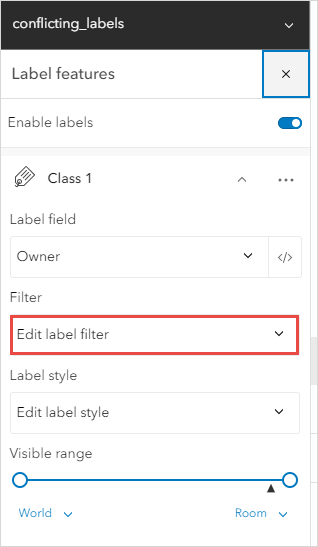
- On the Settings (light) toolbar, click the Labels
 button.
 - In the Label features pane, click Options
 > Rename to rename the label class in the text box. Click OK.
 - Click the label class to expand it.
- Under Label field, select the desired field.
- Under Filter, click Edit label filter.
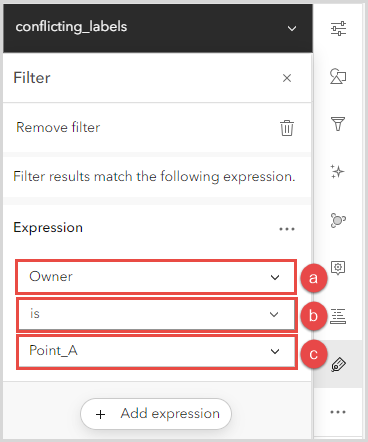
- In the Filter pane, click Add expression.
- Under Expression, configure the parameters to display the label of the point feature.
-
- Click the field name selector, and select the desired field of the feature layer.
- Click the operator selector, and select is.
- Click the value input box drop-down menu and select the chosen point feature. In this example, Point A is selected.
- Click the Close
 button.
 - In the Label features pane, select Add label class to add another label class for another point feature.
- Repeat Steps 6 through 13 to display the rest of the labels. Omit Step 13 for the last label class.
- Adjust the desired location of the label to display. Refer to ArcGIS Online: Customize the label style for further instructions. For Step 2 in the documentation, ensure the label selected is the desired label class.
Note:
The placement of the label may be affected by the zoom levels. Adjust the labels under Placement or Offsets accordingly.
- Click the Close
 button.
 - Click Save and open > Save
 , to save the changes made.
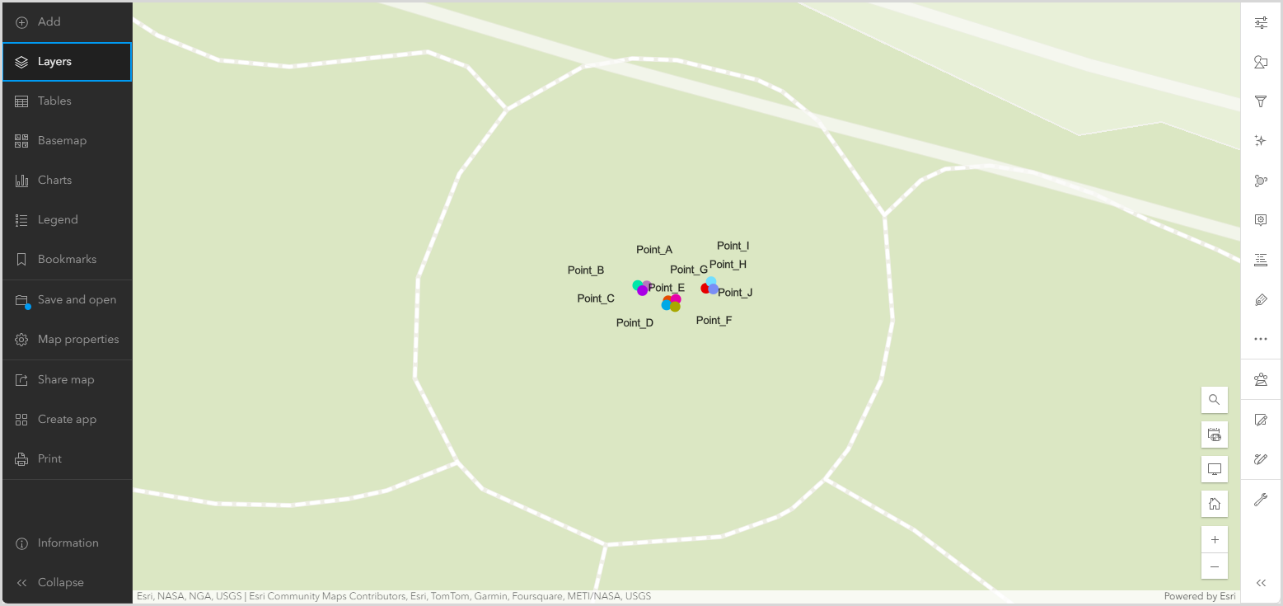
The image below shows all the labels displayed for the cluster of points in ArcGIS Online Map Viewer.
Article ID: 000032246
- ArcGIS Online
Get support with AI
Resolve your issue quickly with the Esri Support AI Chatbot.


Related Information
Discover more on this topic
Search for related information
Find training related to this topic
Explore ideas and give feedback
Get help from ArcGIS experts
Start chatting now