PROBLEM
Raster borders are visible when added directly to a map in ArcGIS Pro
Description
In ArcGIS Pro, rasters contain individual bands which are combined to create a natural looking image on a map. In certain instances, when raster datasets are added from a folder to a map directly, the borders between the rasters are visible, as shown in the image below.

Cause
The rasters added to the map have differing minimum and maximum values. The minimum and maximum values are used to standardize the appearance of multiple rasters for comparison. When the values are not scaled to optimize the color transition between the rasters, a visible border is displayed.
Solution or Workaround
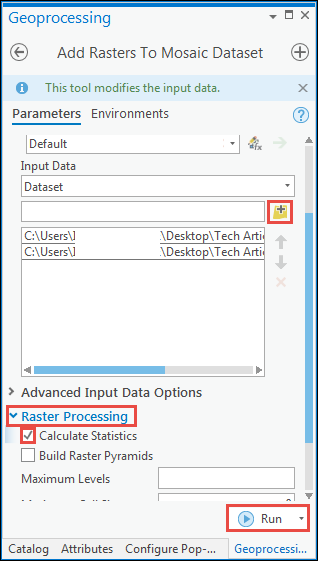
Follow the workflow below to resolve the issue using the Add Rasters To Mosaic Dataset tool.
- Create a mosaic dataset.
- In ArcGIS Pro, in the Catalog pane, under the Databases folder, right-click the desired database. Click New > Mosaic Dataset. In this example, the database is CheckMosaicDataset.gdb.

- In the Create Mosaic Dataset tool pane, on the Parameters tab, for Mosaic Dataset Name, type a name for the dataset. In this example, the name for the mosaic dataset is MinMax_Article.
- Click Run.

- Add the rasters to the mosaic dataset.
- In the Catalog pane, right-click the newly created mosaic dataset. Click Add Rasters....

- In the Add Rasters To Mosaic Dataset tool pane, on the Parameters tab, select the appropriate raster type from the Raster Type drop-down list.
- For Input Data, click the Browse
 icon to select the rasters.
 - Expand Raster Processing. Check the Calculate Statistics box.
- Click Run.
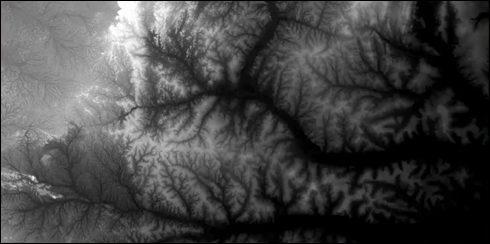
The minimum and maximum values of the rasters are standardized, and the borders are not visible as shown in the image below.
Article ID: 000025128
- ArcGIS Pro 2 7 x
- ArcGIS Pro 2 x
Get support with AI
Resolve your issue quickly with the Esri Support AI Chatbot.


Related Information
Discover more on this topic
Search for related information
Find training related to this topic
Explore ideas and give feedback
Get help from ArcGIS experts
Start chatting now