PROBLEM
Error 001156 is returned when appending data to a feature class in ArcGIS Pro
Description
The Append tool appends multiple input datasets into an existing target dataset of the same type. In some instances, appending data to a feature class in ArcGIS Pro returns the following error:
Error:
001156: Failed on input OID <value>; could not write value '<value>' to output field <value>.
Cause
This issue occurs due to one of the following causes:
- The data type of the appended fields is not the same. Numeric values cannot be appended to text fields.
- The appended values are longer than the target field length. Text values cannot be added to text fields if the values are longer than the field length.
Refer to 01156: Failed on input OID <value>; could not write value '<value>' to output field <value> for more information.
Solution or Workaround
To resolve this issue, use one of the solutions below, depending on the cause.
Create a new field to match the data type and use attribute field mapping when appending
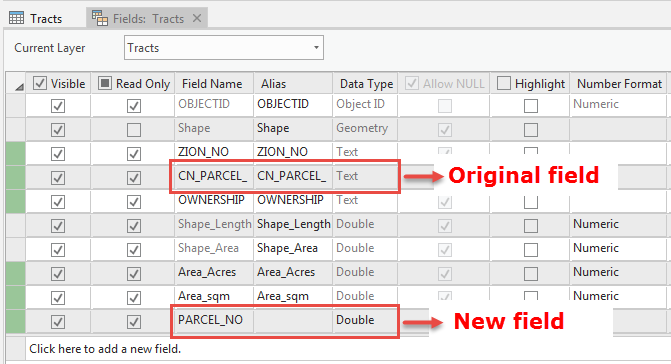
- In the target feature class, create a new field and set the data type to be the same as the values to append. Refer to Create a field and apply a domain and default value for instructions. In this example, a new double field is created to append numeric values to it.
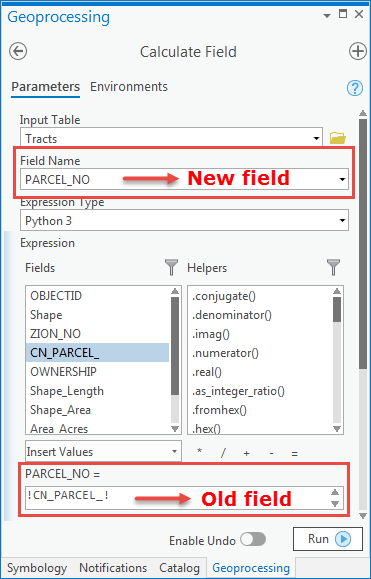
- Copy the values from the original field to the new field using the Calculate Field tool. Skip this step if the original field is empty.
- In the attribute table, right-click the header of the new field and select Calculate Field.
- In the Geoprocessing pane, for Expression, select the original field. In this example, CN_PARCEL is the original field containing values to be copied to the new field.
- Click Run.
- Delete the original field. Refer to ArcGIS Pro: Delete a field for instructions.
- Repeat Steps 1 to 3 for each field that must be re-created.
- Append the input data to the target feature class containing the new field(s) using the Append tool.
- In the Append pane, select the Input Datasets.
- For Target Dataset, select the feature class containing the new field(s).
- For Schema Type, select Use the Field Map to reconcile schema differences.
- In the Field Map section, the new field(s) may appear in red. In this case, manually map the new field(s) to the corresponding fields from the input dataset. Refer to ArcGIS Pro: Source fields for instructions.

- Click Run. The target dataset is appended with data from the input dataset.
Increase the number of allowable characters of the field
To append data between feature classes, the field values from the input dataset must not exceed the target field length. To solve this issue, increase the number of allowable characters for the target field before appending data. Use the Alter Field tool to set the new maximum number of allowable characters for each field.
Note:
This option is only applicable to fields of type TEXT or BLOB. If the table is empty, the field length can be either increased or decreased. If the table is not empty, the length can only be increased from the current value.
Article ID: 000022224
- ArcGIS Pro 3 0
- ArcGIS Pro 2 8 x
- ArcGIS Pro 2 7 x
- ArcGIS Pro 2 x
Get support with AI
Resolve your issue quickly with the Esri Support AI Chatbot.


Related Information
Discover more on this topic
Search for related information
Find training related to this topic
Explore ideas and give feedback
Get help from ArcGIS experts
Start chatting now