PROBLEM
Attempts to edit a hosted feature layer field in ArcGIS Online fail
Description
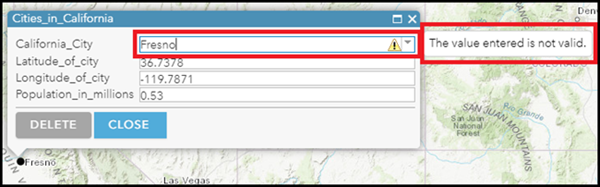
Attempts to edit a hosted feature layer field in the feature pop-up in ArcGIS Online Map Viewer fail, and the following message is returned:
Error:
The value entered is not valid.
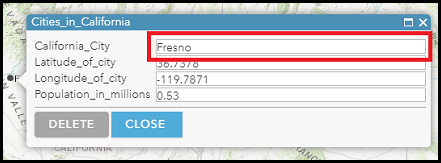
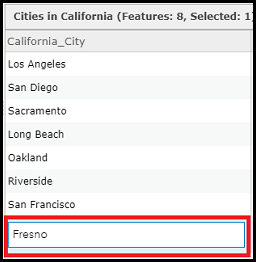
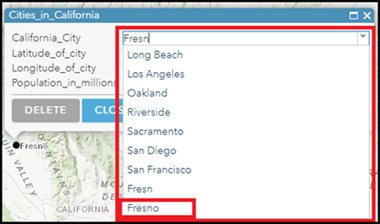
In this example, the warning message is returned when attempting to change Fresn to ‘Fresno.’
Cause
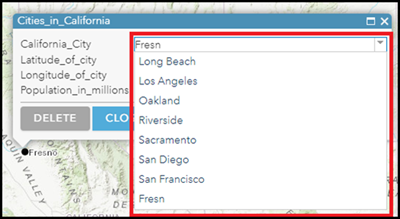
This is a known limitation. The field value in the pop-up and the attribute table can only be selected from the values available in the drop-down list, and the feature template in ArcGIS Online disables input of new field values to prevent incorrect data capturing. In this example, the drop-down list for the user-created hosted feature layer does not contain the value 'Fresno,' but instead contains the misspelled city name 'Fresn.'
Solution or Workaround
To edit the field or pop-up with the desired value, follow one of the workarounds below.
Change the layer symbology from Unique symbols to Single symbol
If a layer uses unique symbology, a drop-down list is automatically applied, and users can only select from the values available in the list. If there is a misspelled value, perform the following steps to rectify it.
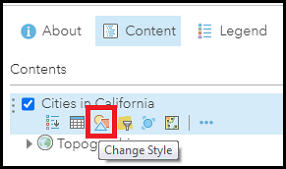
- In the Content pane, click the Change Style icon
 .
.
- In the Select a drawing style section, click SELECT under Location (Single symbol) icon.
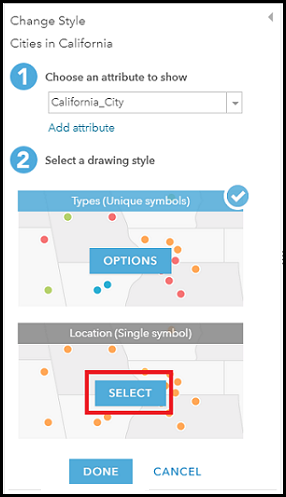
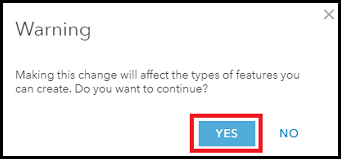
- Click YES in the Warning dialog box.
- Click DONE.
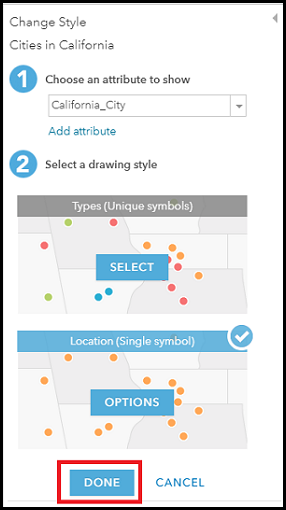
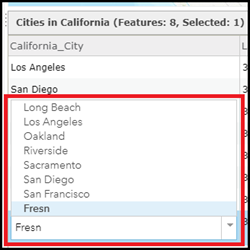
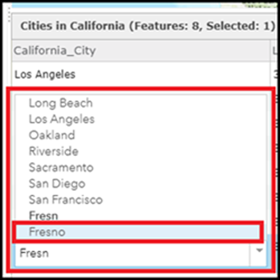
- The field value is changed in the pop-up and the attribute table by entering the desired value into the California_City field. In this example, Fresno is the input value.
Replace the incorrect feature with a new feature type
Note:
Ensure layer editing is enabled. Only administrators or owners can enable editing for members. Refer to ArcGIS Online: Manage hosted feature layers for more information.
The feature template can be modified by adding a new feature type with a new name to replace the original feature name. This option is only available if the layer uses unique symbology. Refer to ArcGIS Online: Style categories for more information on symbology.
The following steps describe how to manage the feature template, and delete the original feature name:
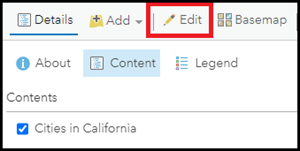
- Open the desired hosted feature layer in ArcGIS Online Map Viewer. Click Edit in the top panel.
Note:
The Edit button is only visible to administrators or owners.
- Click Manage.
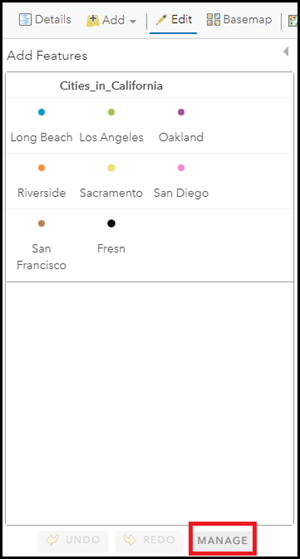
- Select the desired layer for editing from the drop-down list, and click ADD NEW TYPE OF FEATURE. In this example, it is Cities_in_California.
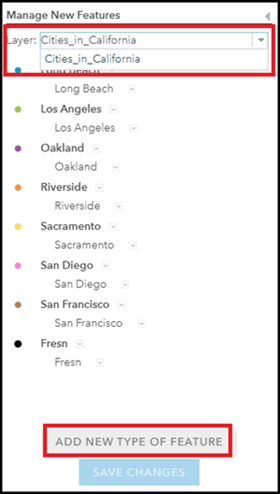
- In the Type Properties dialog window, fill in the required information, and click DONE. In this example, type Fresno for the California_City attribute, and select a black circle (8px) as the symbology.
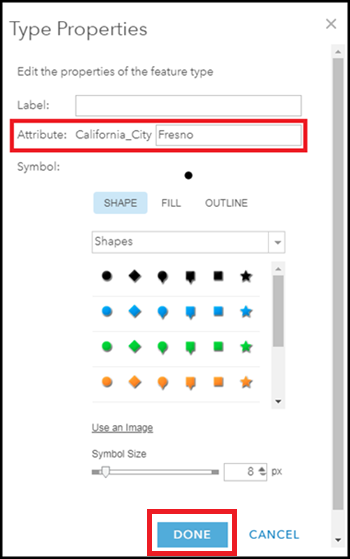
- Click SAVE CHANGES.
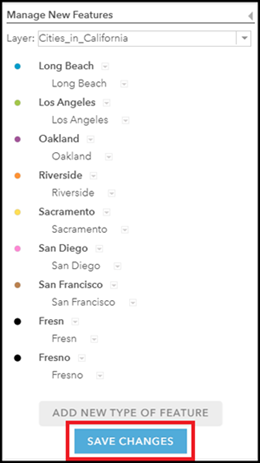
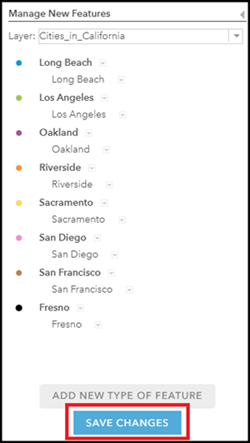
- Change the field value in the attribute attribute table or the pop-up by selecting the new feature name from the drop-down list. In this example, Fresno is selected.
- To delete the original misspelled feature, repeat Steps 1 and 2. Click the drop-down
 button of the feature, and select Remove from the drop-down list. In this example, Fresn is removed.
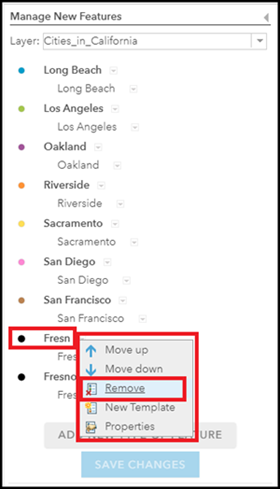
- Click SAVE CHANGES.
Article ID: 000023593
- ArcGIS Online
Get support with AI
Resolve your issue quickly with the Esri Support AI Chatbot.


Related Information
Discover more on this topic
Search for related information
Find training related to this topic
Explore ideas and give feedback
Get help from ArcGIS experts
Start chatting now