HOW TO
Update Named Users for Portal for ArcGIS
Summary
Users with Term license agreements are required to update the Portal for ArcGIS license files periodically. Sometimes, changing the number of Named Users in a license file after adjusting a license agreement is necessary. This article provides a step-by-step guide to update the Named Users for a Portal for ArcGIS deployment.
Procedure
- Cancel the existing provision license file. Log in to My Esri with an administrator account, and navigate to My Organizations > Licensing > License Files > License Files related to Portal for ArcGIS and Pro.
- Select the appropriate provision license file, and cancel it.
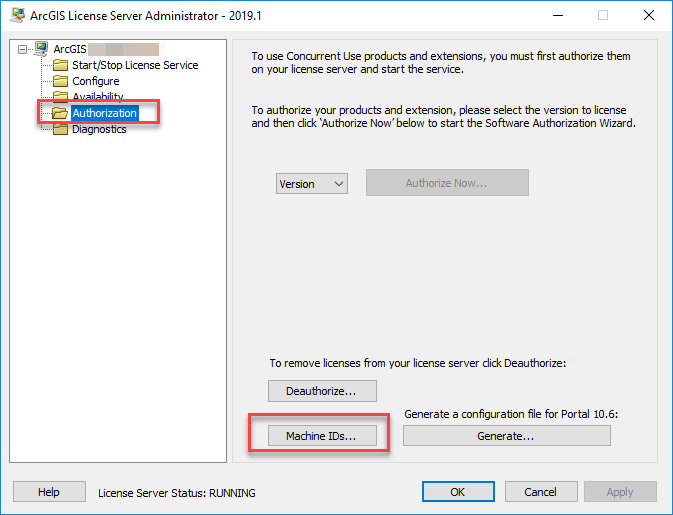
- Launch ArcGIS License Server Administrator on the host machine as an administrator.
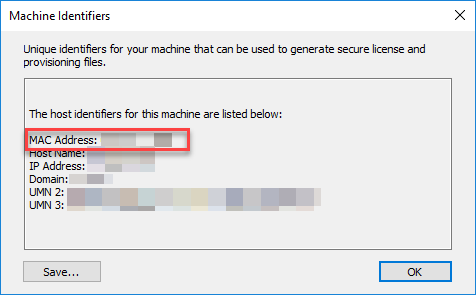
- Select Authorization > Machine IDs.... In the Machine Identifiers window, copy the MAC Address value and save it in a .txt file.
- Create a new provision license file. Navigate to My Organizations > Licensing > License Esri Products.
- Select ArcGIS Enterprise from the Product drop-down menu, 10.7 - 10.7.1 from the Version drop-down menu, and Portal for ArcGIS from the License type drop-down menu. Click Next.
- Choose the number of Named User licenses to add to the file, and select the desired extensions. Click Next.
- Select the licenses for each core product and extension to allocate to the portal. Click Next.
- When prompted, enter the Host Name and Port of the license manager.
- Fill in the MAC ID field with the MAC address copied in Step 4, and populate the fields with the necessary user information.
- Specify the delivery option for the license file, and click Review File to verify the information in the provisioning file is accurate. Click Create File.
- Save the license file in a directory accessible to the machine hosting ArcGIS License Server Administrator.
- Launch ArcGIS License Server Administrator on the host machine, and authorize the software using the newly generated license file. For steps, refer to Configure ArcGIS Pro licenses for your organization.
Note:
Steps 14 to 19 provide instructions to configure licenses for Portal for ArcGIS versions 10.6.1 and below. For versions 10.7 and above, follow the instructions provided in Configure ArcGIS Pro licenses for your organization and Manage licenses.
- Generate a Portal for ArcGIS configuration file. Click the Authorization tab, and click Generate. Save the .json file.
Note:
This specifies the number of ArcGIS Pro licenses available to Portal for ArcGIS, allowing the licenses to be assigned to users.
- Click OK, and close ArcGIS License Server Administrator.
- Sign in to the Portal for ArcGIS admin directory. The default URL format for the admin directory is:
https://<portal>.<domain>.com:7443/arcgis/portaladmin
- Navigate to System > Licenses > Import Entitlements.
- Click Choose File, and select the Portal for ArcGIS configuration file generated in Step 14. Select ArcGIS Pro from the Application drop-down menu.
- Click Import to configure Portal for ArcGIS with the ArcGIS Pro licenses.
Article ID: 000023232
Software:
- Portal for ArcGIS
Get support with AI
Resolve your issue quickly with the Esri Support AI Chatbot.


Related Information
Discover more on this topic
Search for related information
Find training related to this topic
Explore ideas and give feedback
Get help from ArcGIS experts
Start chatting now