HOW TO
Represent data in non-spatial tables on the map in ArcGIS Pro
Summary
Non-spatial tables (standalone tables) are used to store additional data that is related to spatial features. This data can be related to a spatial feature class such as counties, states, cities, and so forth. This article describes the steps to represent certain criteria or attributes based on a non-spatial table on the map in ArcGIS Pro.
Procedure
- In an ArcGIS Pro project, add the non-spatial table and the feature class related to the data in the table. For example, add the States feature class and the non-spatial table containing information on states.
- Relate the feature class to the non-spatial table with a one-to-many relationship.
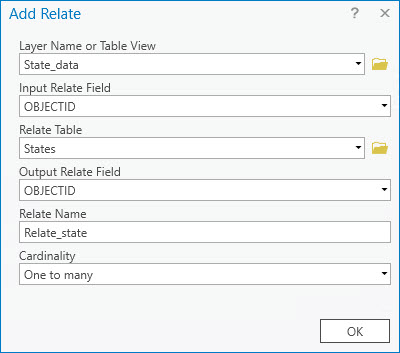
- In the Contents pane, right-click the non-spatial table, and click Joins and Relates > Add Relate.
- In the Add Relate pane, ensure the non-spatial table is selected for Layer Name or Table View.
- Select the feature class for Relate Table.
- Select the fields for Input Relate Field and Output Relate Field.
- For Cardinality, select One to many. Click OK. These options are shown in the following image.
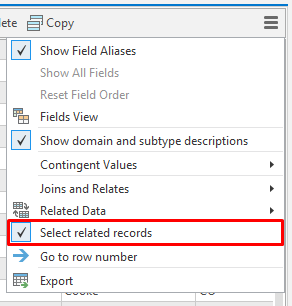
- Right-click the non-spatial table in the Contents pane, and click Open. Click the Table Options menu
 , and activate the Select related records option, as shown below.
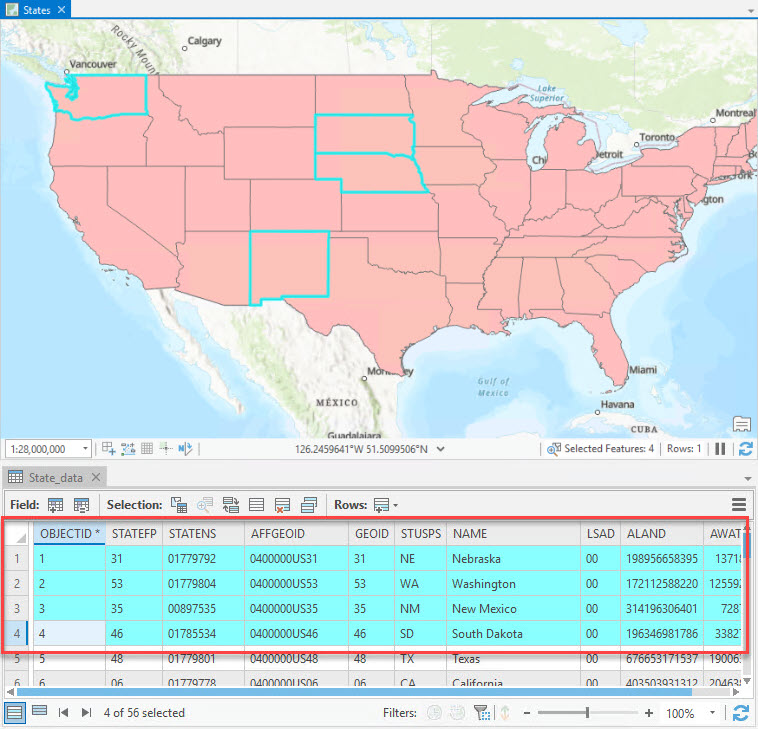
- In the non-spatial table, select one or more rows. The map highlights features that are related to the selected rows.
- Optionally, create a new layer based on the selection using one of the methods below:
- Right-click the feature class containing the selected feature, click Selection > Make Layer From Selected Features. This method creates a new layer on-the-fly in the Contents pane.
- Use the Copy Features tool to export the selected features and create a new feature class.
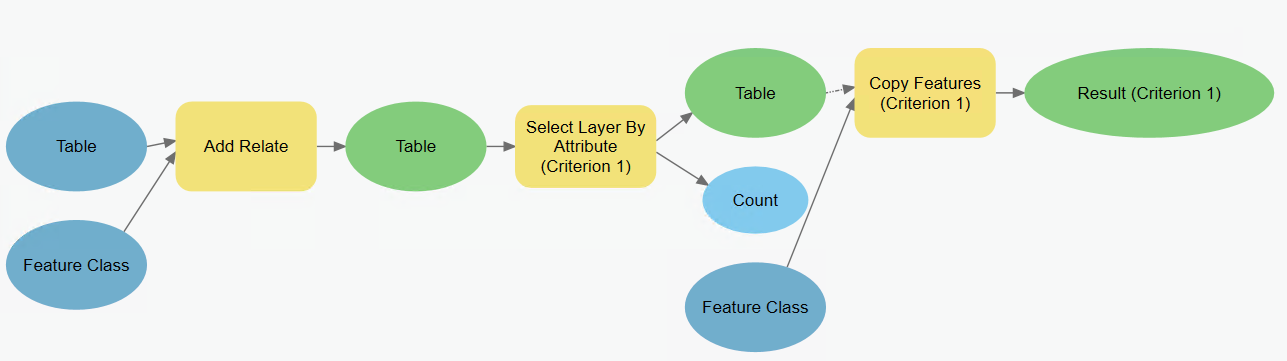
This process can be automated using ModelBuilder from the start, using the geoprocessing tools below:
- Add Relate tool
- Select Layer by Attribute tool
- Copy Features tool
Re-configure the following tools in the geoprocessing model to repeat the workflow based on another selection:
- Select Layer by Attribute tool
- Copy Features tool
Article ID: 000023150
- ArcGIS Pro 2 8 x
- ArcGIS Pro 2 7 x
- ArcGIS Pro 2 x
Get support with AI
Resolve your issue quickly with the Esri Support AI Chatbot.


Related Information
Discover more on this topic
Search for related information
Find training related to this topic
Explore ideas and give feedback
Get help from ArcGIS experts
Start chatting now