HOW TO
Recover deleted features from a hosted feature layer using ExtractChanges
Summary
The ArcGIS REST API ExtractChanges operation can be used to retrieve changes made to a service with the ChangeTracking capability enabled. Feature service change tracking is an efficient change tracking mechanism for applications. ArcGIS applications can use change tracking to query changes that have been made to the layers and tables in the service. Change tracking can also be enabled for hosted feature services. If all layers and tables in the service have the ChangeTracking capability, the ExtractChanges operation can be used to get changes.
Prerequisites:
- Make sure the hosted feature layer has ChangeTracking capability enabled.
- Hosted feature services cannot have both the Sync and ChangeTracking capabilities enabled at the same time and hence, Sync must be disabled.
Procedure
In this example, two point features are recovered from a hosted feature layer.
- Publish a hosted feature layer and make sure the layer has ChangeTracking capability enabled.
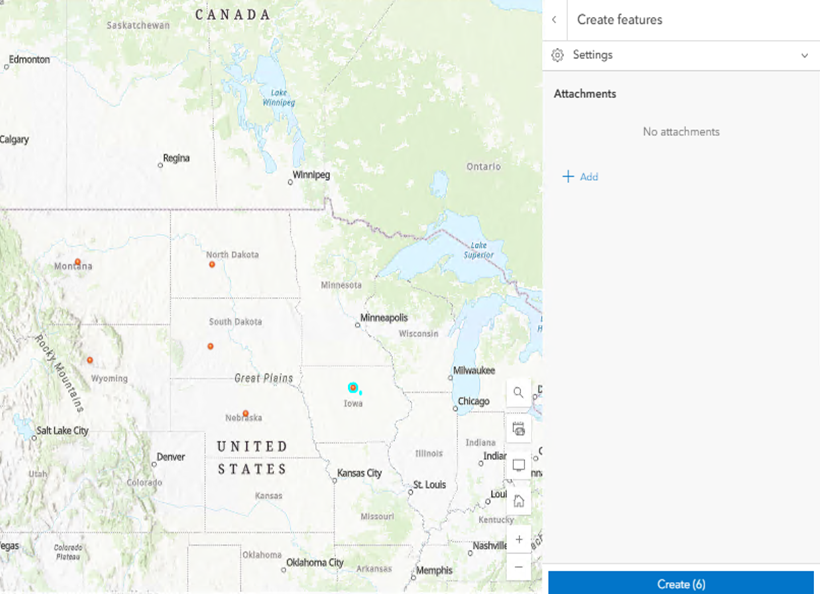
- Create a few random features on the layer. In this example six new features have been created, as shown in the image below.
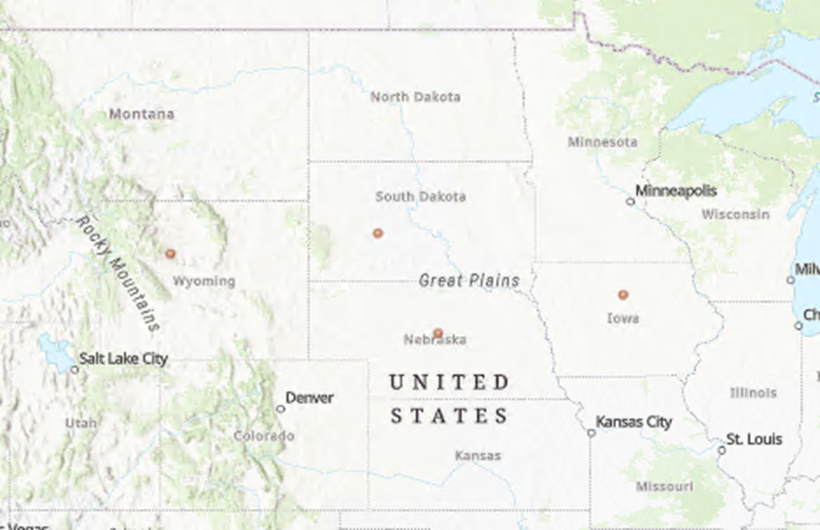
- Delete a few of the features created in the previous step. Two features have been deleted in the next image.
- In Portal for ArcGIS, navigate to the REST endpoint of the service and click the JSON link in the top left corner.
- Search for the LayerServerGens parameter and copy the whole parameter, as shown below:
[
   {
    "minServerGen": 2257664,
    "serverGen": 2257664,
    "id": 0
   }
]
- Navigate to the service REST endpoint once again and click the Extract Changes operation at the bottom.
- Paste the details copied in Step 5 in the LayerServerGens parameter and keep the rest of the parameters, as shown in the image below:

- Execute the Extract Changes operation and notice that it returns a job link.
- Open the job link and access the JSON output; this JSON output includes all the changes made to the hosted feature layer.
- Copy the details of the deleted features, as shown in the following example:
[
          {
            "attributes": {
              "globalid": "{B915D9DA-D9D1-490B-B1EA-F1C946F3869F}",
              "objectid": 2
            },
            "geometry": {
              "x": -11316756.7282,
              "y": 5963311.1987
            }
          },
          {
            "attributes": {
              "globalid": "{9E30F522-75FD-42AC-ADAE-C2A8CBBDBFA9}",
              "objectid": 1
            },
            "geometry": {
              "x": -12177743.4148,
              "y": 5976356.4018
            }
          }
        ]
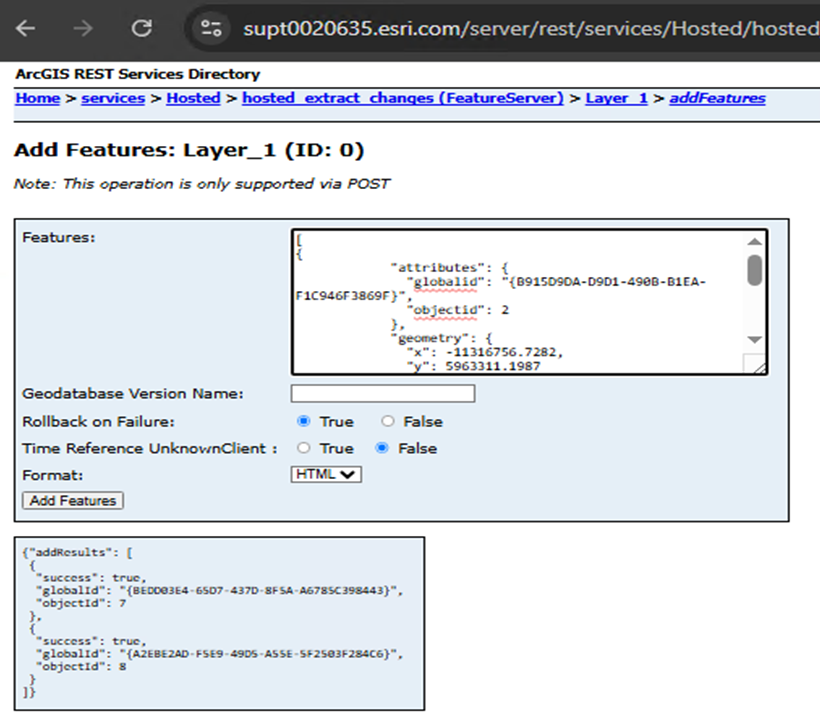
- Navigate back to the service’s REST endpoint, click on the layer, scroll to the bottom, and click the Add Features operation:

- Paste the details copied in Step 10 in the Features parameter and execute the operation. Notice that it returns a "success": true message once the features are added:
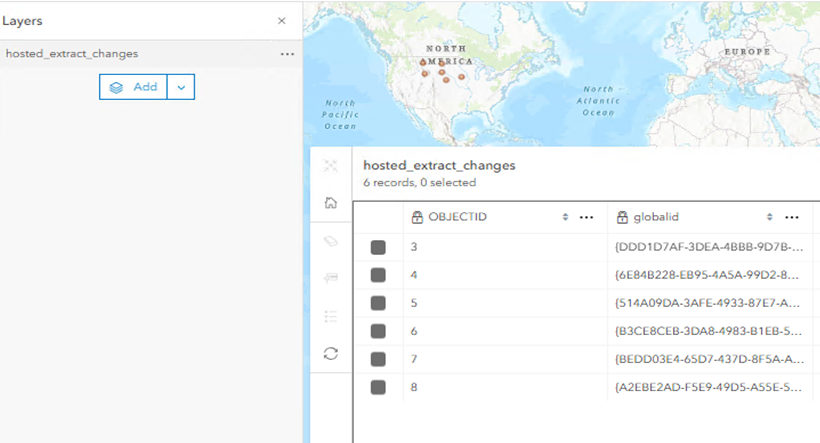
- Navigate back to the Portal for ArcGIS Home page and open the layer in a web map. Notice that the features are added once again, as shown in the image below
Note that the OBJECTID and GLOBALID values are different from the original since these are unique fields, however the other details and the geometry are the same.
Article ID: 000037178
- Portal for ArcGIS
- ArcGIS Server
Get support with AI
Resolve your issue quickly with the Esri Support AI Chatbot.


Related Information
Discover more on this topic
Search for related information
Find training related to this topic
Explore ideas and give feedback
Get help from ArcGIS experts
Start chatting now