HOW TO
Import SVG files into a style file using Python in ArcGIS Pro
Summary
Scalable Vector Graphics (SVG) is a vector-based image format designed for two-dimensional graphics. SVG files provide several advantages, including resolution-independent scalability, ease of editing, and smaller file sizes compared to raster formats. In ArcGIS Pro, SVG files can be imported and managed within a style file (.stylx) for custom symbol creation. This article provides the workflow to import SVG files into a style file using Python in ArcGIS Pro. Using Python enables quick, scalable batch imports of SVGs with consistent metadata, producing reusable Cartographic Information Model (CIM) style items and offering greater efficiency than manually uploading symbols one at a time.
Procedure
- Create folders to store the project and SVG files.
- Create a main project folder on the local drive, and within it, create a subfolder. In this example, the subfolder is named 'Symbols'.
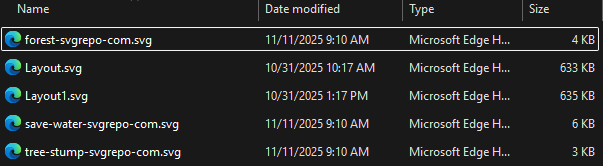
- Place all SVG files into the 'Symbols' subfolder and ensure each filename has the .svg extension.
- Open the ArcGIS Pro project.
- Create an empty style in the project. Refer to ArcGIS Pro: Create a style in the project for instructions. Save the style in the main project folder alongside the 'Symbols' subfolder.

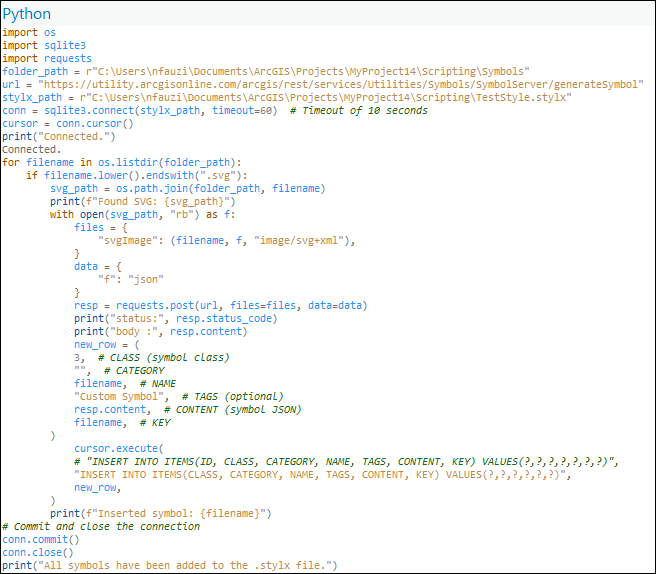
- Open the Python window and import the necessary modules.
import os
import sqlite3
import requests
- Specify the input folder path, the REST endpoint URL, and the style file path. Replace <folder_path_containing_SVG_files> with the path to the 'Symbols' subfolder, and <style_path> with the path to the style file.
# Path to the folder containing SVG files
folder_path = r"<folder_path_containing_SVG_files>"

# Generate Symbol URL
url = "https://utility.arcgisonline.com/arcgis/rest/services/Utilities/Symbols/SymbolServer/generateSymbol"

# Connect to the .stylx file as a SQLite database
stylx_path = r"<style_path>"
- Establish a database connection to the style file.
conn = sqlite3.connect(stylx_path, timeout=60)
cursor = conn.cursor()
print("Connected.")
- Upload the SVG files to the REST endpoint and convert them into the CIM symbol format. Save the converted symbols into the style file.
for filename in os.listdir(folder_path):
  if filename.lower().endswith(".svg"):
    svg_path = os.path.join(folder_path, filename)
    print(f"Found SVG: 	{svg_path}")
    with open(svg_path, "rb") as f:
      files = {
            "svgImage": (filename, f, "image/svg+xml"),
      }
      data = {
            "f": "json"
      }
      resp = requests.post(url, files=files, data=data)
      print("status:", resp.status_code)
      print("body:", resp.content)

      new_row = (
      3,  # CLASS (symbol class - 3 = Point Symbol)
      "",  # CATEGORY
      filename,  # NAME
      "Custom Symbol",  # TAGS
      resp.content,  # CONTENT (CIM symbol JSON)
      filename,  # KEY
    )
      cursor.execute(
      "INSERT INTO ITEMS(CLASS, CATEGORY, NAME, TAGS, CONTENT, KEY) VALUES(?,?,?,?,?,?)",
      new_row,
    )
    print(f"Inserted symbol: {filename}")
conn.commit()
conn.close()
print("All symbols have been added to the .stylx file.")
- Run the script.
The following shows the sample script running in ArcGIS Pro.
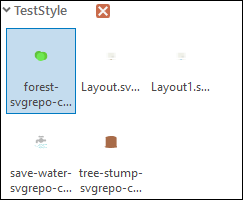
The image below illustrates the SVG files displayed as symbols in the Symbology pane.
Article ID: 000038814
- ArcGIS Pro
Get support with AI
Resolve your issue quickly with the Esri Support AI Chatbot.


Related Information
Discover more on this topic
Search for related information
Find training related to this topic
Explore ideas and give feedback
Get help from ArcGIS experts
Start chatting now