HOW TO
Generate Contingent Values from a standalone table
Summary
The following workflow can be used to generate contingent values from a standalone table in ArcGIS Pro, so they can be used in other layers.
Procedure
- Set up the standalone table to generate contingent values - make sure the standalone table is selected in the Contents pane, and make sure to always save your edits.
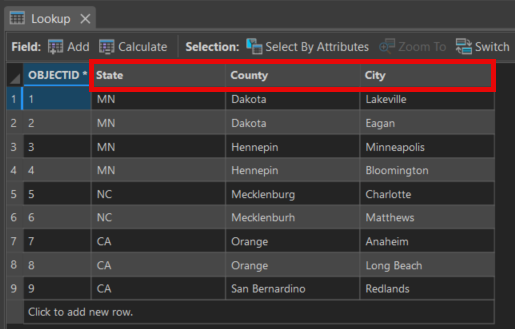
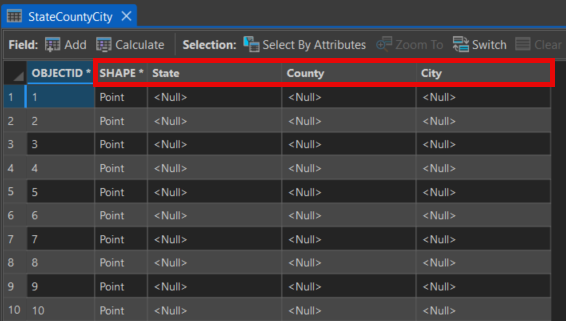
- Make sure the fields in the standalone table (Lookup) match the exact names of fields in the feature class to attach to the contingent values (StateCountyCity). In the example shown in the image below, State, City, and County are the fields that match in both the standalone table and feature layer.
- Set/create domains for each field - this is done in the Domains editor.
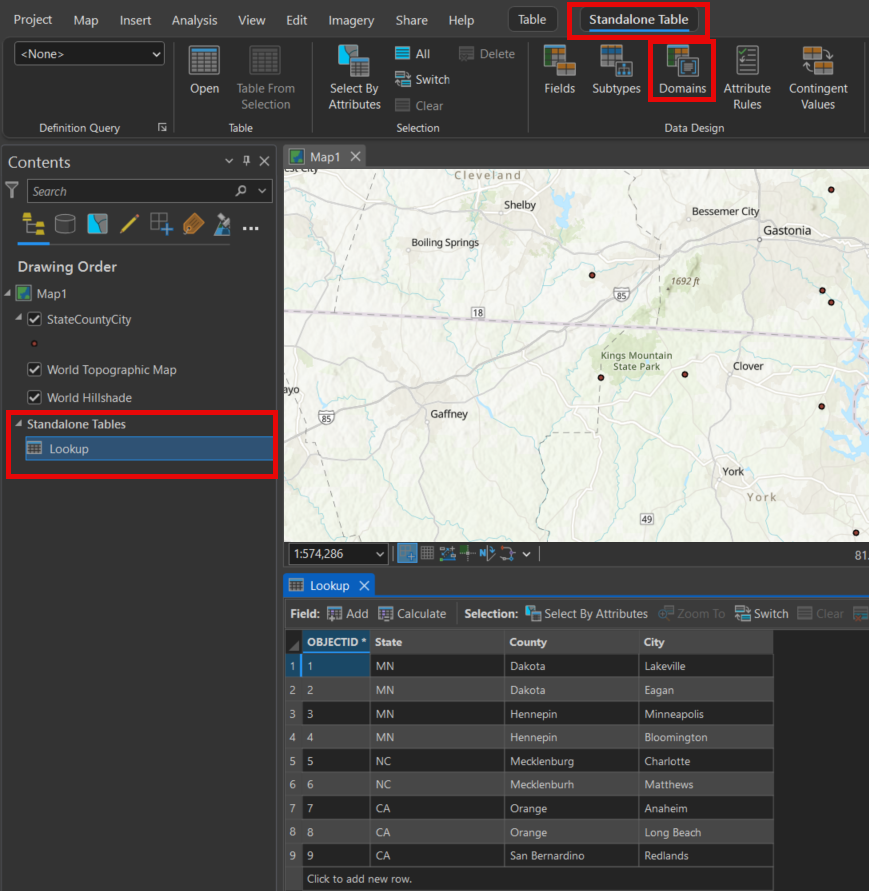
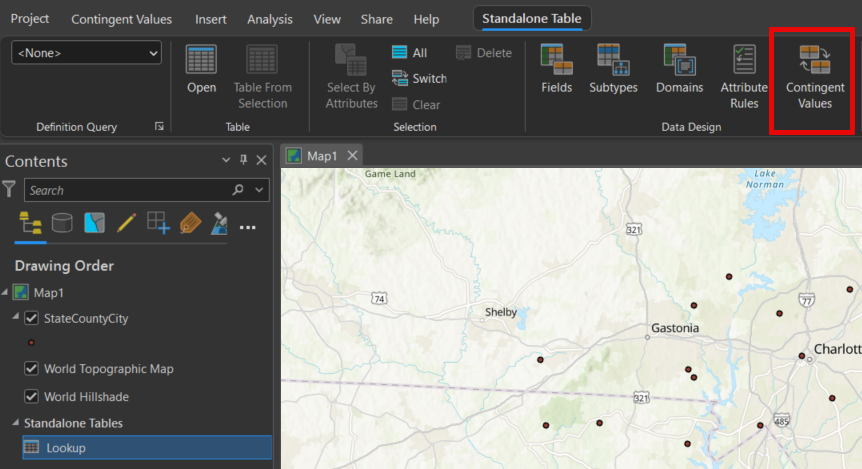
- With the standalone table Lookup selected in the Contents pane, navigate to the Standalone Tables options in the ribbon.
- In the Data Design section, select Domains, as shown in the image below.
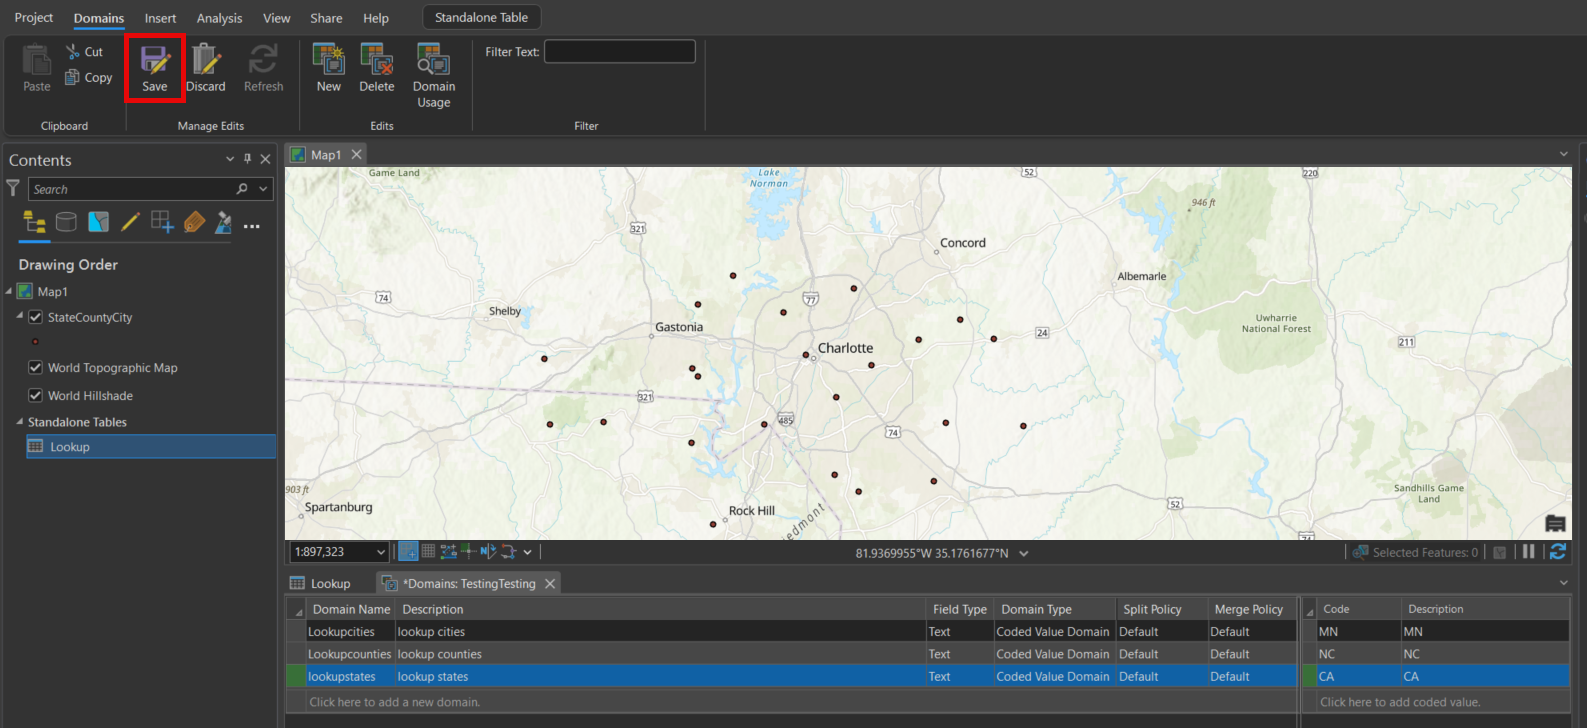
- Create Domains for each field in your standalone table (State, County, City), as shown in the next image. Be sure to save the edits when finished creating the Domains.
- Attach the Domains to the fields - this is done in the Fields editor, shown below.
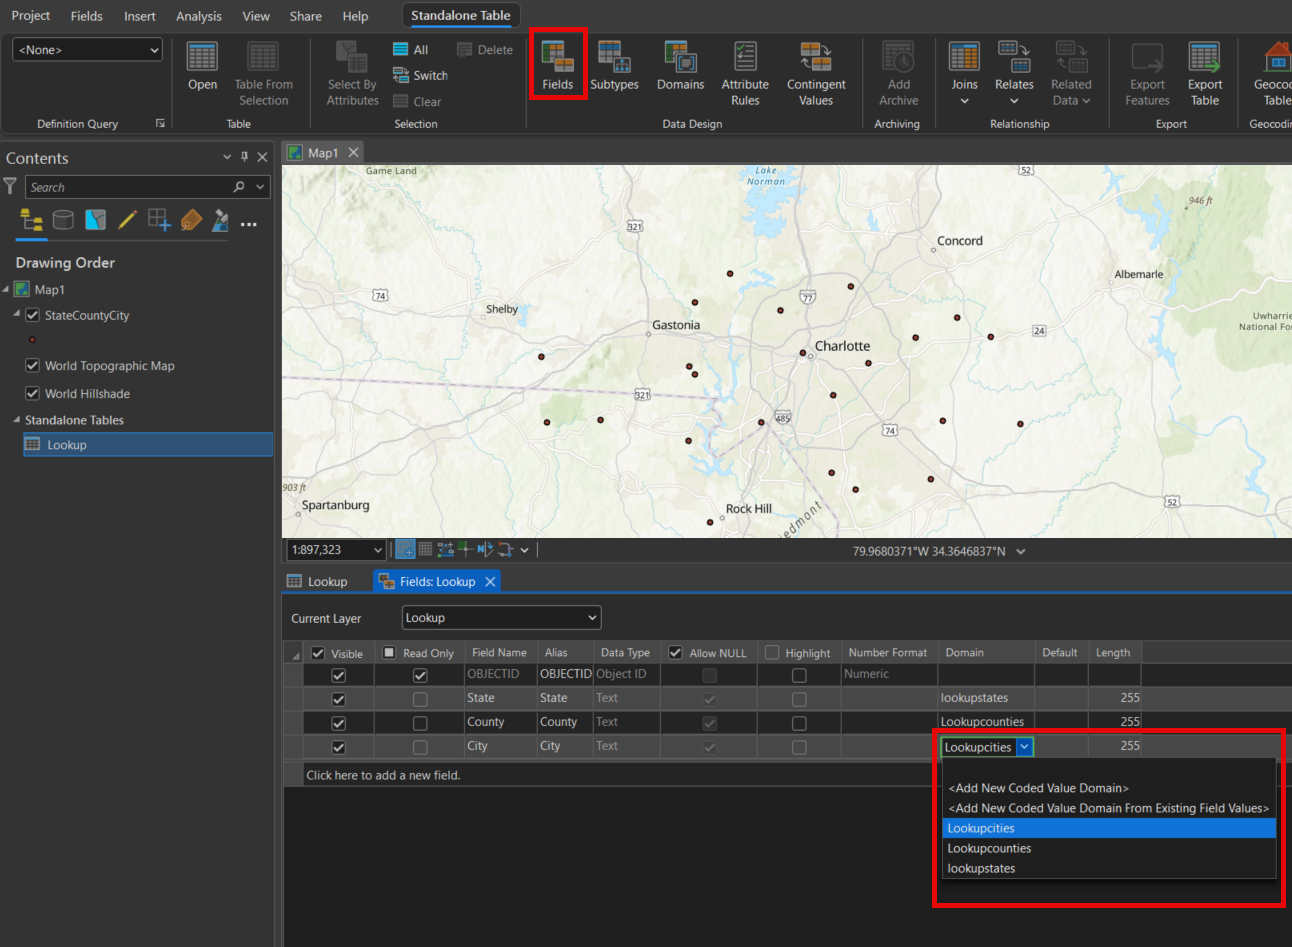
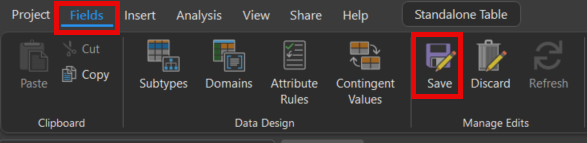
- Save the edits.
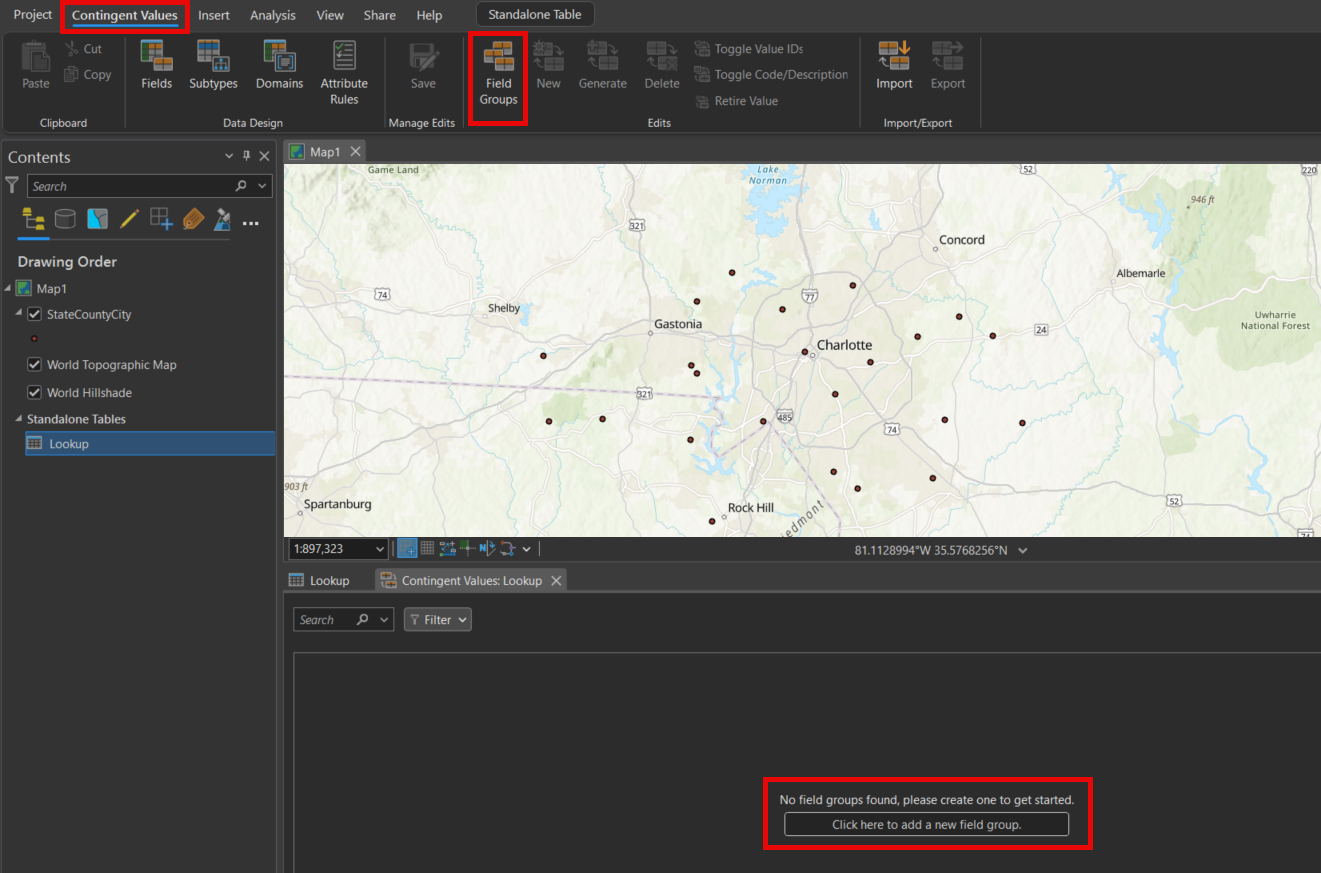
- In the Contingent Values editor, shown below, create a Field Group encompassing the fields that represent the contingent values.
- Create a Field Group by either selecting Click here to add a new field group or Field Groups in the Edits section of the Contingent Values ribbon.
- Click to add a new field group, name it, and in the Add Fields dropdown, shown below, select all the fields to include in the group. Add them, then finish by clicking OK.
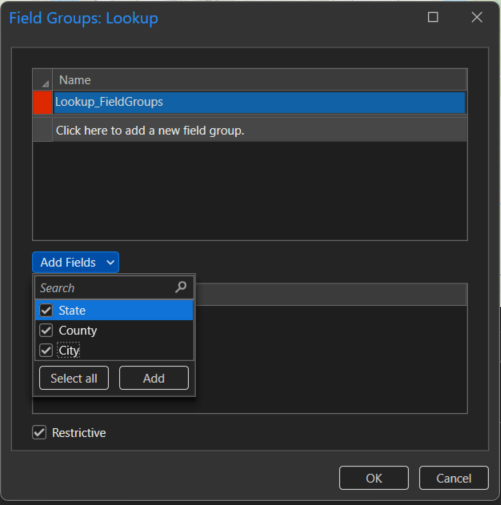
- When the Restrictive oprion is selected, values in the fields (State, County, City) contained in the field group (Lookup_FieldGroups) will be restricted to only the specified contingent values. Unselecting this allows for other values to be saved even when they are flagged as not being satisfied the specified contingent values.
- Save the edits.
- Use the geoprocessing tool Generate Contingent Values
- Select the prepared standalone table as the Input Table.
- The default name and location for both the Field Groups File and Contingent Values File will be "<Input Table Name>_FieldGroups.csv" / "< >_ContingentValues.csv" respectively, and they'll be stored in your project folder. These default locations can be edited
- For Mode, select Data.
- If you were to select Schema, it would create contingent values for every possible combination of your data - you would then have to go through it all and delete the entries that you weren't looking to create.
- Choosing Data tells the tool to only create contingent values out of the data combinations already present in the table.
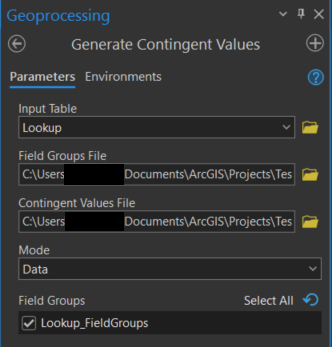
- Check the Field Groups box for the Field Group(s) you created.
- Run the tool.
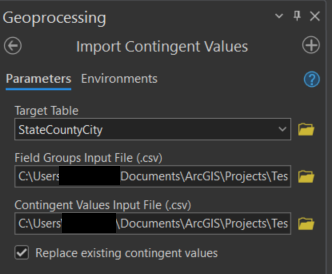
- Use the geoprocessing tool Import Contingent Values.
- Select the target feature class as the Target Table.
- Locate the Field Groups Input File (.csv) and the Contingent Values Input Files (.csv) by selecting the folder and navigating to the file locations in the file explorer.
- At your discretion, check the box for Replace existing contingent values.
- If you have contingent values for the target feature class that are a) already made and b) are not included in the standalone table of contingent values, do not check the box.
- If you have repeat contingent values or failed attempts at making contingent values, check the box.
The contingent values are now included in your target feature class! This can be checked by going to the Contingent Values editor while the feature layer is selected in the Contents pane.
Article ID: 000037281
Software:
- ArcGIS Pro
Get support with AI
Resolve your issue quickly with the Esri Support AI Chatbot.


Related Information
Discover more on this topic
Search for related information
Find training related to this topic
Explore ideas and give feedback
Get help from ArcGIS experts
Start chatting now