HOW TO
Export selected features from a feature layer in ArcGIS Pro
Summary
Exporting a feature layer is one method of backing up data so editing, analyzing, or querying data without changing the original data is enabled. In some cases, instead of exporting the entire feature layer, it is necessary to export selected features from it, as the editing or analyzing data requires only certain features from the feature layer.
This article provides a few workflows to export selected features from a feature layer in ArcGIS Pro.
Procedure
Use Export Features
- Open the ArcGIS Pro project containing the feature layer, and select the features using either one of the following methods:
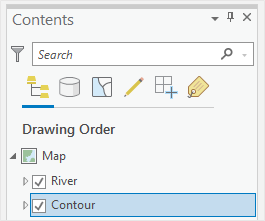
- In the Contents pane, click the feature layer. In this example, Contour is selected.
- On the ribbon, click the Data tab on the Feature Layer contextual tab set.

- In the Export group, click Export Features to open the Export Features window.

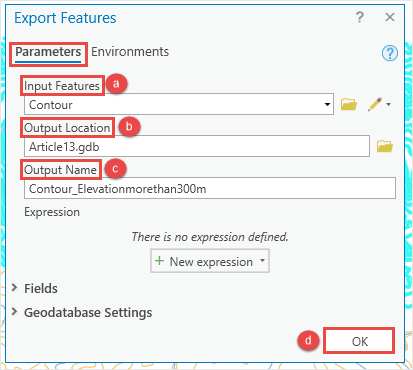
- Configure the Export Features parameters as follows:
- Select the feature layer from the Input Features drop-down list. In this example, Contour is selected.
- For Output Location, click Browse….
 to specify the location for the output feature class.
 - Specify Output Name.
- Click OK.
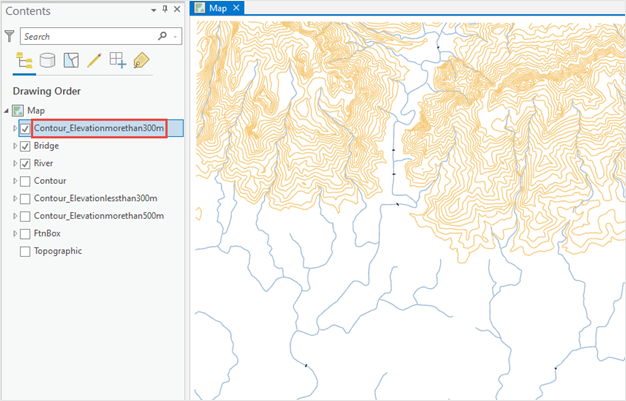
The image below shows the new feature layer, Contour_Elevationmorethan300m is created from the selected features and displayed on the ArcGIS Pro map.
Use the Feature Class To Feature Class tool
Note:
The Feature Class to Feature Class tool was deprecated at ArcGIS Pro 3.2. Use the Export Features tool to perform this operation.
- Open an ArcGIS Pro project containing the feature layer, and select the features using either one of the following methods:
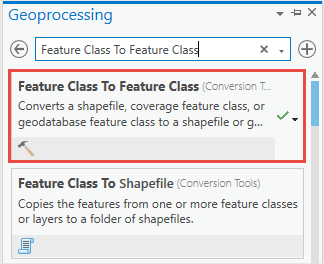
- In the Geoprocessing pane, search for the Feature Class To Feature Class tool, and click it. Refer to ArcGIS Pro: Run a tool in the Geoprocessing pane for steps to do this.
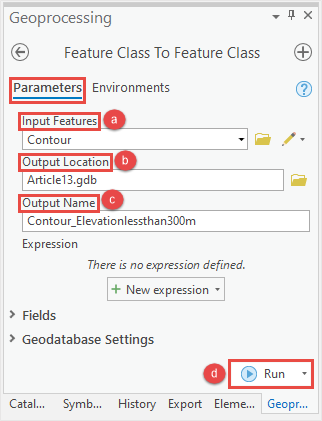
- In the Feature Class To Feature Class pane, configure the Parameters tab as follows:
- Select the feature layer from the Input Features drop-down list. In this example, Contour is selected.
- For Output Location, click Browse….
 to specify the location for the output feature class.
 - Specify Output Name.
- Click Run. The new feature class created by the Feature Class To Feature Class tool is automatically added to the map.
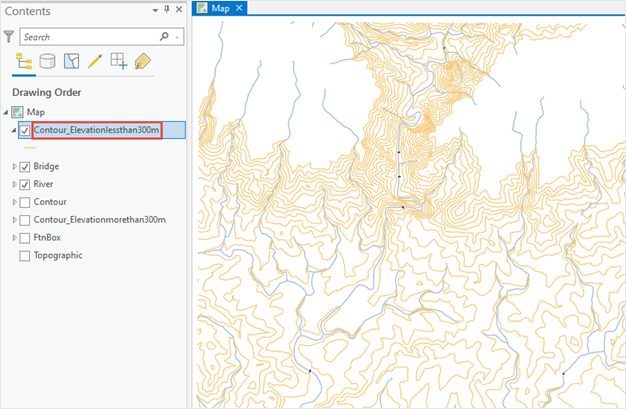
The image below shows the new feature layer, Contour_Elevationlessthan300m is created from the selected features and displayed on the ArcGIS Pro map.
Use the Copy Features tool
- Open an ArcGIS Pro project containing the feature layer, and select the features using either one of the following methods:
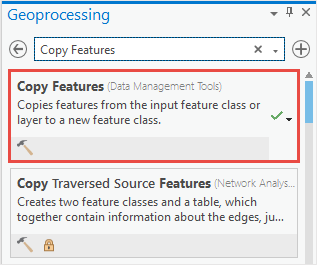
- In the Geoprocessing pane, search for the Copy Features tool, and click it. Refer to ArcGIS Pro: Run a tool in the Geoprocessing pane for steps to do this.
- In the Copy Features pane, configure the Parameters tab as follows:
- Select the feature layer from the Input Features drop-down list. In this example, Contour is selected.
- Provide a name for Output Feature Class, and click Browse….
 to specify the location for the output feature class.
 - Click Run. The new feature class created by the Copy Features tool is automatically added to the map.

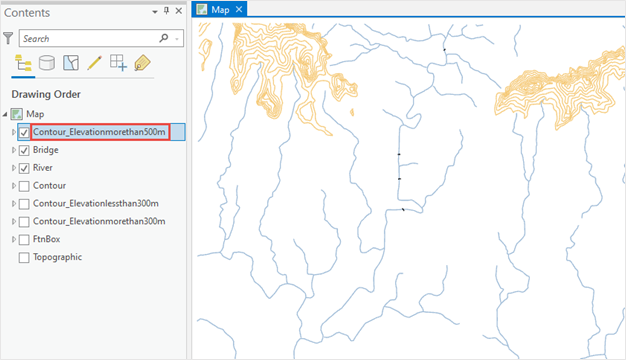
The image below shows the new feature layer, Contour_Elevationmorethan500m is created from the selected features and displayed on the ArcGIS Pro map.
Article ID: 000025141
- ArcGIS Pro
Get support with AI
Resolve your issue quickly with the Esri Support AI Chatbot.


Related Information
Discover more on this topic
Search for related information
Find training related to this topic
Explore ideas and give feedback
Get help from ArcGIS experts
Start chatting now