HOW TO
Embed a Google Calendar in an ArcGIS Dashboard
Summary
This article describes the steps to embed a Google Calendar in ArcGIS Dashboards via an HTML embed code.
Procedure
Get the iFrame code from the desired Google Calendar
- Follow the steps outlined in the following link to copy the HTML iFrame code for the desired Google Calendar:
- Add a Google calendar to your website - Google Calendar Help
- On Step 3 of this Google Calendar Help article, select the name of the desired calendar under the Settings for my calendars section on the left-hand panel.
- Step 5 of this article is where the embed code (and embedded calendar) can be customized as needed, for example, background color, height and width, etc.
- After the customizations are completed, copy the Embed code at the top of the page, as shown in the next image.

Set up the ArcGIS Dashboard
- Navigate to the ArcGIS Dashboards page and find the desired Dashboard (or create a new Dashboard), and click the Edit icon.
- In the Dashboard's Edit window, click the Add element icon.
- Click the Add (+) button in the desired location for the embedded Google Calendar.
- Select Rich Text as the type of element to create.
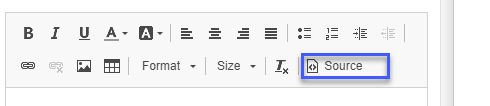
- In the Rich Text element's configuration page, in text box controls, click the <>Source button, as shown in the next image.
- Paste the embed code copied in Step 2 of the previous procedure in the text box.
- Click the <>Source button again to preview the embedded Google Calendar.
- If all appears correct, click Done to add the embedded calendar to the Dashboard.
- Otherwise, the embed code can be edited manually by clicking the <>Source button again, or by going back to Step 5 of the Google Calendar Help article linked above and editing further there and re-copying/pasting the embed code into the Rich Text element.
Article ID: 000030111
Software:
- ArcGIS Dashboards
Get support with AI
Resolve your issue quickly with the Esri Support AI Chatbot.


Related Information
Discover more on this topic
Search for related information
Find training related to this topic
Explore ideas and give feedback
Get help from ArcGIS experts
Start chatting now