HOW TO
Downgrade from 64-bit to 32-bit object ID in ArcGIS Pro
Summary
In ArcGIS Pro, an object identifier (object ID) is assigned to each row in a layer's attribute table to uniquely identify features and attributes. Beginning from ArcGIS Pro version 3.2, both 32-bit and 64-bit object ID values are supported. For more information, refer to ArcGIS Pro: What's new in ArcGIS Pro 3.2.
However, in some cases, data with 64-bit object ID values are not compatible with certain geoprocessing tools or legacy formats, such as shapefiles, and must be downgraded to 32-bit. To achieve this, a new feature class must be created with a 32-bit object ID type and populated with values from the original table. This article describes the workflow.
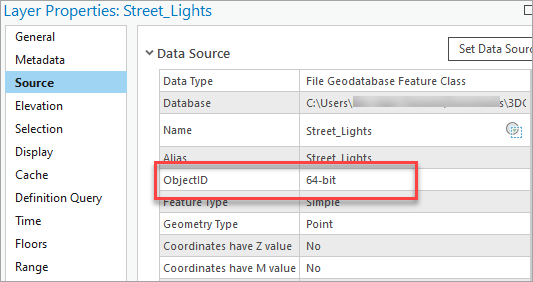
The image below shows the Street_Lights feature class with a 64-bit object ID type.
Procedure
- Open the ArcGIS Pro project.
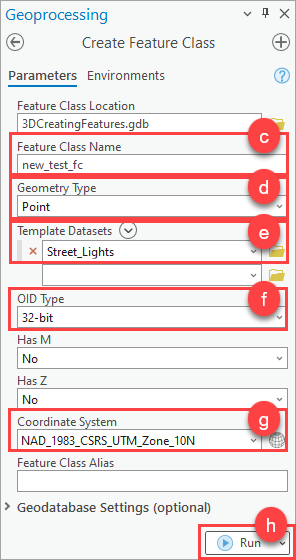
- Create a new feature class with a 32-bit object ID type using the Create Feature Class tool.
- On the Analysis tab, in the Geoprocessing group, click Tools.
- In the Geoprocessing pane, search for and select Create Feature Class (Data Management Tools).
- In the Create Feature Class pane, specify the new feature class name. In this example, new_test_fc is used.
- For Geometry Type, select the same geometry type as the existing feature class. In this example, Point is selected as Street_Lights is a point feature class.
- For Template Datasets, select the existing feature class to copy the template of the attribute fields.
- For OID Type, select 32-bit from the drop-down list.
- For Coordinate System, select the same coordinate system as the existing feature class to ensure the new features are placed at the correct location on the map.
- Configure the other parameters if necessary and click Run.
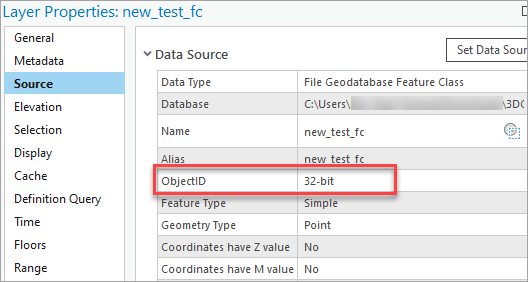
The image below shows the new_test_fc feature class with a 32-bit object ID type.
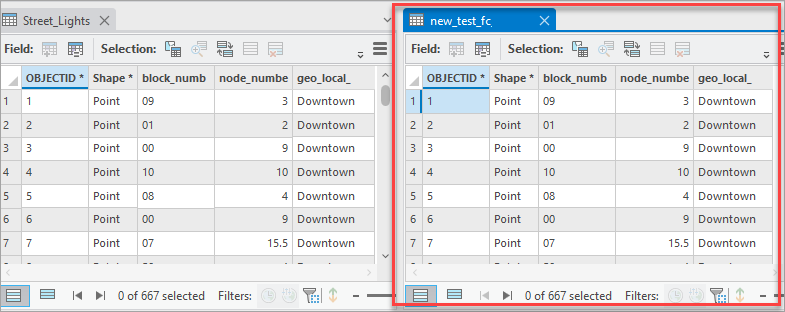
- Append the attributes from the existing feature class to the new feature class created in Step 2 using the Append tool.
The image below shows the new_test_fc attribute table containing the attributes from the original dataset.
Article ID: 000032106
- ArcGIS Pro 3 2
Get support with AI
Resolve your issue quickly with the Esri Support AI Chatbot.


Related Information
Discover more on this topic
Search for related information
Find training related to this topic
Explore ideas and give feedback
Get help from ArcGIS experts
Start chatting now