HOW TO
Create elevated 3D polygons from a surface layer in ArcGIS Pro
Summary
Elevated 3D polygons offer realistic visual representations derived from surface datasets such as digital elevation models (DEMs) or raster layers. They are particularly useful for flood visualization, as they can depict the extent of inundation at specific elevation levels. This helps in assessing the potential impact of flooding on elevated infrastructure, including bridges, overpasses, and multi-level parking structures. This article describes the workflow to create elevated 3D polygons from a surface layer in ArcGIS Pro.
Procedure
Note:
The Interpolate Shape and Create TIN tools require a 3D Analyst license.
Note:
For instructions to find and use a geoprocessing tool, refer to ArcGIS Pro: Find a geoprocessing tool.
- Open the ArcGIS Pro project containing the surface layer.
- Create a polygon feature class and create polygon features as desired. For instructions, refer to ArcGIS Pro: Create a stand-alone feature class and ArcGIS Pro: Create polygon features. Skip this step if using an existing polygon feature class.
- Convert the polygon features to 3D features using the Interpolate Shape tool.
- In the Interpolate Shape pane, for Input Surface, select the surface layer.
- For Input Features, select the existing polygon feature layer or the one created in Step 2 from the drop-down list.
- Click Run.
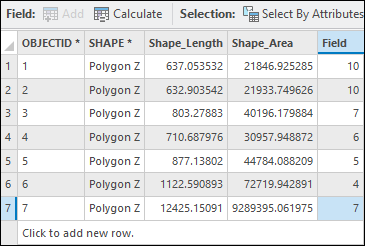
- Add a new elevation field in the interpolated polygon feature layer and populate the field.
- In the Contents pane, right-click the output layer created in Step 3 and select Attribute Table.
- In the attribute table, click Add Field to open the Fields view.
- Configure the new field as desired. Refer to ArcGIS Pro: Create a field and apply a domain and default value for instructions and more information.
- On the Fields tab, in the Manage Edits group, click Save. Close the Fields view.
- In the attribute table, double-click each cell in the new field and enter the desired elevation values.
- On the Edit tab, click Save to apply the changes. Close the attribute table.
- Elevate the interpolated polygon features above the ground surface using the Adjust 3D Z tool.
Note:
This tool modifies the input features. To create a backup, export the feature layer to another geodatabase. Refer to ArcGIS Pro: Export Data for instructions.
- In the Adjust 3D Z pane, for Input Features, select the interpolated polygon feature layer from the drop-down list.
- For Adjust Z Value, select Field and select the newly added field created in Step 4 from the drop-down list.
- Click Run.
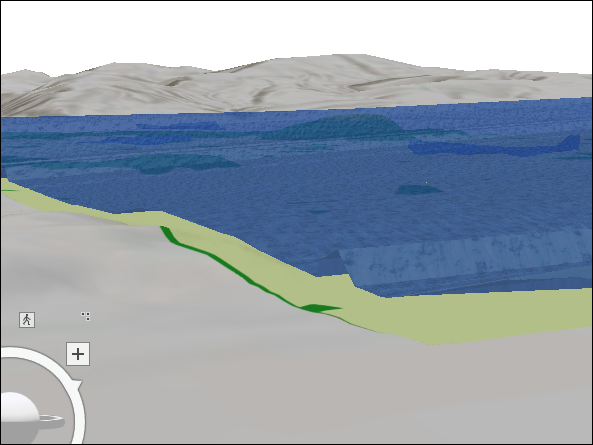
- Convert the 2D map to a 3D scene. Refer to ArcGIS Pro: Convert a map to a scene for instructions.
The image below shows the elevated 3D polygons derived from the ground surface in the local scene.
Article ID: 000036762
- ArcGIS Pro
Get support with AI
Resolve your issue quickly with the Esri Support AI Chatbot.


Related Information
Discover more on this topic
Search for related information
Find training related to this topic
Explore ideas and give feedback
Get help from ArcGIS experts
Start chatting now