HOW TO
Create custom ArcGIS Pro shortcuts by license type
Summary
Custom batch files provide the flexibility to launch ArcGIS Pro with different license types and license levels. This is useful in both Concurrent Use and Single Use environments, where users may need to switch licenses based on task requirements. This article provides the workflow to create custom batch files for ArcGIS Pro based on license type and license level.
Procedure
Note:
Ensure all license types and license levels are authorized on the machine before following the workflow provided.
- On the machine, create a new text file using a text editor such as Notepad.
- In the text file, input the following script:
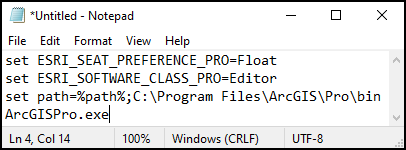
set ESRI_SEAT_PREFERENCE_PRO=<license_type>
set ESRI_SOFTWARE_CLASS_PRO=<license_level>
set path=%path%;C:\Program Files\ArcGIS\Pro\bin
ArcGISPro.exe
- For the <license_type> variable, specify:
- Float for Concurrent Use license.
- Fixed for Single Use license.
- For the <license_level> variable, specify:
- Viewer for the Basic license type.
- Editor for the Standard license type.
- Professional for the Advance license type.
Note:
For the 'set path' parameter, the default path for the ArcGIS Pro.exe file is used in this script. Specify the path appropriately if this path is changed during the installation process.
The image below shows the script used for this article. Float is specified for the Concurrent Use license, and Editor is specified for the Standard license type.
- Save the script as a batch file.
- On the text file, click File and click Save As....
- In the Save As window, specify a name for the file and type .bat at the end of the name.
- On the Save as type drop-down menu, select All Files, and click Save.
- Create a shortcut and a custom shortcut icon for the batch file.
- Right-click the batch file icon and select Create shortcut.
- Right-click the shortcut and select Properties.
- Click the Shortcut tab and select Change Icon....
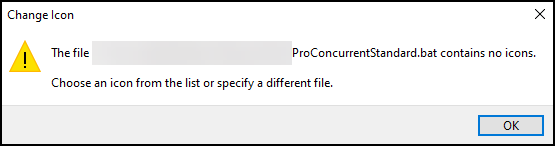
- When the "The file <.bat file directory> contains no icons. Choose an icon from the list or specify a different file" warning message is returned, click OK.
- In the Change Icon window, select an icon and click OK.
- In the Shortcut Properties window, click Apply and OK.
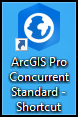
The image below shows the shortcut created for ArcGIS Pro with the Concurrent Use license type and the Standard license level.
Article ID: 000031505
- ArcGIS Pro 3 1
- ArcGIS Pro 3 0
- ArcGIS Pro 3 2
Get support with AI
Resolve your issue quickly with the Esri Support AI Chatbot.


Related Information
Discover more on this topic
Search for related information
Find training related to this topic
Explore ideas and give feedback
Get help from ArcGIS experts
Start chatting now