HOW TO
Create an MGRS locator in ArcGIS Pro
Summary
In ArcGIS Pro, the Locate pane supports direct MGRS coordinate searches for map navigation; however, these searches are limited to coordinate-based navigation and are not returned as locator results.
Creating an MGRS locator allows MGRS coordinate values to be indexed and returned as formal locator matches in the Locate pane, enabling consistent, repeatable searches using a reusable locator file.
This article provides the workflow to create an MGRS locator in ArcGIS Pro that returns MGRS coordinate results in the Locate pane.
Procedure
- In ArcGIS Pro, open the project and create a point feature class. Refer to ArcGIS Pro: Get started editing for more information.
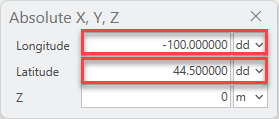
- Create the feature class at known latitude and longitude coordinates using the Absolute X,Y,Z command. Refer to ArcGIS Pro: Specify an exact x,y,z location for more information. For Step 3, select the dd unit format for the coordinates.
- On the Analysis tab, in the Geoprocessing group, click Tools.
- In the Geoprocessing pane, search for and click Calculate Geometry Attributes (Data Management Tools).
- In the Calculate Geometry Attributes pane, configure the parameters as follows:
- For Input Features, select the layer.
- For Geometry Attributes Field (Existing or New), create new fields for the latitude and longitude values and the properties by clicking the drop-down menu under Property. Select Point y-coordinate for latitude and Point x-coordinate for longitude.
- For Coordinate Format, select Decimal Degrees from the drop-down menu.
- For Coordinate System, select the coordinate system for the layer from the drop-down menu.
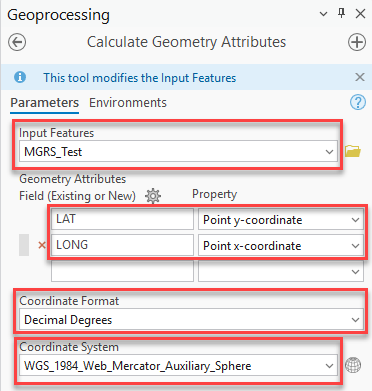
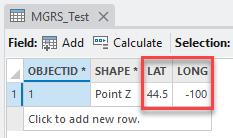
- Click Run. The output is new fields with coordinate values added to the table.
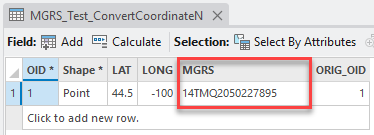
- Use the Convert Coordinate Notation (Data Management Tools) tool to convert the latitude and longitude coordinates into MGRS coordinates.
- On the Geoprocessing tab, clickBack to return to the Geoprocessing pane.
- In the Geoprocessing pane, search for and click Convert Coordinate Notation (Data Management Tools).
- In the Convert Coordinate Notation pane, select the table from the Input Table drop-down menu. In this example, MGRS_Test is selected.
- For Input Coordinate System, select the coordinate system of the layer.
- For Output Feature Class, specify the output geodatabase or folder for the source table.
- For X Field (Longitude), select the longitude field name from the drop-down menu.
- For Y Field (Latitude), select the latitude field name from the drop-down menu.
- For Output Coordinate System, select the coordinate system of the layer from the drop-down menu.
- For Input Coordinate Format, select DD 2 from the drop-down menu.
- For Output Coordinate Format, select MGRS from the drop-down menu.
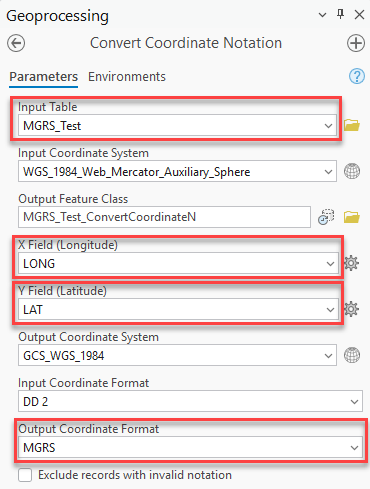
- Click Run. The output is a new table with a new field containing an MGRS coordinate.
- Use the Create Locator (Geocoding Tools) tool to create the locator.
- On the Geoprocessing tab, click Back to return to the Geoprocessing pane.
- In the Geoprocessing pane, search for and click Create Locator (Geocoding Tools).
- In the Create Locator pane, select the new table from the Primary Table(s) drop-down menu and select POI from the Role drop-down menu.
- Under Field Mapping, select MGRS from the drop-down menu for *Place Name field.
- For Output Locator, specify the output address locator file. In this example, the output locator is MGRS_Test_Locator.
- For Language Code, select English.
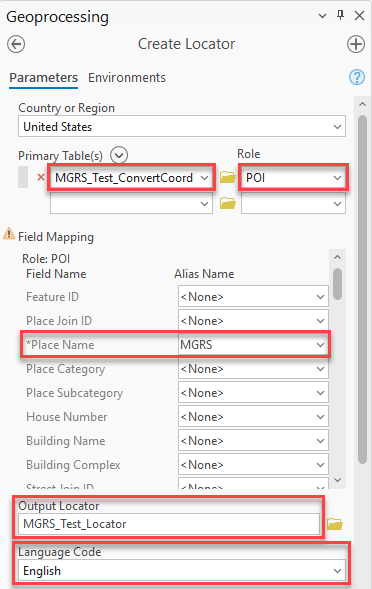
- Leave the other parameters as default and click Run.
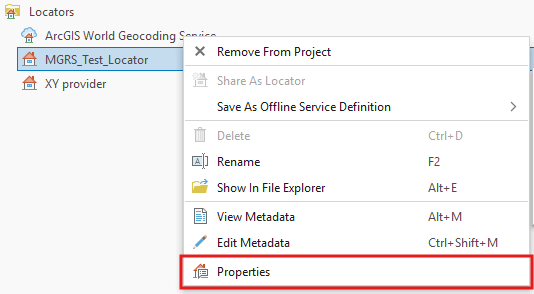
- Navigate to the Catalog pane, click Locators, right-click the newly created locator and click Properties.
- In the Locator Properties dialog box, click Geocoding options and expand the Match Options section.
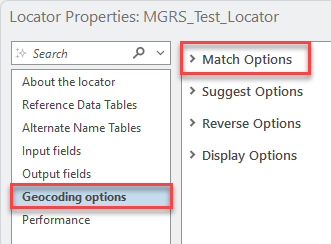
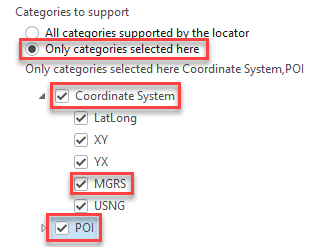
- Under Categories to support, select the Only categories selected here option and check the box for the Coordinate System and POI category group.
- Click OK.
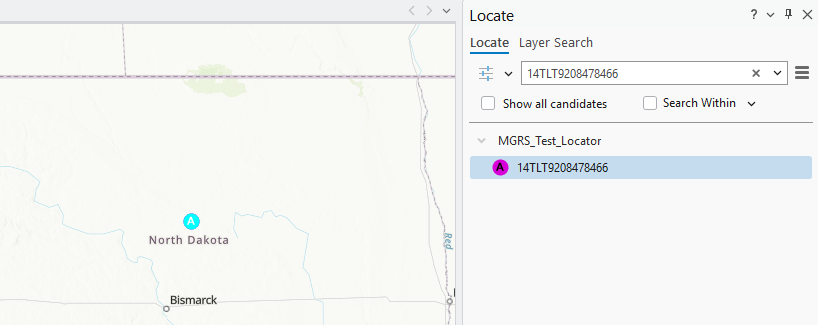
The map below shows the newly created MGRS locator has returned the MGRS coordinate result when the Locate pane is used.
Article ID: 000034257
- ArcGIS Pro
Get support with AI
Resolve your issue quickly with the Esri Support AI Chatbot.


Related Information
Discover more on this topic
Search for related information
Find training related to this topic
Explore ideas and give feedback
Get help from ArcGIS experts
Start chatting now