HOW TO
Create a temporary circle in ArcGIS Online Map Viewer
Summary
In some instances, a temporary circle needs to be created in ArcGIS Online Map Viewer for reference and analysis purposes. This article describes how to create a temporary circle with a specific radius length by creating a map notes layer in Map Viewer, instead of using the Create Buffers tool that requires privileges to creature features and perform spatial analysis.
Procedure
- In ArcGIS Online, open the desired hosted feature layer in Map Viewer.
- At the top-left corner, click Add > Add Map Notes.
- In the Add Map Notes dialog box, type a name for Name, and select Map Notes for Template. Click CREATE.
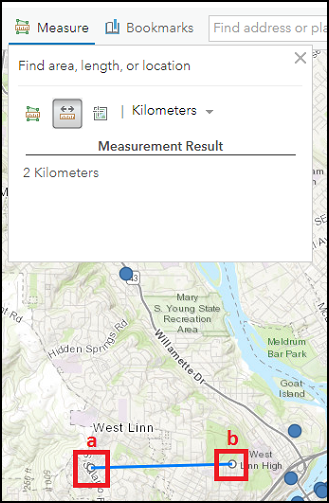
- On the ribbon, click Measure. Click the Distance tool
 , and select the unit of measurement from the drop-down list.
 - Construct a radius line.
- Click a point of interest on the map.
- Drag the line, and double-click to create an endpoint at the desired radius length. In this example, the radius length is two kilometers.
- Create a circle based on the constructed radius line.
- Click Circle in the Add Features pane.
- Click one of the line endpoints, drag until the circle’s edge touches the other endpoint, and release the cursor.
- Accept the default values in the Areas dialog box, or refer to Steps 5 and 6 in ArcGIS Online: Add map notes for instructions to complete the fields.
- Click CLOSE.
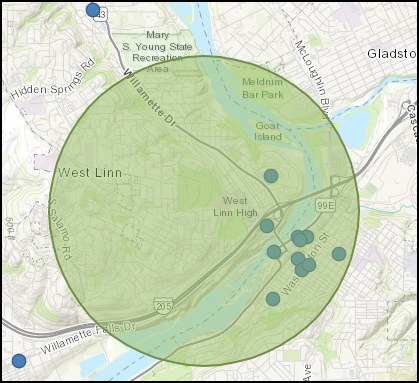
In this example, a circle with a diameter of four kilometers is created around West Linn High as reference to a housing development project.
Note:
A circle’s diameter is twice the circle’s radius. The color of the circle may differ from the image shown below.
- Click the Close button
 on the top-right corner of the Measure window.
 - Optionally, refer to ArcGIS Online: Save maps for the guide on saving the map, or save the map notes layer as a feature collection item in My Content.
Note:
By default, the features in a map notes layer are saved with the map to allow the map author to edit and save the edits.
Article ID: 000024267
- ArcGIS Online
Get support with AI
Resolve your issue quickly with the Esri Support AI Chatbot.


Related Information
Discover more on this topic
Search for related information
Find training related to this topic
Explore ideas and give feedback
Get help from ArcGIS experts
Start chatting now