HOW TO
How to configure SMTP servers in Portal for ArcGIS for testing
Summary
This guide provides a step-by-step process for configuring SMTP servers in Portal for ArcGIS to send notifications to members. Follow these instructions for a quick test setup.
The included SMTP server examples are Gmail and Hotmail.
Procedure
- Mail account setup: There are two methods, Gmail or Hotmail SMTP.
- Gmail: Ensure your Gmail account has two-step verification enabled and create an app password. Note: The app password is required for this SMTP configuration, so keep it secure.
- Hotmail: For Outlook or Hotmail SMTP to work, make sure that POP or IMAP access is enabled. For more details, refer to the Microsoft site: POP, IMAP, and SMTP settings for Outlook.com
- Access ArcGIS portal settings.
- Log in to Portal for ArcGIS as an administrator. Navigate to Organization > Settings > Security.
- Under Email settings, select Manage email settings.
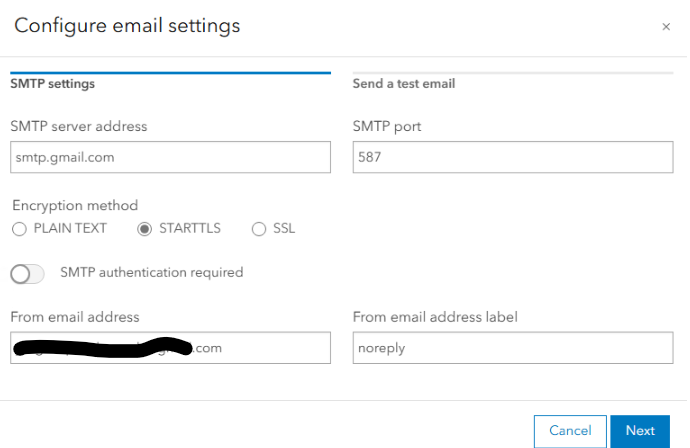
- Configure email settings, fill in the following details in the Configure email settings form:
- SMTP server address: smtp.gmail.com or smtp.office365.com
- SMTP port: 587
- Encryption method: STARTTLS
- SMTP authentication: Optional (can be unchecked). If checked, provide your Gmail or Hotmail address and app password or Hotmail password.
- From email address: Your Gmail or Hotmail address
- From email address label: Optional
Example screenshot of the settings using Gmail SMTP:
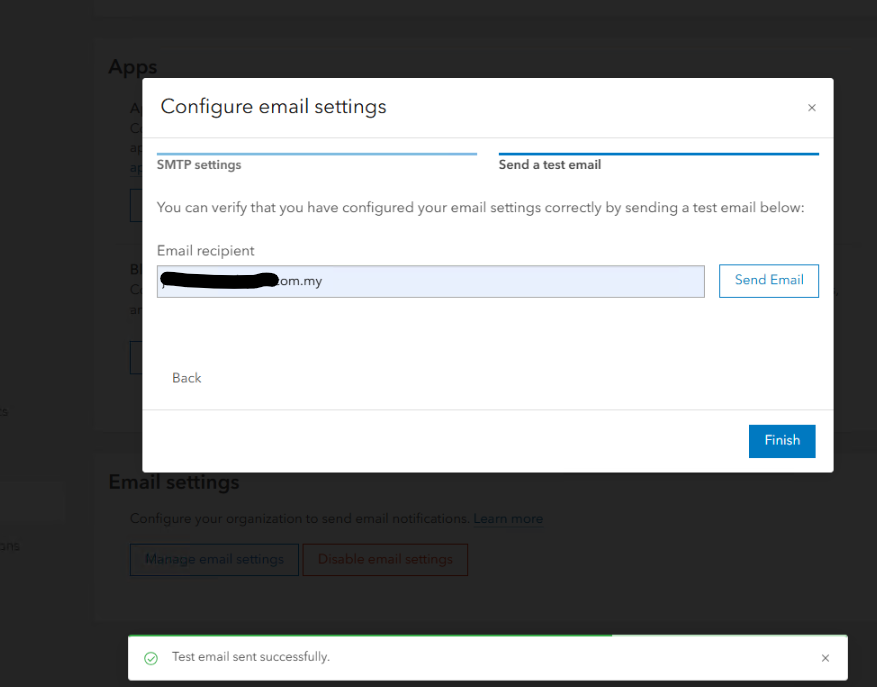
- Click Next to proceed.
- Send a test email. Under the Send a test email section, enter a recipient email address for testing and click Send Email.
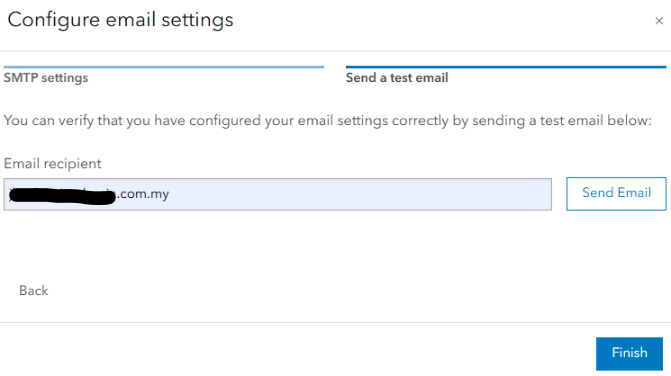
- Confirmation: If the setup is successful, you will receive the message "Test email sent successfully." Additionally, check the recipient's mailbox for confirmation.
Article ID: 000033359
Software:
- Portal for ArcGIS
Get support with AI
Resolve your issue quickly with the Esri Support AI Chatbot.


Related Information
Discover more on this topic
Search for related information
Find training related to this topic
Explore ideas and give feedback
Get help from ArcGIS experts
Start chatting now