HOW TO
Configure OpenID Connect through Google accounts
Summary
OpenID Connect is an authentication layer on top of OAuth 2.0, which is similar to the Security Assertion Markup Language (SAML) authentication. It allows third-party applications to verify the identity of an end-user and provides basic user profile information. This article provides the instructions to configure OpenID Connect through Google accounts.
Procedure
In the Google API Console
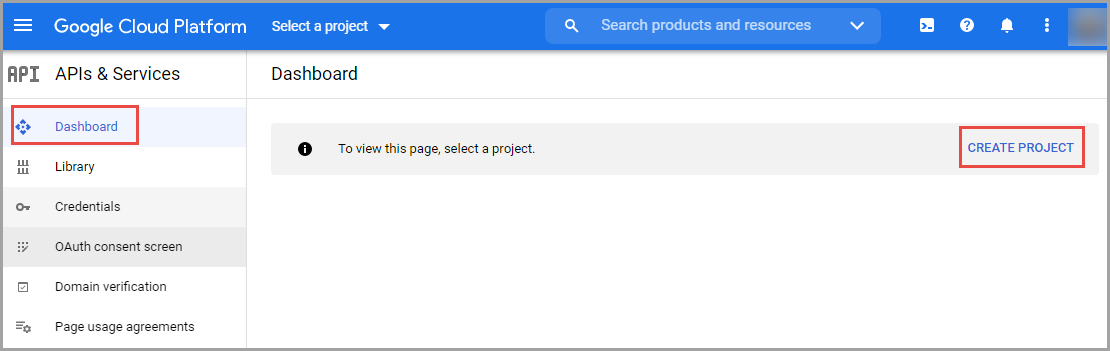
- Open the Google API Console, and log in with a Google account.
- Click Dashboard > CREATE PROJECT.
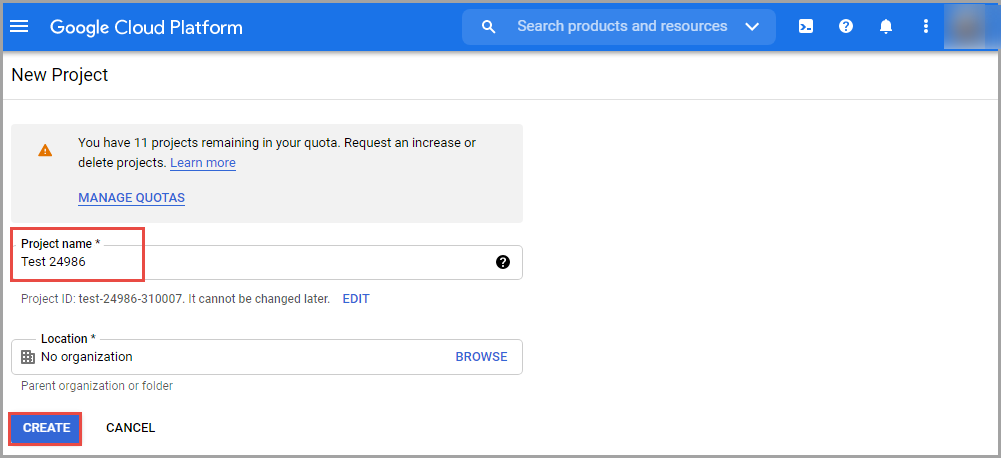
- On the New Project page, fill in the Project name box, and click CREATE.
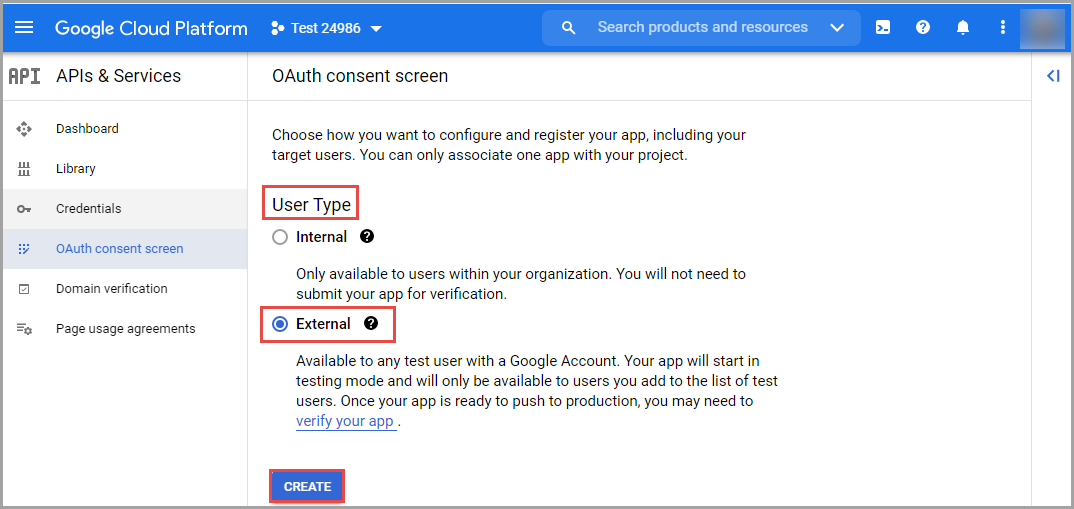
- Click OAuth consent screen, and select the External option for User Type. Click CREATE.
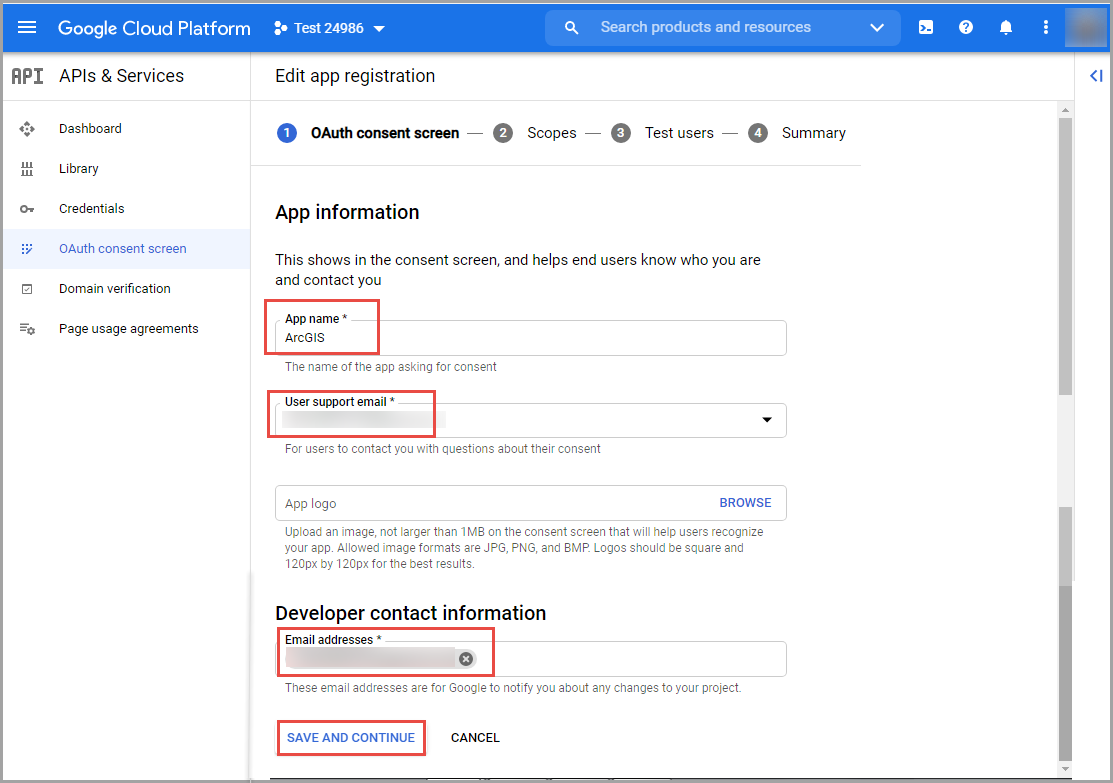
- On the Edit app registration page in the OAuth consent screen section, fill in the App name, User support email, and Email addresses boxes. Click SAVE AND CONTINUE.
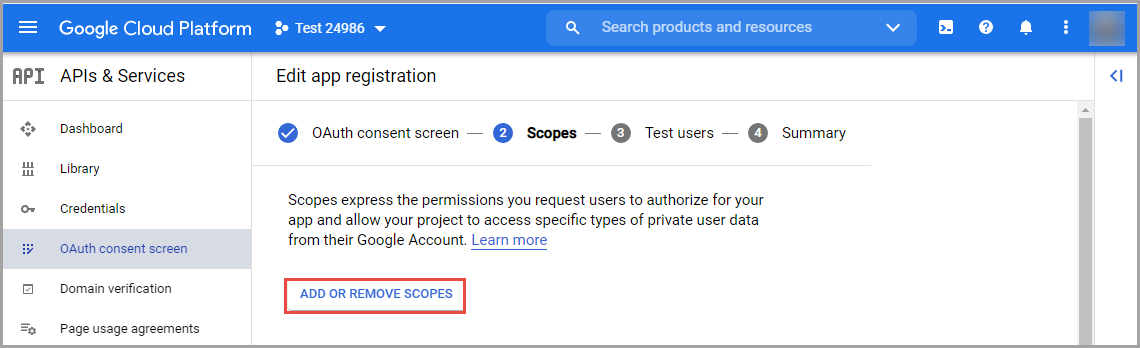
- In the Scopes section, click ADD OR REMOVE SCOPES.
- In the Update selected scopes window, check the /auth/userinfo.email, /auth/userinfo.profile, and openid check boxes. Click UPDATE.

- Click SAVE AND CONTINUE.
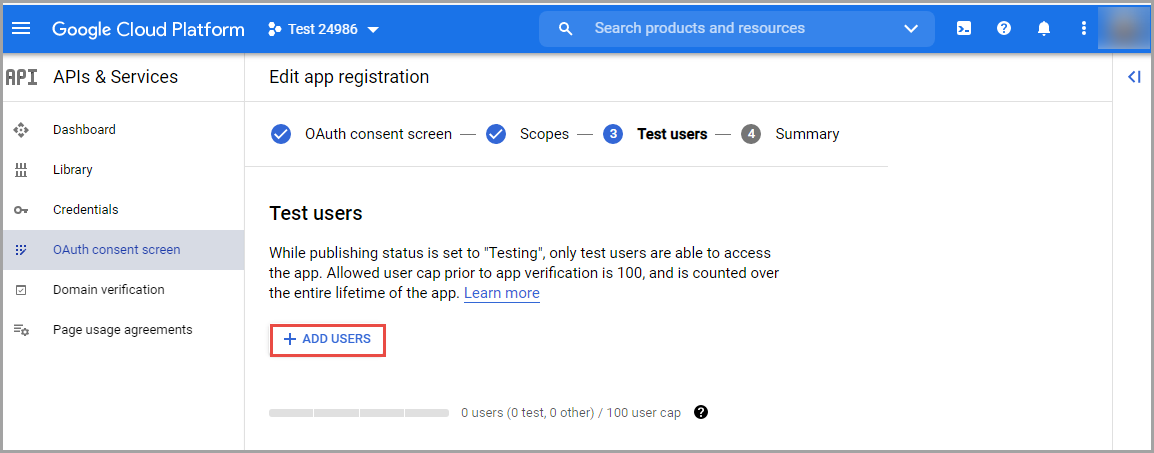
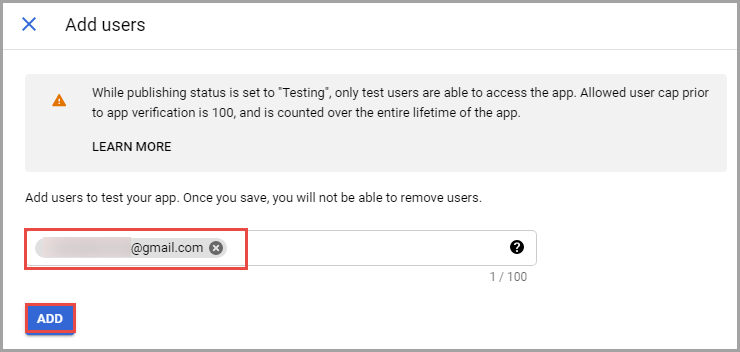
- In the Test users section, click ADD USERS. In the Add users window, fill in the email address of the test users, and click ADD.
- Click SAVE AND CONTINUE.
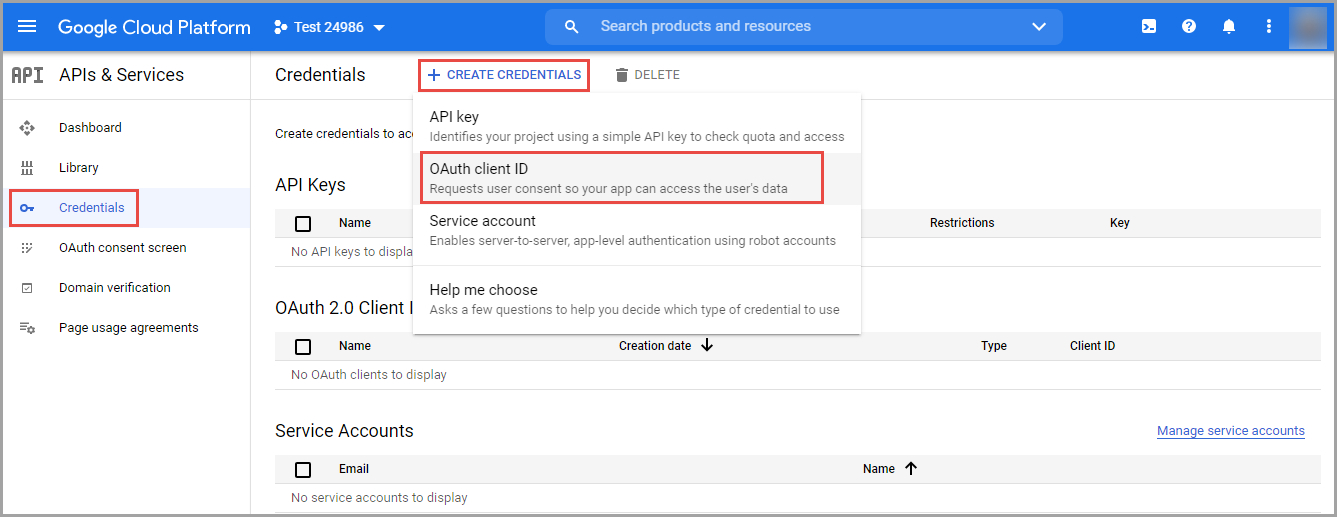
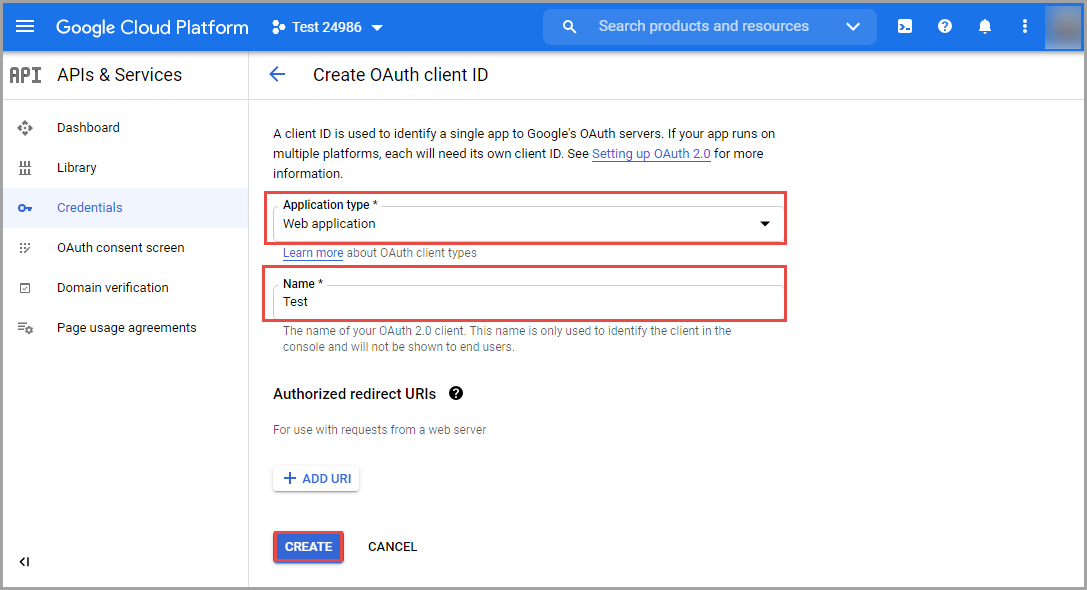
- Click Credentials > CREATE CREDENTIALS > OAuth client ID.
- On the Create OAuth client ID page, click the Application type box, and select Web application.
- Fill in the name in the Name box, and click CREATE. A Client ID and Client Secret is created. Proceed with the next workflow in ArcGIS Online.
In ArcGIS Online
- Log in to the ArcGIS Online organizational account.
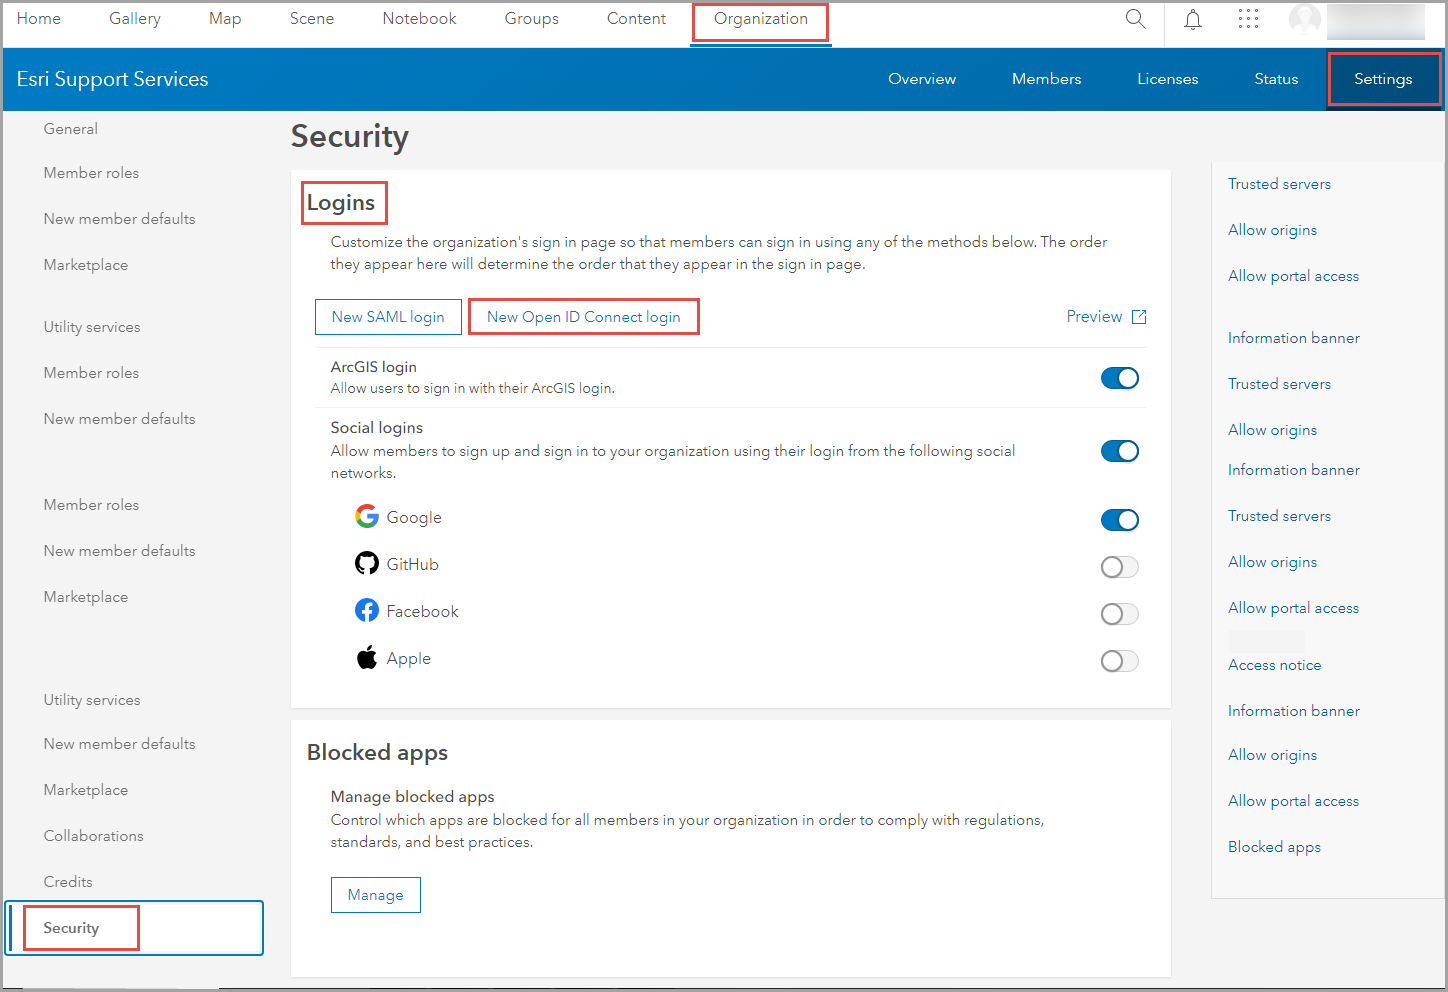
- Click the Organization tab > Settings. Navigate to Security.
- On the Security page, navigate to the Logins section. Click New Open ID Connect login.
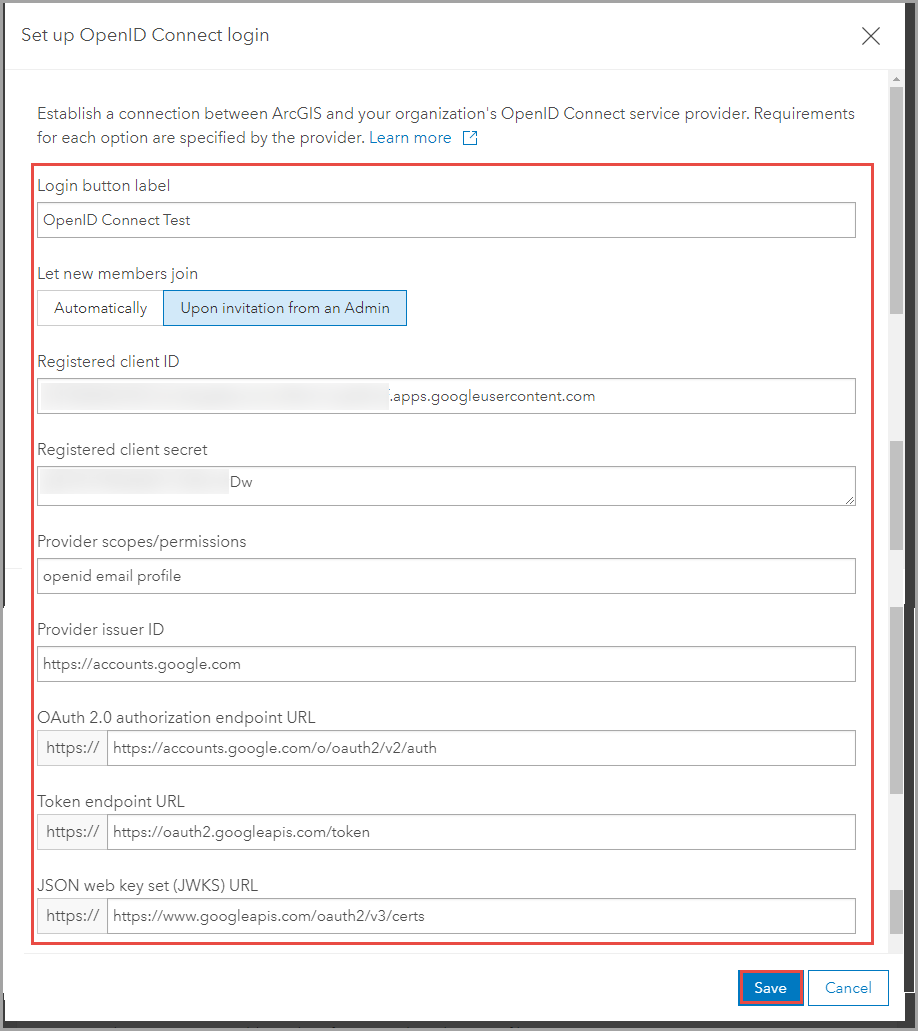
- In the Set up OpenID Connect login window, fill in the Login button label, Registered client ID, Registered client secret, Provider scopes/permissions, Provider issuer ID, OAuth 2.0 authorization endpoint URL, Token endpoint URL, and JSON web key set (JWKS) URL boxes.
Note:
The Registered client ID and Registered client secret sections are obtained from Step 13 in the previous workflow. The Provider issuer ID, OAuth 2.0 authorization endpoint URL, Token endpoint URL, and JSON web key set (JWKS) URL sections are obtained from the openid configuration web page.
- Click Save.
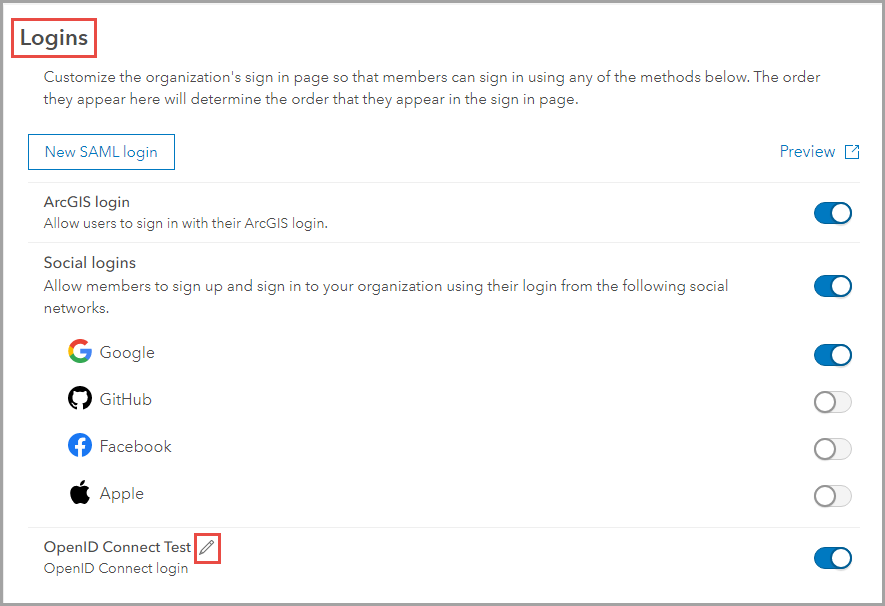
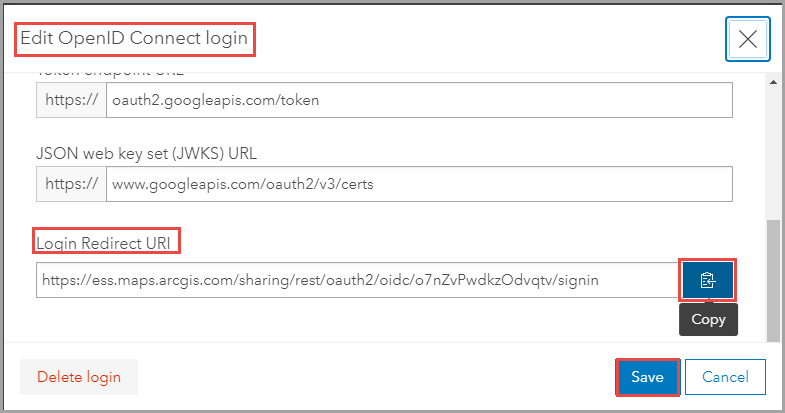
- Click the Edit icon. In the Edit OpenID Connect login window, navigate to the Login Redirect URI section. Click the Copy button.
- Click Save.
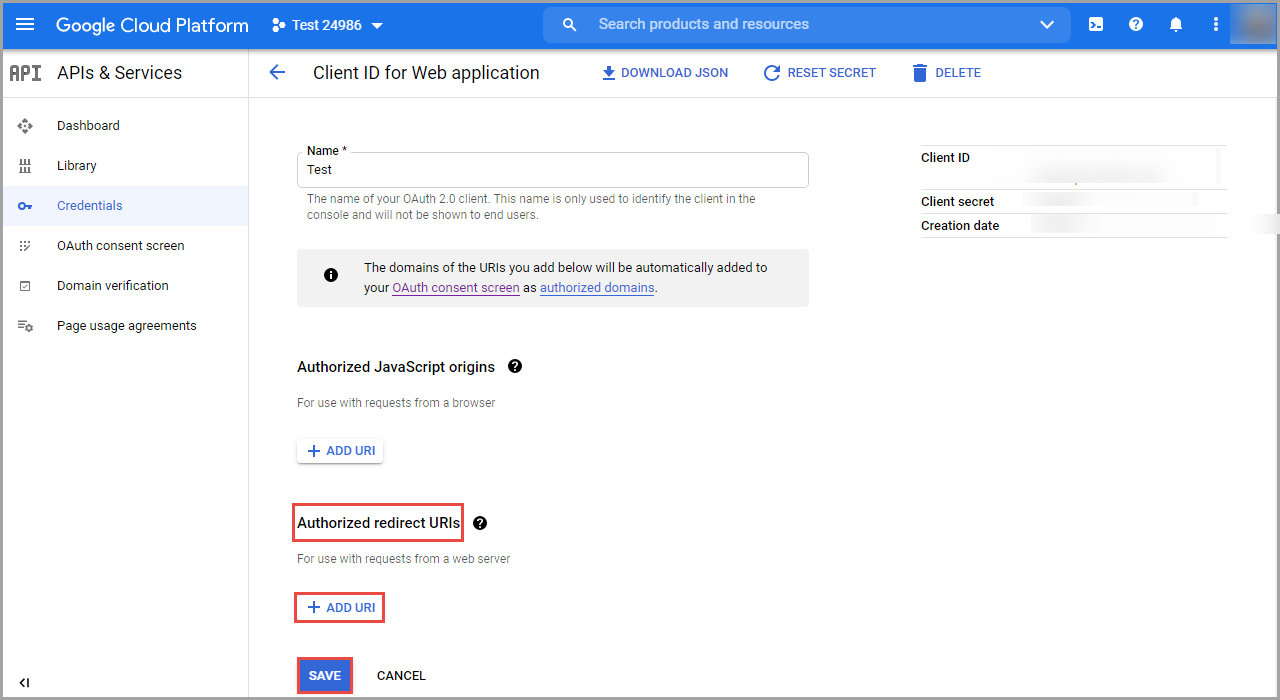
- Open Google API Console once more, and navigate to APIs & Services. Click the Credentials tab.
- In the OAuth 2.0 Client IDs section, click the Edit OAuth client icon on the newly created project.

- Navigate to the Authorized redirect URIs section, and click ADD URI. Paste the URI from Step 6, and click SAVE.
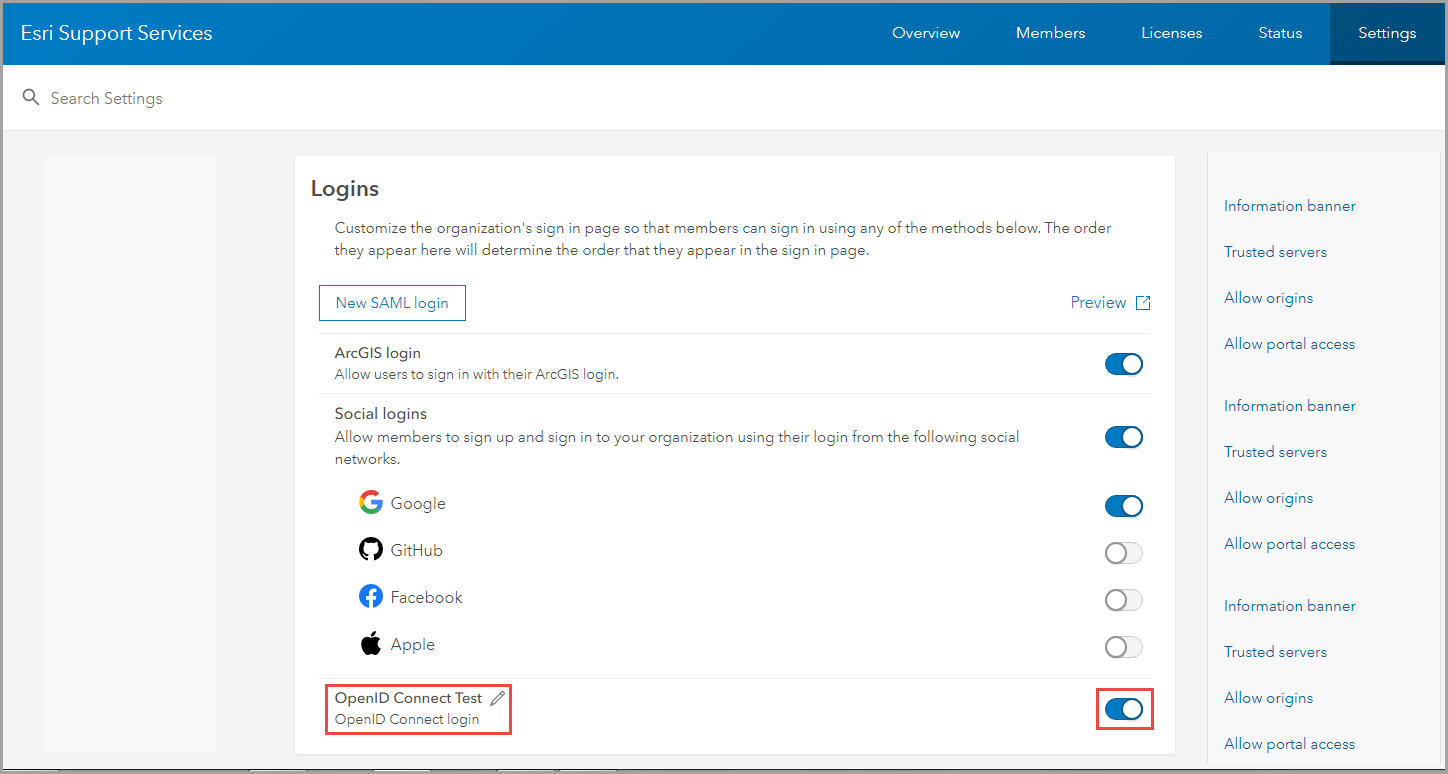
- On the Security page in ArcGIS Online, navigate to the Logins section. Toggle the created OpenID Connect login option on.
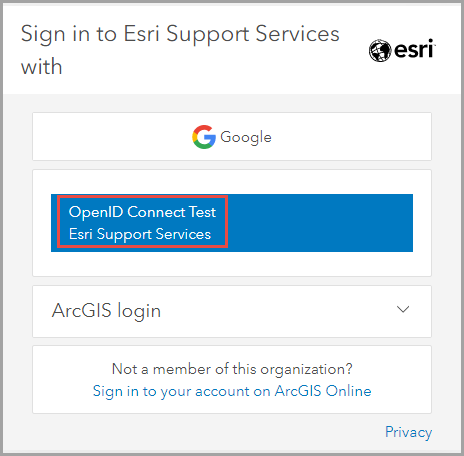
- Log out from ArcGIS Online, and log in again through the ArcGIS Online login page.
Article ID: 000024986
- ArcGIS Online
- Third Party Product
Get support with AI
Resolve your issue quickly with the Esri Support AI Chatbot.


Related Information
Discover more on this topic
Search for related information
Find training related to this topic
Explore ideas and give feedback
Get help from ArcGIS experts
Start chatting now