HOW TO
Configure a hyperlink in web map pop-up to create an email when adding/editing features
Summary
In ArcGIS Online, when adding a new feature to a web map, or editing an existing one, it is possible to configure a pop-up to send an email notification of the update to the web map's owner. This article describes the workflow in ArcGIS Online to send email notifications from web map pop-ups when these changes are made.
Procedure
Use one of the methods below to create a hyperlink in the web map pop-up to create an email that can be sent manually when adding new features.
Note:
This workflow does not automatically send email notifications, but creates a draft email that allows specifying the subject and recipient(s), customizing the email body, and using attributes from the added feature if necessary.

To automate email notifications, consider using alternative solutions, as described in Automate email notifications for field updates, and How To: Create a webhook with Make which sends an email notification when a feature service is updated
Add the email URL in the pop-up's custom attribute display
- Log in to the ArcGIS Online organizational account.
- Click Content, and click the My Content tab. Select the web map to open in Map Viewer.
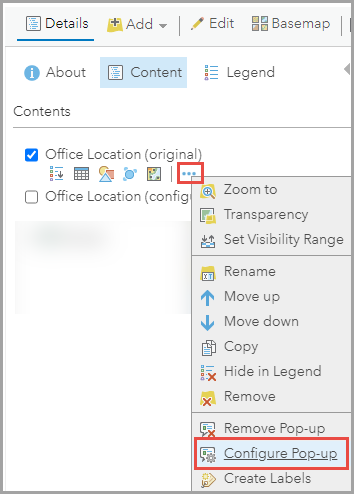
- In ArcGIS Online Map Viewer, in the Contents pane, click the More Options icon on the layer.
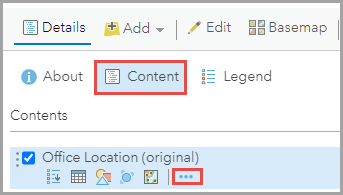
- Select Configure Pop-up.
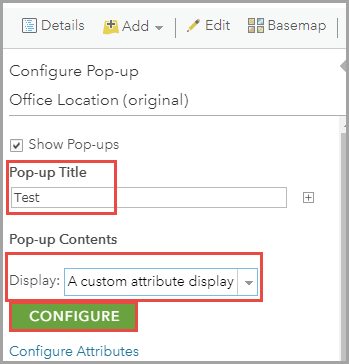
- In the Configure Pop-up pane, fill in the Pop-up Title box. Under Pop-up Contents, click the drop-down list next to Display, and select A custom attribute display.
- Click the CONFIGURE button.
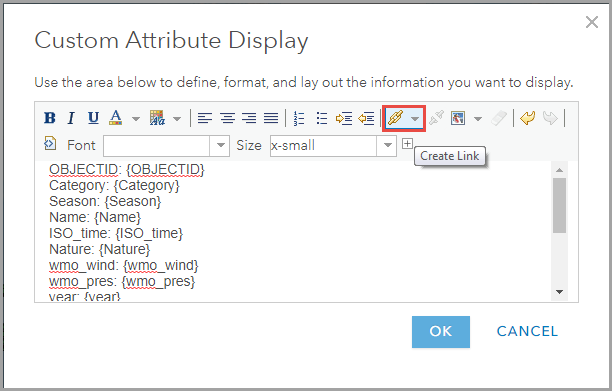
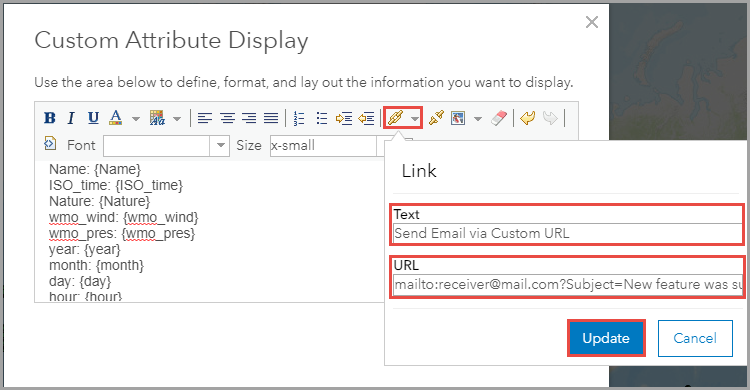
- In the Custom Attribute Display window, add the desired attributes in the text box, and click the Create Link icon.
- In the Link pop-up window, fill in the Text and URL text boxes. Copy and paste the following URL for a sample template of the email, and click Update.
mailto:receiver@mail.com?Subject=New feature was submitted by {FieldWorker_Name}&body=Hi,%0D%0A%0D%0AA new feature was added.%0D%0ACondition: {Condition}%0D%0ANext Inspection Date:{NextInspection_Date}%0D%0A%0D%0AThis email was created via a custom URL
Note:
Click the View HTML Source icon in the Custom Attribute Display window to view and edit the URL.
The following image displays the HTML source view.

- Click OK to close the Custom Attribute Display window. Click OK once again to close the Configure Pop-up pane.
- Click Save to save the changes in the web map.
Note:
The link to the email is available after the feature is added.
Add the email URL to the pop-up's attribute expressions
Note:
Ensure the fields included in the expressions are added to the attribute fields before proceeding with the workflow below.
- Log in to the ArcGIS Online organizational account.
- Click Content, and click the My Content tab. Select the web map to open in Map Viewer.
- In ArcGIS Online Map Viewer, in the Contents pane, click the More Options icon on the layer.
- Select Configure Pop-up.
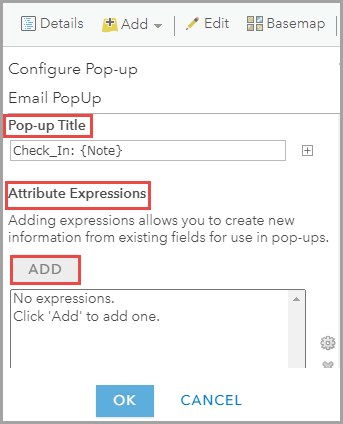
- In the Configure Pop-up pane, fill in the Pop-up Title box, and navigate to the Attribute Expressions section. Click ADD.
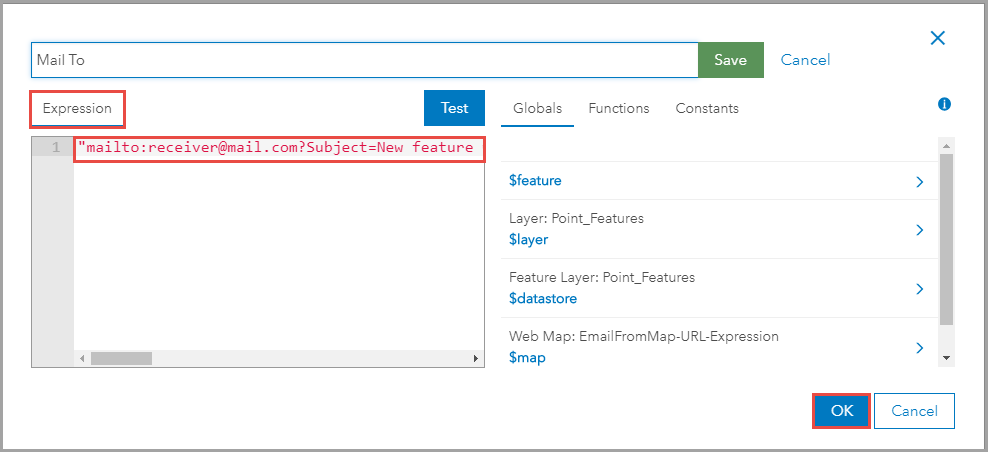
- In the Expression window, fill in the required expression script. The following script is an example of a sample template for the email.
"mailto:receiver@mail.com?Subject=New feature was submitted by "+$feature.FieldWorker_Name+"&body=Hi,%0D%0A%0D%0AA new feature was added.%0D%0ACondition: "+$feature.Condition+"%0D%0ANext Inspection Date: "+$feature.NextInspection_Date+"%0D%0A%0D%0AThis email was created via an Arcade Expression"
- Click OK to close the Expression window.
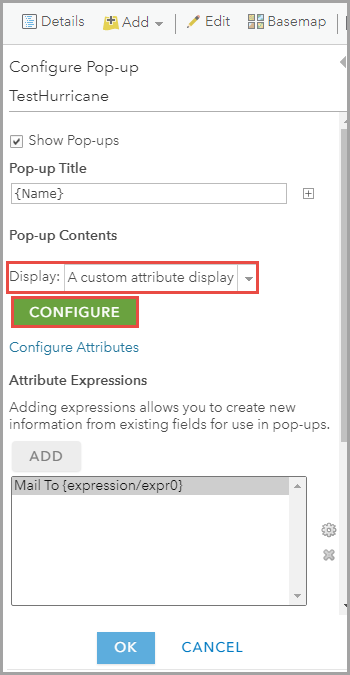
- In the Configure Pop-up pane, under Pop-up Contents, click the drop-down list next to Display, and select A custom attribute display.
- Click the CONFIGURE button.
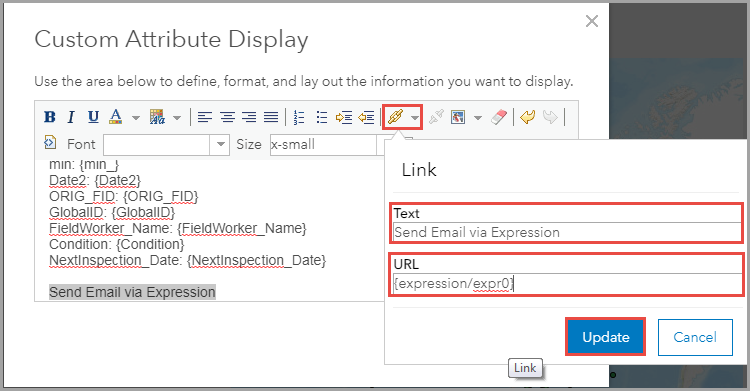
- In the Custom Attribute Display window, add the desired attributes in the text box, and click the Create Link icon.
- In the Link pop-up window, fill in the Text and URL text boxes. Copy and paste the following URL in the URL text box, and click Update.
{expression/expr0}
- Click OK to close the Custom Attribute Display window. Click OK once again to close the Configure Pop-up pane.
- Click Save to save the changes in the web map.
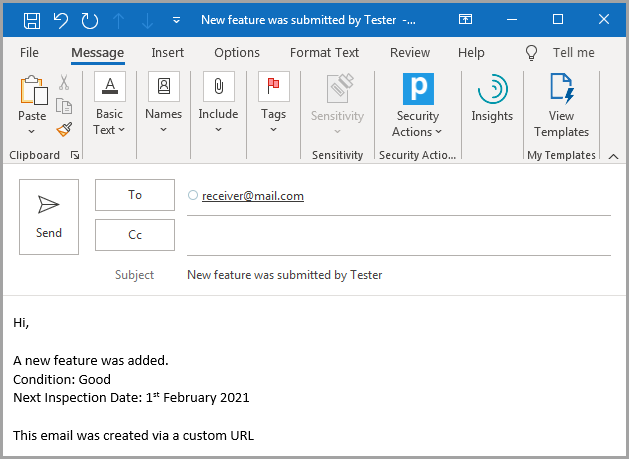
The following image displays the email notification window after clicking the link.
Article ID: 000023946
- ArcGIS Online
Get support with AI
Resolve your issue quickly with the Esri Support AI Chatbot.


Related Information
Discover more on this topic
Search for related information
Find training related to this topic
Explore ideas and give feedback
Get help from ArcGIS experts
Start chatting now