HOW TO
Combine schemas from different feature classes
Summary
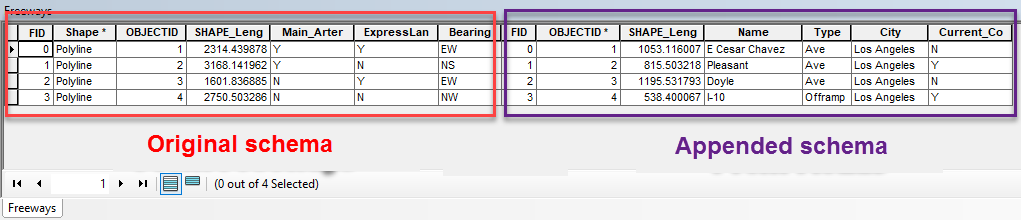
A schema from a feature class can be combined with a schema of another feature class without altering the original schema to maintain the structure of the geodatabase. The instructions provided describe how to combine schemas from two different feature classes.
Procedure
- In ArcMap, join the table containing the schema to be combined.
- In Table Of Contents, right-click one of the layers and select Joins and Relates > Join.
Note:
The selected layer is the layer that stores the combined schema at the end of this workflow.
- In the Join Data window, select Join Attributes from a table.
- For the field in the layer that the join will be based on, select OBJECTID.
Note:
Joins are best done with fields that are unique and do not contain repeating values.
- For the table to be joined to the first layer, select the second layer. The schema from this layer is appended to the first layer.
- For the field to base the join on, select OBJECTID.
Note:
It is not necessary that the selected fields have the same name. They merely have to have the same data type and unique non-repeating values that match each other.
- For the Join Options, select Keep all records.
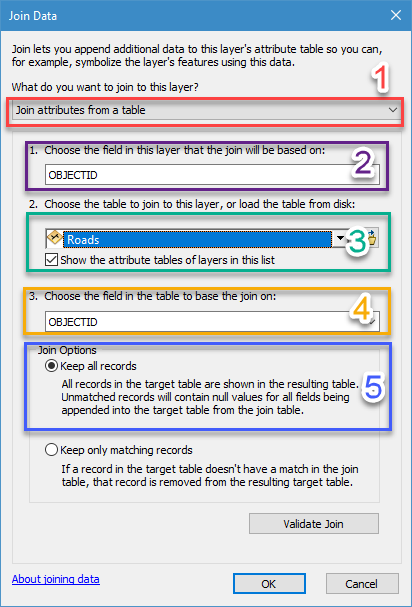
- Click OK to run the join. If prompted to create an index, select Yes. The joined layer contains the fields from the imported schema.
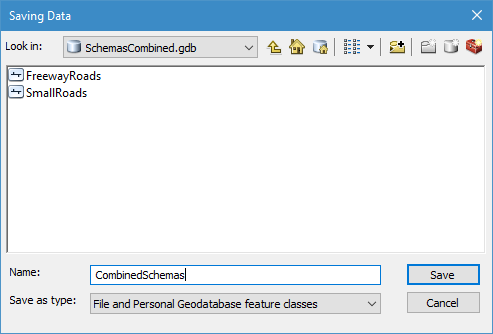
- To make the join permanent and editable, right-click the joined layer, and select Data > Export Data. Set a name for the Output feature class and locate it in a file geodatabase.
- Open the attribute table of the resulting feature class to verify that the schema from both feature classes are combined. Optionally, delete the unwanted fields. Refer to Deleting fields for steps to delete fields in the feature class.
- If necessary, delete unwanted attributes from the joined fields.
- Select the column containing unwanted data, right-click the column header, and select Field Calculator.
- In the Field Calculator window, set the field equal to "". This returns a blank value for all rows in the selected column.
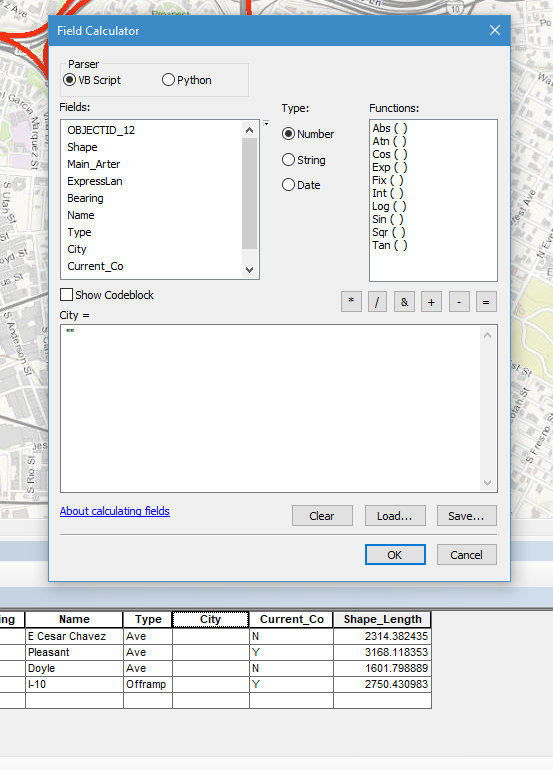
- Repeat this step until the desired columns are blank. Use these columns to enter new attributes based on the feature class.
Article ID: 000021995
Software:
- ArcMap
Get support with AI
Resolve your issue quickly with the Esri Support AI Chatbot.


Related Information
Discover more on this topic
Search for related information
Find training related to this topic
Explore ideas and give feedback
Get help from ArcGIS experts
Start chatting now