HOW TO
Center a table in the ArcGIS Enterprise portal and ArcGIS Online Map Viewer pop-ups
Summary
In Map Viewer in the ArcGIS Enterprise portal and ArcGIS Online, a table in a pop-up is left-aligned by default, which makes the information appear unbalanced or visually less appealing. HTML formatting can be used to center the table, improving readability and enhancing presentation quality.
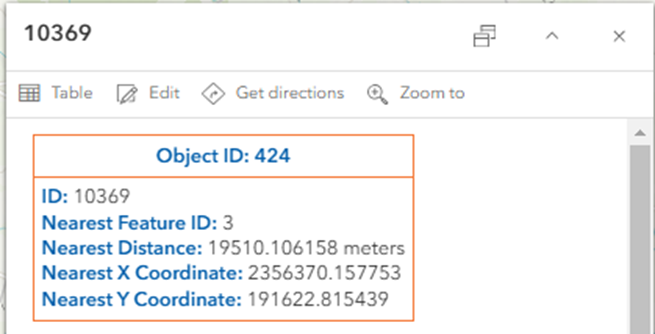
The image below shows the table is left-aligned by default in a pop-up.
This article provides the workflow to center a table in the ArcGIS Enterprise portal and ArcGIS Online Map Viewer pop-ups.
Procedure
- Log in to the ArcGIS Enterprise portal or ArcGIS Online and open the web map in Map Viewer.
- In Map Viewer, on the Settings toolbar, click Pop-ups
 .
. - In the Pop-ups pane, click Add content, and select Text.
- In the text editor, click Source
 .
. - Configure the HTML codes.
- This method only applies in ArcGIS Online.
<div style="display:flex; justify-content:center;">
- This method applies in both the ArcGIS Enterprise portal and ArcGIS Online.
<table style="border-collapse: collapse; margin: auto;">
The code block below shows the example of the full working script in the ArcGIS Enterprise portal and ArcGIS Online:
<div>
    <figure class="table">
        <table style="border-collapse: collapse; margin: auto;">
            <tbody>
                <tr>
                    <td style="border: 2px solid #f47735; padding: 5px;">
                        <p style="margin: 0; text-align: left;">
                            <span style="color: #005daa;"><strong>Object ID: {OID}</strong></span>
                        </p>
                    </td>
                </tr>
                <tr>
                    <td style="border: 2px solid #f47735; padding: 5px;">
                        <span style="color: #005daa;"><strong>ID: </strong></span><span>{ID}</span><br>
                        <span style="color: #005daa;"><strong>Nearest Feature ID: </strong></span><span>{NEAR_FID}</span><br>
                        <span style="color: #005daa;"><strong>Nearest Distance: </strong></span><span>{NEAR_DIST} meters</span><br>
                        <span style="color: #005daa;"><strong>Nearest X Coordinate: </strong></span><span>{NEAR_X}</span><br>
                        <span style="color: #005daa;"><strong>Nearest Y Coordinate: </strong></span><span>{NEAR_Y}</span>
                    </td>
                </tr>
            </tbody>
        </table>
    </figure>
</div>
- Click Source. The table is displayed in the text editor.
- Click OK to close the text editor.
- On the Contents toolbar, click Save and open > Save to save the modifications.
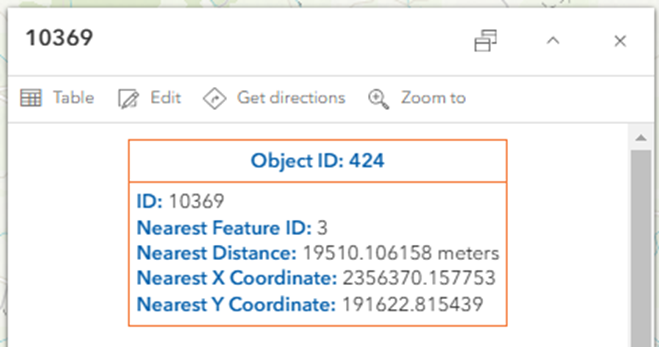
The image below shows the table is centered in the ArcGIS Enterprise portal and ArcGIS Online Map Viewer pop-up.
Article ID: 000034672
- ArcGIS Online
- Portal for ArcGIS
- ArcGIS Enterprise 11 3
- ArcGIS Enterprise 11 2
- ArcGIS Enterprise 11 4
Get support with AI
Resolve your issue quickly with the Esri Support AI Chatbot.


Related Information
Discover more on this topic
Search for related information
Find training related to this topic
Explore ideas and give feedback
Get help from ArcGIS experts
Start chatting now