HOW TO
Back up a PostgreSQL geodatabase for Esri Support Services
Summary
In certain instances, Esri Support Services may request a backup of a PostgreSQL database or geodatabase. This article outlines the required processes for backing up a PostgreSQL database to share with Esri Support.
While there can be multiple ways of backing up a database, there are specific supported processes for backing up these databases for use and successful restoration by Esri support.
Procedure
Note:
There is a video outlining the PostgreSQL geodatabase backup processes in this article available online: How To Backup a PostgreSQL (geo)database for Esri Support Services.
Prerequisites:
- Access to the psql executable and pg_dump utility on the database machine
- The database user credentials of a Database Administrator (a user with superuser authorization)
- Access to the location where the database backup will be stored - this is typically on the database server machine
Gathering important information about your PostgreSQL Environment:
- Open a command prompt as an administrator and change directories to the PostgreSQL bin folder, for example:
C:\Windows\system32>cd C:\Program Files\PostgreSQL\11\bin

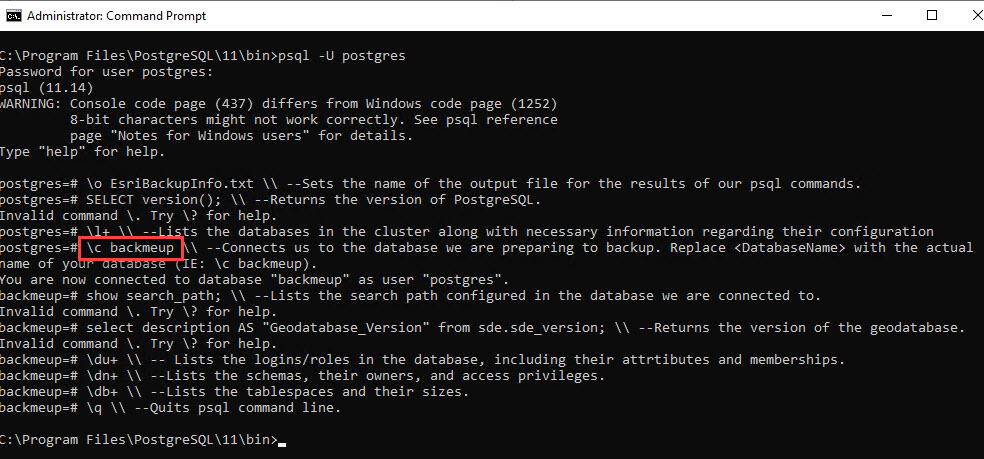
- Connect to psql as a superuser, for example:
C:\Program Files\PostgreSQL\11\bin>psql -U postgres

The script below gathers information about your database and database cluster that aids in the restoration of your database.
- Change the \c <DatabaseName> on the fourth line of the script below to match the name of the database you are preparing to back up.
- Copy and paste the entire script into the psql command prompt:
\o EsriBackupInfo.txt \\ --Sets the name of the output file for the results of our psql commands.
SELECT version(); \\ --Returns the version of PostgreSQL.
\l+ \\ --Lists the databases in the cluster along with necessary information regarding their configuration
\c <DatabaseName> \\ --Connects us to the database we are preparing to backup Replace <DatabaseName> with the actual name of your database (IE: \c backmeup).
show search_path; \\ --Lists the search path configured in the database we are connected to.
select description from sde.sde_version; \\ --Returns the version of the geodatabase.
\du+ \\ -- Lists the logins/roles in the database, including their attributes and memberships.
\dn+ \\ --Lists the schemas, their owners, and access privileges.
\db+ \\ --Lists the tablespaces and their sizes.
\q \\ --Quits psql command line.
- If necessary, press Enter to run the last line of the script and exit the psql command prompt to return to the bin folder.
- Using a file manager application such as Windows File Explorer, browse to the bin folder to locate the EsriBackupInfo.txt file generated by running the script. This must be provided to Esri Support along with the dump file that is created during the backup process.
Backing up the database:
- Return to the command line window and ensure that you are in the PostgreSQL bin directory:

- Update the script below substituting the items in brackets with appropriate values for your environment:
pg_dump -U <superuser> -p <port> -Fc -v -d <DatabaseName> -f "<PathToWriteBackupFileTo>"
Replace:
- <superuser> with a login role that has the superuser authority.
- <port> with the port # that your cluster is listening on. 5432 is the default.
- <DatabaseName> with the name of the database you are backing up.
- <PathToWriteBackupFileTo> with the location that you want to write the dump file to.
For information regarding the command line options used with pg_dump, please refer to the PostgreSQL pg_dump documentation.
- Copy and paste the updated pg_dump script into the command prompt. For example, for a database named 'backmeup', this would be:
C:\Program Files\PostgreSQL\11\bin>pg_dump -U postgres -p 5432 -Fc -v -d backmeup -f "C:\PG_Backups\backmeup.dmp"

- Press Enter.
- Enter the password for the superuser used in the pg_dump script and press Enter to execute pg_dump and back up the database:

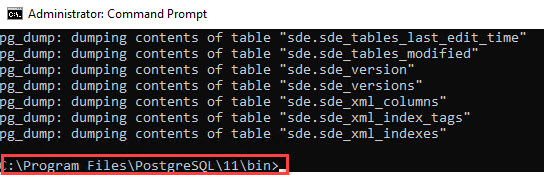
- The pg_dump utility begins writing information to the dump file and to the command prompt window. Once the writing stops and the command prompt returns to displaying the prompt with the path to the bin folder, the backup is complete, as seen in the next image:
Provide your files to Esri Support:
Once the backup has been completed successfully, follow these steps:
- Using a file manager application, browse to the folder you specified in the pg_dump script and locate your dump file, as shown in the next image.

- Gather the dump file and the EsriBackupInfo.txt file generated in the bin folder earlier, as seen below.

- Provide both of these files to Esri Support for further troubleshooting.
Article ID: 000026422
- ArcGIS Pro
Get support with AI
Resolve your issue quickly with the Esri Support AI Chatbot.


Related Information
Discover more on this topic
Search for related information
Find training related to this topic
Explore ideas and give feedback
Get help from ArcGIS experts
Start chatting now