HOW TO
Automate ArcGIS Enterprise updates using Windows Task Scheduler
Summary
This article provides instructions on how to create a CMD file, and utilize the file to automate updates for ArcGIS Enterprise components via Windows Task Scheduler.
Procedure
Create the CMD file
- Launch a text editor software such as Notepad.
- Enter the following script, and save the CMD file with the .cmd extension in a desired directory.
cd "<ArcGIS Enterprise installation directory>\tools\patchnotification" && call patchnotification.bat <parameters>
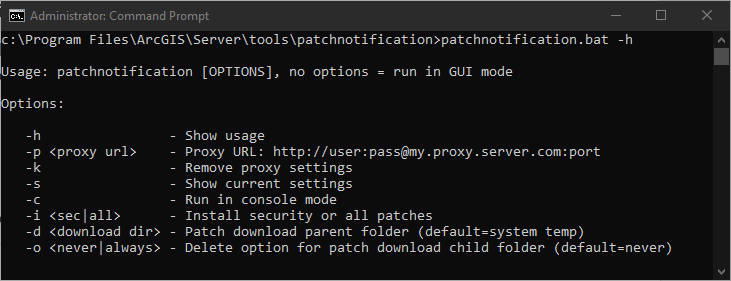
Note:
For a list of parameters and its functions, see below:
-h: Show usage
-p <proxy URL>: Proxy URL: https://user:pass@my.proxy.server.com:port
-k: Remove proxy settings
-s: Show current settings
-c: Run in console mode
-i  <sec> or -i <all>: Install security or all patches
-d <download directory>: Patch download parent folder
-o <never> or -o <always>: Delete option for patch download child folder.
The following sample script runs the tool in console mode, and installs security patches:
cd "C:\Program Files\ArcGIS\Server\tools\patchnotification" && call patchnotification.bat -c -i sec
Note:
The patchnotification.bat file can be used in any ArcGIS Enterprise component machine (ArcGIS Server, Portal for ArcGIS, or ArcGIS Data Store). For single machine deployments, the tool can be used with any of the component's directories.
Create the task in Windows Task Scheduler
- Log on to the ArcGIS Enterprise component machine, and launch Windows Task Scheduler.
- In the left pane, right-click Task Scheduler Library, and select New Folder.... Name the folder.
- Right-click the new folder, and select Create Task.... The Create Task window displays.
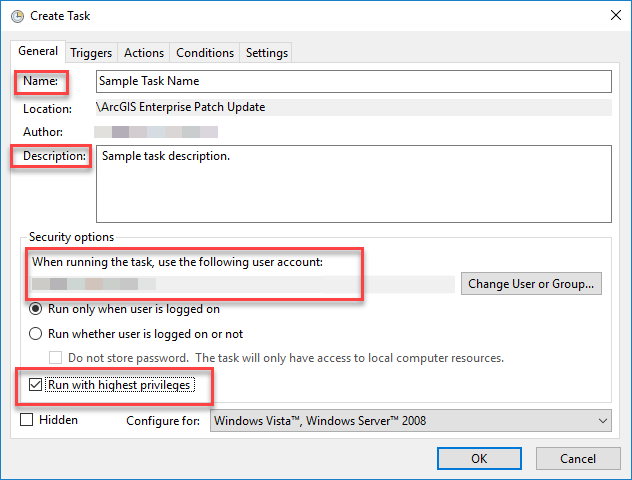
- Click the General tab, and specify a Name and Description for the task.
- In the Security options section, select the ArcGIS Server Windows user account, and check the Run with highest privileges checkbox.
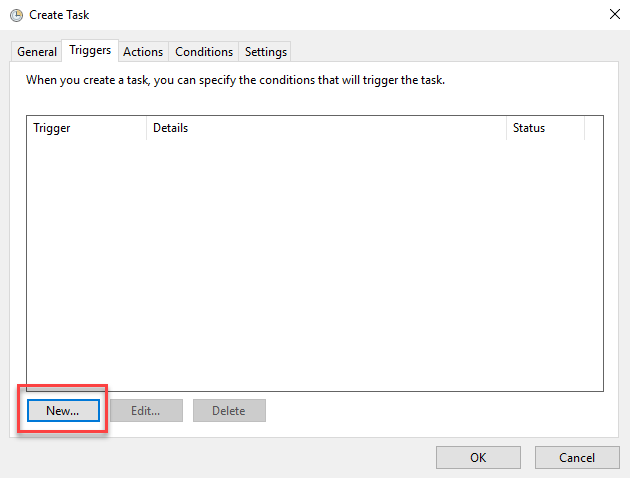
- Click the Triggers tab, and click New.... The New Trigger window displays.
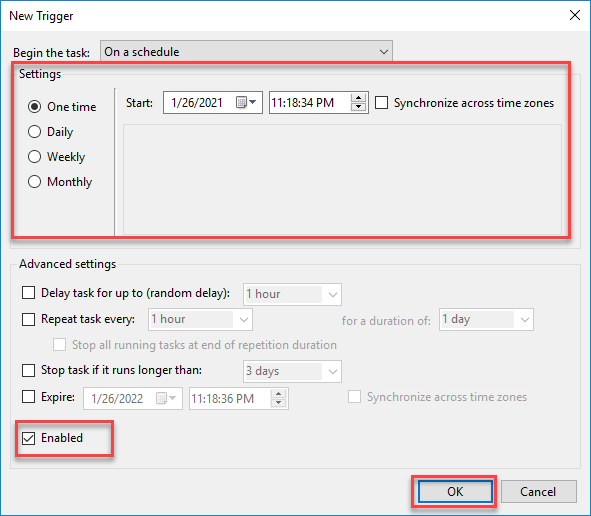
- In the Settings section, select the desired frequency to run the task.
- In the Advanced settings section, check the Enabled checkbox. Click OK.
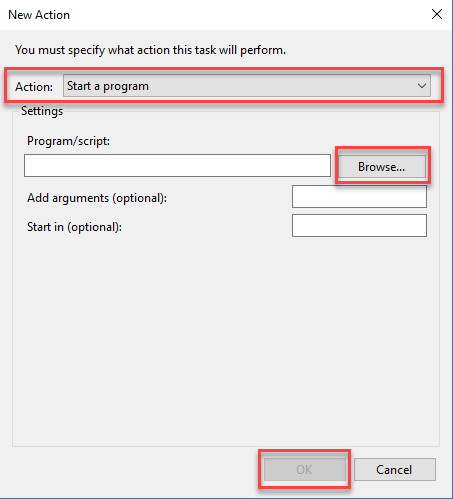
- Click the Actions tab, and click New.... The New Action window displays.
- Select Start a program from the Actions drop-down list.
- In the Settings section, click Browse. Navigate to the directory of the CMD file created in Step 2 of the previous workflow, and select the CMD file. Click OK.
- Click the Conditions tab, and check any of the desired condition checkboxes.
- Click the Settings tab, and check any of the desired additional settings checkboxes.
- Click OK to save the task.
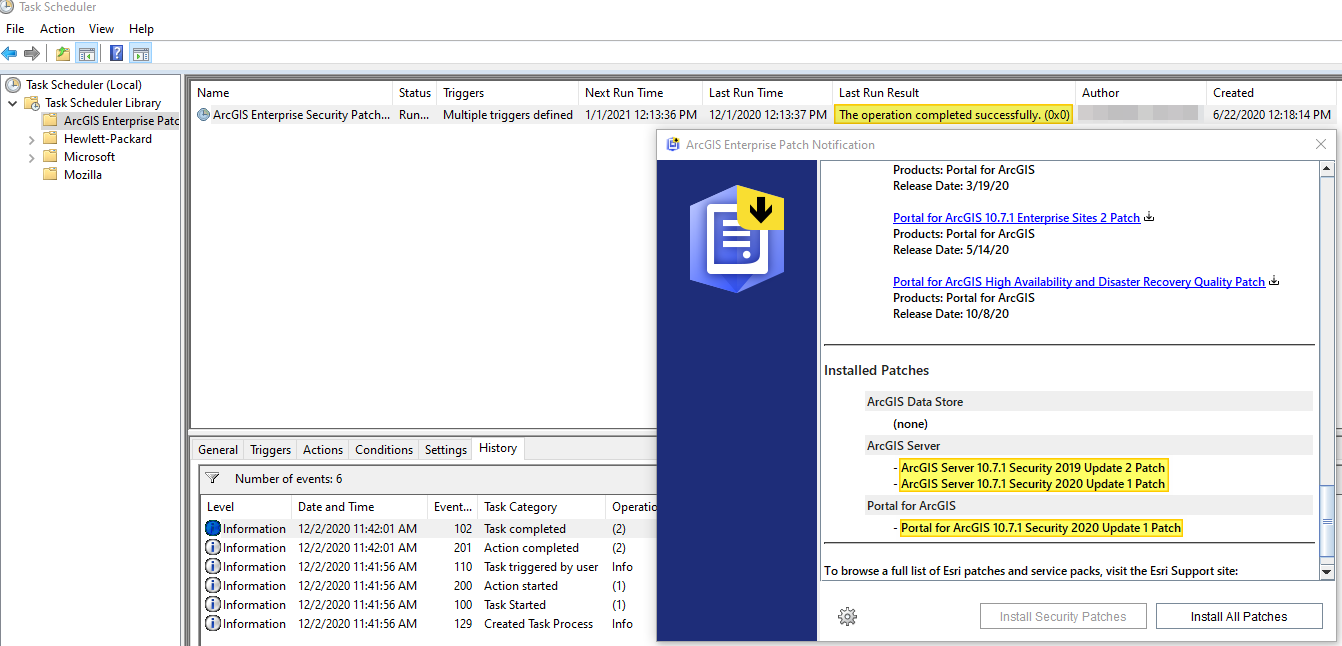
The task now displays in Windows Task Scheduler. The image example below displays a task configured to apply ArcGIS Enterprise security patches. The results can be viewed in the Windows Task Scheduler history, and in the ArcGIS Enterprise Patch Notification window.
Article ID: 000024772
- ArcGIS Data Store
- Portal for ArcGIS
- ArcGIS Server
Get support with AI
Resolve your issue quickly with the Esri Support AI Chatbot.


Related Information
Discover more on this topic
Search for related information
Find training related to this topic
Explore ideas and give feedback
Get help from ArcGIS experts
Start chatting now