HOW TO
Auto-populate values based on common fields using Attribute Rules in ArcGIS Pro
Summary
When creating features for a new feature layer, it is uncommon to refer to an existing table or an attribute table of a feature layer to populate the value of the matching field of both the table and the feature layer. When creating a large number of features, repopulating the field with the existing table may be time-consuming, or require an additional step to run the calculation. It is possible to automatically populate the data as the feature is created using Attribute Rules.
Procedure
- Open a new project and add both the table and the new feature layer.
- Add GlobalID to the new feature layer using the Add Global IDs tool.
- In the Contents pane, right-click the feature layer to be drawn > Data Design > Attribute Rules.
- Click Add Rule. Select New Rule and enter the Rule Name. In this example, the rule name is New Rule.
- In the Expression text box, insert the following script. Modify the parameters below.
- Feature_Name with the source feature layer name to be compared to. It can also be the name of the stand-alone table.
- Matching_Field with the matching field to be compared to. In this example, the SHAPE field is used.
- Output_Field with the name of the field in which values must be copied into the new feature. In this example, the Direction field is used.
var sourceTable = FeatureSetByName($datastore,"<Feature_Name>", ["<Matching_Field>", "<Output_Field>"], false)
var matchingAttr = $feature.<Matching_Field>
var matchedFeature = First(Filter(sourceTable, "<Matching_Field> = @matchingAttr"))
If (matchedFeature == null){
    return "not found"}
else{
    return matchedFeature.<Output_Field>}
var sourceTable = FeatureSetByName($datastore,"House", ["OBJECTID", "Direction"], false)
var matchingOID = $feature.OBJECTID
var matchedFeature = First(Filter(sourceTable, "OBJECTID = @matchingOID"))
If (matchedFeature == null){
    return "not found"}
else{
    return matchedFeature.matchedFeature.Direction}
- Check the Insert and Update check boxes under the Triggers section.
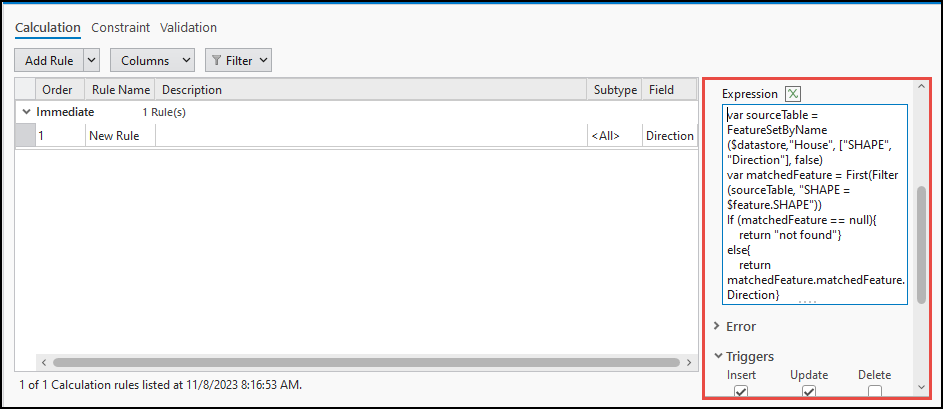
- On the Attribute Rules ribbon, click Save.
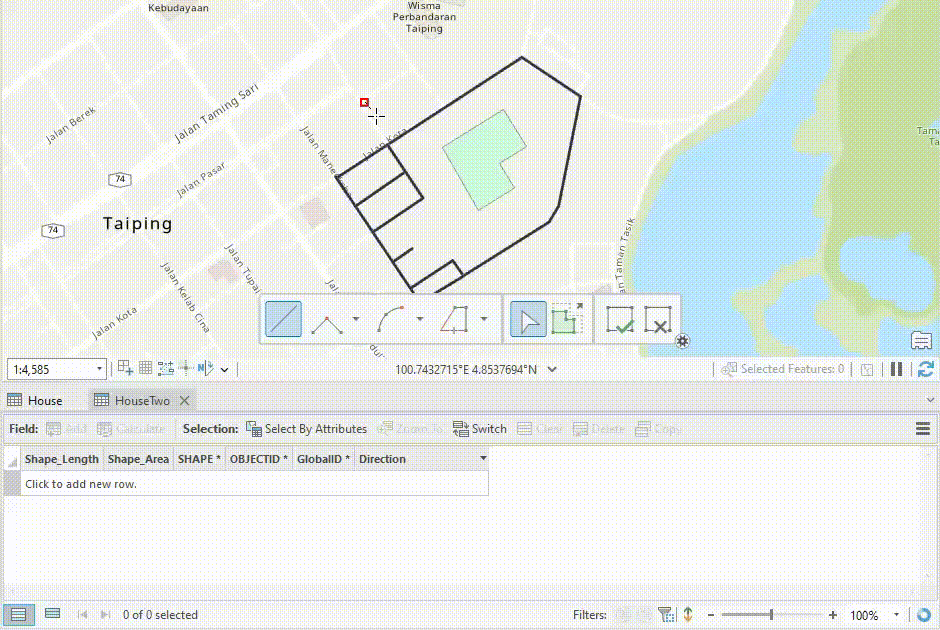
- Draw the feature. The map below demonstrates the Direction field populated.
Article ID: 000030999
- ArcGIS Pro 3 1
- ArcGIS Pro 3 0
- ArcGIS Pro 2 8 x
- ArcGIS Pro 2 9x
Get support with AI
Resolve your issue quickly with the Esri Support AI Chatbot.


Related Information
Discover more on this topic
Search for related information
Find training related to this topic
Explore ideas and give feedback
Get help from ArcGIS experts
Start chatting now