HOW TO
Authorize ArcGIS Pro and extensions offline for single use licensing
Summary
Some customers require ArcGIS Pro to work on a machine that is not connected to the internet. In these cases, they cannot authorize ArcGIS Pro by connecting to My Esri through the machine. To work around this, an offline authorization must be completed. This involves creating an authorization.txt file and uploading it to My Esri using Secure Site Operations. This provides the user an authorization.respc file that can be used to authorize ArcGIS Pro on a machine that does not have access to the internet or is highly constricted.
Procedure
To start the offline authorization process for single use, follow these steps:
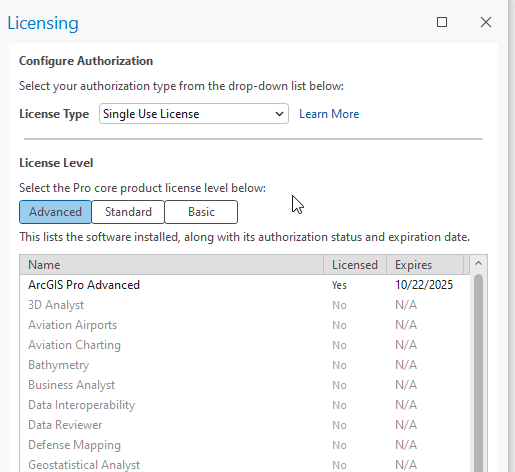
- Start ArcGIS Pro on the machine that requires the licenses. Go to the Licensing tab and choose Configure your licensing options.
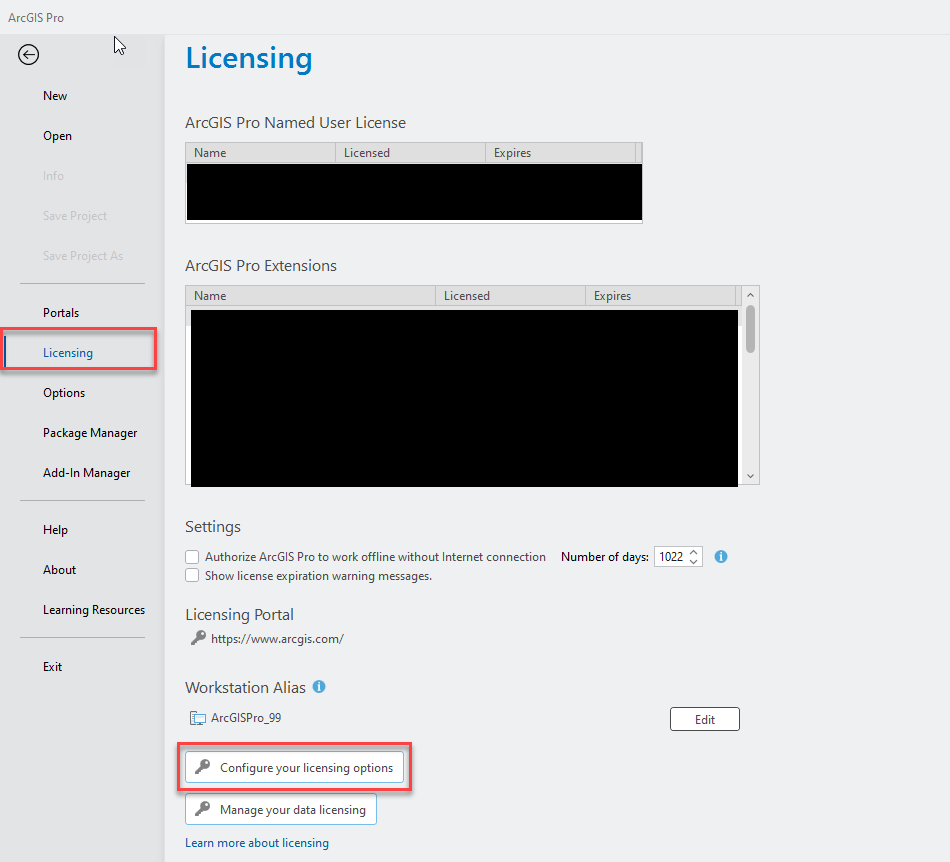
- In the Licensing window, for License Type, choose Single Use License, select the needed License Level, and click Authorize.
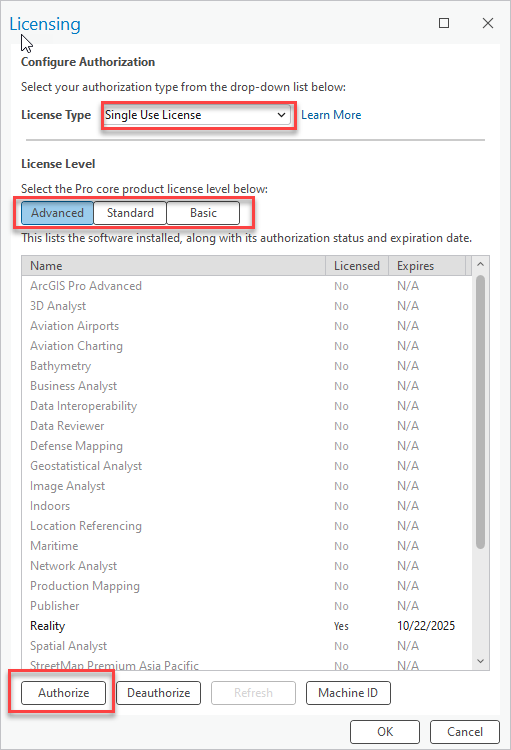
- The Software Authorization Wizard opens. In the Authorization Options box, choose I have installed my software and need to authorize it. Click Next.
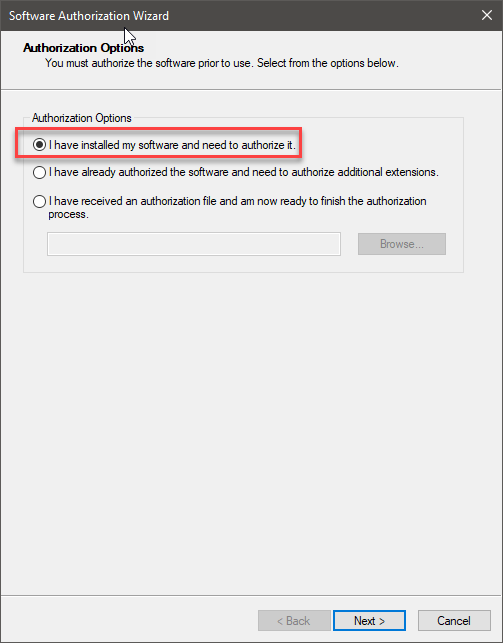
- In the next step, choose Authorize at Esri's website or by email to receive your authorization file. Click Next.
- Fill out the appropriate user information. This may already be filled out automatically. After entering the required information, click Next.
- Enter the authorization number (ESU) for the level of ArcGIS Pro single use license that is needed: Advanced, Standard, or Basic.
- This can be found in My Esri by going to Licensing > Authorizations, and searching for "ArcGIS Pro". After the number is entered, including ESU, click Next.
To also authorize any single use extension licenses for ArcGIS Pro at this time, follow the previous steps to find the ESU number. If the desired extension is not listed in the Feature column, enter the name of it using the keyboard under the last listed extension, making sure all the characters match exactly as they are listed on My Esri. Click Next.
- The Email Authorization step in the wizard should be open. Click Save. The wizard prompts to choose a location to save the authorization.txt file. This file is used on My Esri to create the needed file. If the current machine does not have the ability to access My Esri with the correct permissions, move the file to a machine that does.

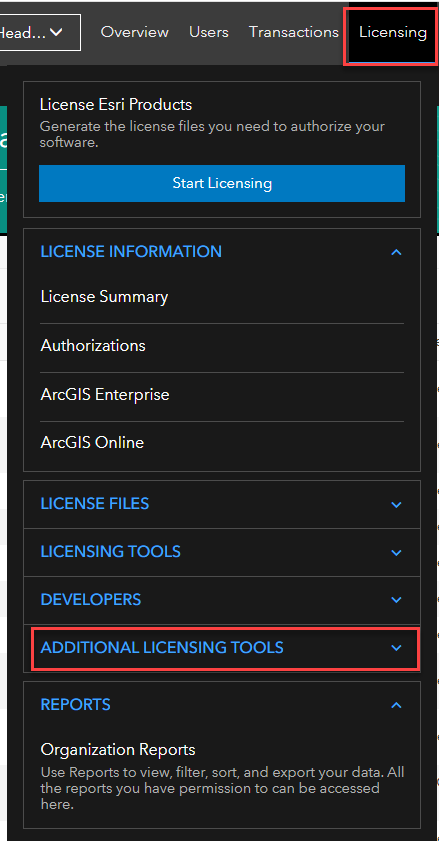
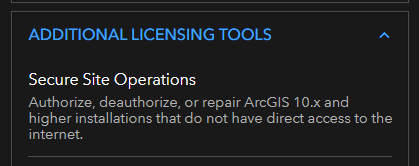
- Go to My Esri on a machine that has access to it and the correct permissions. Go to the Licensing tab, under Additional Licensing Tools, click Secure Site Operations.
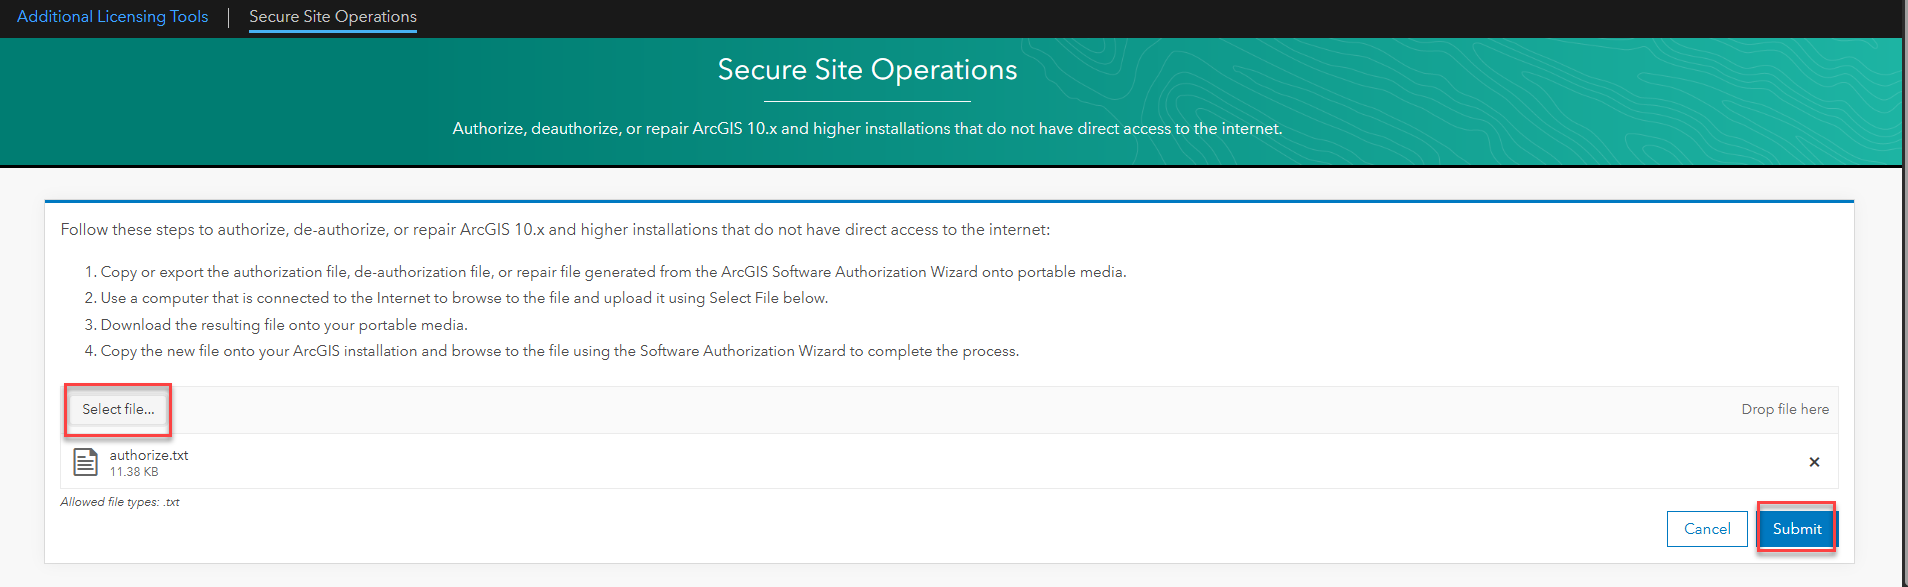
- On the Secure Site Operations page, click Select file and use the authorization.txt file created previously. Click Submit. After the tool is done loading, the authorization.respc file is downloaded.
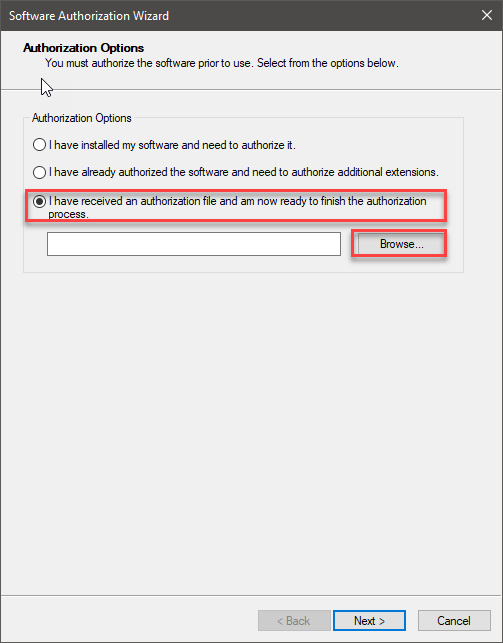
- If necessary, move this file to the machine that requires ArcGIS Pro licensing. Open ArcGIS Pro, and open the Software Authorization Wizard again. This time, choose I have received an authorization file and am now ready to finish the authorization process. Click Browse and choose the authorization.respc file. If extensions are added to the list of authorizations, this step should be the same. Click Next.
- The file is then processed. A checkmark should appear once completed. Click Finish.

In the Licensing window, ArcGIS Pro should now be licensed.
Article ID: 000037720
- ArcGIS Pro
Get support with AI
Resolve your issue quickly with the Esri Support AI Chatbot.


Discover more on this topic
Search for related information
Find training related to this topic
Explore ideas and give feedback
Get help from ArcGIS experts
Start chatting now