HOW TO
Access a Snowflake dynamic table in ArcGIS Pro
Summary
Snowflake is a cloud-based data warehouse platform that runs on supported cloud providers. Snowflake dynamic tables are physical tables stored within the Snowflake data warehouse and automatically refreshed based on a defined SQL query. Snowflake dynamic tables can be accessed by creating a Snowflake database connection and defining a query layer referencing the dynamic table.
Procedure
Prerequisites to successfully access a Snowflake dynamic table:
• Install and download the latest version of Snowflake ODBC Driver and Visual C++ Redistributable (x64) for Windows.
• Create a Snowflake Standard Edition account and select Amazon Web Services (AWS) as the cloud platform for the Snowflake account.
• Create a Snowflake dynamic table. Refer to Snowflake Documentation: CREATE DYNAMIC TABLE for more information.
- Create a Snowflake database connection in ArcGIS Pro. On the Insert ribbon, in the Project group, click Connections > Database > New Database Connection.
- Fill in the required information in the Database Connection window.
- On the Connection Properties tab, select Snowflake for Database Platform.
- In the Server field, enter the Account/Server URL value derived from the Snowflake Account Details page.
- For the Authentication Type field, select User. Enter the Snowflake username in the User Name field and the password in the Password field.
- Ensure Save User/Password is checked.
- For the Role field, enter the Snowflake role with the required privileges to access the target database and schema.
- For the Database field, select the database of the Snowflake dynamic table.
- For Schema, input the Snowflake dynamic table schema.
- For Warehouse, enter the Snowflake warehouse with the required permission.
- For Connection File Name, click the empty field to automatically populate the value.
- Click Validate. The message 'Success' with a green check mark is returned to indicate the validation of the database connection properties is successful.

- Click OK.
- On the View ribbon, click Catalog Pane in the Windows group.
- In the Catalog Pane, click the Project tab and expand the Databases folder. The Snowflake database is displayed in this folder, as shown in the example below.

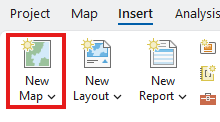
- On the Insert ribbon, in the Project group, click New Map to create a new map.
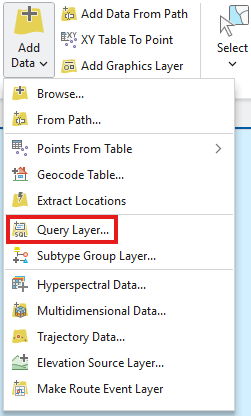
- On the Map ribbon, in the Layer group, click Add Data and select Query Layer to open New Query Layer.
- For the Datasource field, click the drop-down menu and select the connected Snowflake database.

- For the Name field, enter a name for the layer.
- Paste the following SQL query in the Query field:
SELECT
  CAST(ROW_NUMBER() OVER (ORDER BY CATEGORY) AS BIGINT) AS OBJECTID,
  CATEGORY, -- <column name>
  TOTAL_AMOUNT  -- <column name>
  FROM SNOWFLAKE_LEARNING_DB.PUBLIC.DYNAMIC_SUMMARY
  /*Replace SNOWFLAKE_LEARNING_DB = <database name>, PUBLIC = <schema name>, and DYNAMIC_SUMMARY = <table name>*/
Note:
The SQL code above is an example based on the workflow provided. Results may vary according to user input. - Ensure the Let ArcGIS Pro discover spatial properties of the layer option is selected.
- Click Validate > Next > Finish.
- For the Datasource field, click the drop-down menu and select the connected Snowflake database.
- On the View ribbon, in the Windows group, click Contents. Right-click the dynamic table in Standalone Tables and click Open.

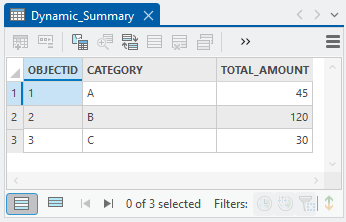
- Verify that OBJECTID, CATEGORY, and TOTAL_AMOUNT created in the Snowflake dynamic table are displayed in the attribute table, as demonstrated below.
Article ID: 000036566
- ArcGIS Pro
- Third Party Product
Get support with AI
Resolve your issue quickly with the Esri Support AI Chatbot.


Related Information
Discover more on this topic
Search for related information
Find training related to this topic
Explore ideas and give feedback
Get help from ArcGIS experts
Start chatting now